How To Install An Infant Car Seat Correctly And Safely
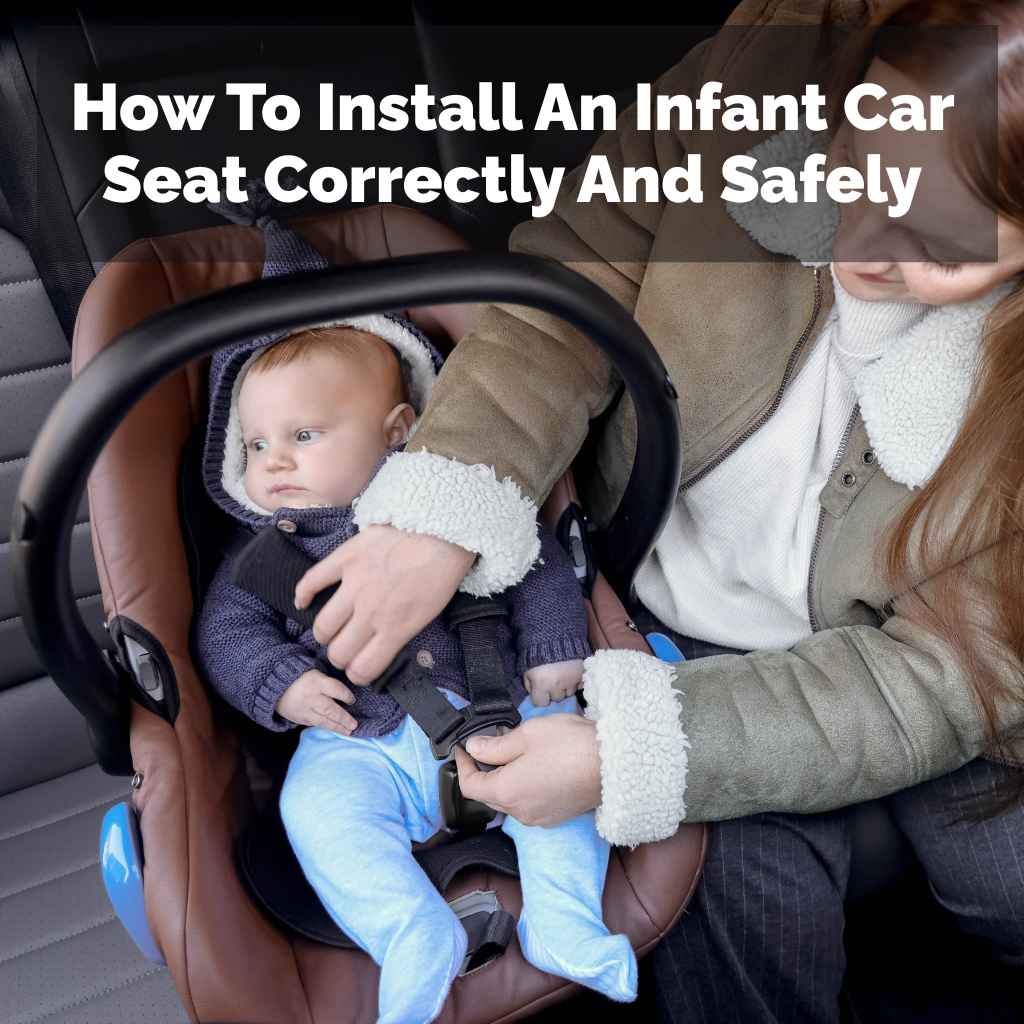
Getting an infant car seat installed correctly is super important for your baby’s safety. It needs to be snug and secure. This guide shows you the right way to do it. We cover common issues and safety tips so you can drive with confidence.
Understanding Your Infant Car Seat Installation
An infant car seat is designed to keep your newborn safe when you’re driving. It’s different from a convertible car seat. It typically comes with a base that stays in the car.
You then click the carrier part in and out of the base. This makes it easy to move your sleeping baby from the car to your home. The main goal of installation is to ensure the seat doesn’t move around too much.
It also needs to be at the right angle for your baby’s breathing.
The base of the car seat is what actually gets installed into your vehicle. It needs to be secure against the car’s seat. You’ll use either the car’s seat belt or the LATCH system.
Both methods work well if done correctly. The key is to make sure there is very little give. Think about it like a firm hug from the car seat to the vehicle seat.
It shouldn’t wiggle or slide.
The angle is another critical part. Most infant car seats have an indicator. This shows you if the recline angle is correct.
For newborns, a proper angle helps keep their airway open. Their heads can sometimes fall forward in a seat that’s too upright. This can make it hard for them to breathe.
So, getting this angle right is not just about comfort, it’s about safety.
My First Car Seat Installation: A Moment of Panic
I remember the day we brought our first baby home from the hospital. We had this brand-new infant car seat. It looked so safe and fancy.
I’d read the manual. I’d watched a video online. But actually doing it?
My hands were shaking. The car was parked outside the hospital. My partner was juggling the baby.
I was trying to wrestle with seat belts and this bulky car seat base.
It felt like nothing was lining up. The seat belt wouldn’t click properly. When I thought I had it, I gave it a tug.
It wobbled! Not just a little bit, but a lot. I started to panic.
Was I doing this wrong? Was the car seat faulty? Was I going to get my baby home and realize it wasn’t safe?
My mind was racing with all the “what ifs.” That initial feeling of dread is something many new parents experience. It’s a huge responsibility.
Quick Car Seat Check Before You Drive
Wiggle Test: Grab the car seat at the belt path (where the seat belt or LATCH strap goes through). Try to move it side to side and front to back. It should move less than one inch in any direction.
Angle Check: Look for the level indicator on the car seat. Make sure it shows the correct angle for your baby’s age and weight.
Strap Fit: Ensure the harness straps are snug. The “pinch test” is a good way to check. You shouldn’t be able to pinch any slack at your baby’s shoulder.
That feeling of uncertainty is exactly why we need clear, simple steps. Once I calmed down and reread the instructions, I realized a small detail I’d missed. The seat belt needed to be locked.
This made a huge difference. It’s often the tiny things that make the biggest impact on safety. Don’t be afraid to stop, breathe, and check again.
It’s much better than rushing and making a mistake.
Choosing Your Installation Method: Seat Belt vs. LATCH
Most modern cars and car seats offer two ways to install the base. You can use your vehicle’s seat belt system. Or, you can use the LATCH (Lower Anchors and Tethers for CHildren) system.
Both are designed to be safe. The best method for you depends on your car and your car seat. You should always check your car seat manual and your car’s owner manual.
They will tell you which is recommended or allowed.
Using the seat belt is a tried-and-true method. It’s available in almost all cars. The key is to make sure the seat belt is installed correctly.
This often involves locking the seat belt. Many cars have an ALR (Automatic Locking Retractor) feature. You usually pull the shoulder belt all the way out to engage it.
Then, you let it retract. This locks it, holding the car seat base firmly in place. Your car seat manual will explain how to use the seat belt to secure the base.
The LATCH system is newer. It uses special anchors built into your car. These are usually found in the seams of your back seat.
You’ll also find a top tether anchor, often in the back of the seat or on the ceiling. The car seat base will have straps with connectors that attach to these anchors. LATCH can sometimes be easier to get a tight fit.
But it’s important to know that LATCH systems have weight limits. Once the combined weight of the child and the car seat exceeds a certain limit, you must switch to using the vehicle seat belt.
Seat Belt vs. LATCH: What to Know
Seat Belt:
- Works in most cars.
- Requires careful tightening and locking.
- No weight limits for installation method itself.
LATCH System:
- Uses car’s built-in anchors.
- Can be easier to achieve a tight fit.
- Has weight limits (check manuals).
It’s not about one being “better” than the other. It’s about which method you can install correctly and snugly in your car. If you find that one method is giving you trouble, try the other.
Sometimes, a car seat base fits better using the seat belt in one car. The same base might install more easily with LATCH in another car. Don’t be afraid to experiment if the manuals allow it.
Step-by-Step Installation Guide (Using Seat Belt)
Let’s break down how to install the base using your car’s seat belt. This is a common method. Remember to always refer to your specific car seat manual.
These are general steps.
First, decide where the car seat will go. The back seat is the safest place for infants. The middle seat is often best if it allows for a secure installation.
This keeps the child away from side-impact collisions.
Next, place the car seat base on the vehicle seat. Position it where you want it installed. You’ll want to thread the vehicle seat belt through the designated belt path on the base.
Your car seat manual will show you exactly where this is. It’s usually clearly marked.
Now, buckle the seat belt. After it’s buckled, you need to tighten it. This is the most crucial step.
Pull the shoulder belt portion of the seat belt as tight as you can. You want to push down on the car seat base with your body weight. This helps compress the vehicle seat foam.
While you’re pushing down, pull the slack out of the lap belt. Slowly let the shoulder belt retract. If your car has an ALR, engage it now.
Locking the Seat Belt: A Closer Look
Finding the Lock: Look for a button or lever on the seat belt buckle. Or, pull the shoulder belt all the way out. Listen for a ratcheting sound as it retracts.
Testing the Lock: Once it retracts, try to pull the belt out again. If it doesn’t extend, it’s locked. You can then use it to secure the car seat.
Once the seat belt is buckled and locked, perform the wiggle test. Grab the base at the belt path. Try to move it side to side and front to back.
It should not move more than one inch in any direction. If it moves more than that, you need to tighten it further. This might mean trying again with more body weight.
Or, you might need to reroute the seat belt to get a better angle.
The final step for the base is checking the recline angle. Most infant car seats have a level indicator. This could be a bubble, a line, or a spirit level.
Make sure this indicator shows the correct angle for your infant. If the base is too upright, your baby’s head can fall forward. If it’s too reclined, the seat might not be stable.
Adjust the base as needed. Some car seats have built-in recline adjustments. Others might need pool noodles or rolled towels placed under the base to achieve the correct angle.
Always check your manual for approved methods.
Step-by-Step Installation Guide (Using LATCH System)
Now, let’s look at installing the base using the LATCH system. This system uses built-in anchors in your car.
First, locate the LATCH anchors in your vehicle. They are usually found in the back seat. Look in the crease between the seat back and the seat cushion.
Your car’s owner manual will show you their exact location. They often have a small symbol nearby.
Next, connect the lower anchor connectors on your car seat base to these vehicle anchors. Make sure they click securely into place. You might need to push the base down firmly.
This helps ensure a good connection.
LATCH Connectors: What to Look For
Hook/Clip Style: These often look like metal hooks or plastic clips. They attach directly to the metal bars of the LATCH anchors.
Push-On Style: Some connectors are designed to push directly onto the anchor points. You’ll often hear a click when they are properly secured.
Once connected, you need to tighten the LATCH straps. Similar to the seat belt method, you’ll apply downward pressure on the base. Push down with your body weight.
Then, pull the LATCH strap to remove any slack. The goal is to get the base as tight as possible against the vehicle seat.
After tightening, perform the wiggle test. Grab the base at the belt path. It should not move more than one inch in any direction.
If it moves too much, you need to tighten the strap more. You might need to adjust how you’re applying pressure. Or, try a different angle for the strap.
Finally, check the recline angle. Use the level indicator on the car seat base. Ensure it’s within the safe range for your infant.
If it’s not correct, you might need to adjust the base. Some bases have built-in recline levers. Others may require approved accessories like pool noodles to achieve the proper tilt.
Always consult your car seat manual for acceptable methods.
Remember the LATCH weight limit. Your car seat manual and vehicle manual will specify this limit. It’s the combined weight of your child and the car seat.
Once you reach this limit, you must switch to using the vehicle seat belt for installation. This is a critical safety step.
The Top Tether: An Important Safety Feature
While the top tether is primarily used for forward-facing car seats, it’s worth understanding its role. For infant car seats, the base typically doesn’t use a top tether. The carrier itself might have a way to attach a harness tether for the baby.
However, the base installation usually relies on the lower anchors or the seat belt. Always check your specific car seat manual. It will clearly state if a top tether is used for the infant base.
When is Top Tether Used?
Forward-Facing Seats: The top tether is crucial for forward-facing car seats. It helps reduce forward head movement in a crash.
Infant Seats: Most infant car seat bases do NOT use a top tether. The carrier itself has a harness system for the baby.
Always Check Manuals: Refer to your car seat and vehicle manuals for specific instructions.
The purpose of a top tether is to reduce forward head excursion. This is how far a child’s head moves forward during a crash. By tethering the seat to an anchor point behind the car seat, it limits this movement.
This can significantly reduce the risk of head and neck injuries. For forward-facing seats, it’s a vital safety component. Knowing about it helps understand the overall car seat safety ecosystem.
Common Installation Mistakes to Avoid
Even with the best intentions, parents often make mistakes when installing car seats. Being aware of these common errors can help you avoid them. This is where experience really counts.
One of the biggest mistakes is a loose installation. Remember that one-inch movement rule? Many parents think “a little wiggle is okay.” But even an inch of movement can be too much.
This looseness means the seat won’t absorb crash forces effectively. It won’t protect your baby as well as it should.
Another common error is incorrect recline angle. As we’ve discussed, this is vital for newborns. If the seat is too upright, the baby’s head can fall forward.
This can block their airway. If it’s too reclined, the seat might not be stable. Always check the angle indicator.
Use approved methods if you need to adjust it.
Top Mistakes to Watch Out For
- Loose Installation: The seat wiggles more than one inch.
- Wrong Angle: Recline indicator is not in the safe zone for newborns.
- Twisted Straps: Harness straps or seat belt are twisted.
- Loose Harness: Baby’s harness is too loose (pinch test fails).
- Improper Belt Path: Seat belt or LATCH straps are not in the correct slots.
- Using Unauthorized Items: Adding things like blankets under the base not approved by the manufacturer.
Twisted harness straps or seat belts are another frequent problem. Twisted straps can’t distribute crash forces evenly. They are also weaker.
Always make sure the straps lie flat against the baby and the seat. For the seat belt installation, ensure the belt itself isn’t twisted.
Improper use of the harness is also common. The harness needs to be snug. The “pinch test” is your friend here.
If you can pinch slack in the harness at your baby’s shoulder, it’s too loose. The chest clip should be at armpit level. This keeps the straps in the right place.
Finally, using unapproved accessories can compromise safety. Things like aftermarket padding or extra blankets placed under the base are a no-go unless specifically approved by the car seat manufacturer. These items can interfere with the seat’s ability to function correctly in a crash.
Checking the Fit of the Infant Carrier
Once the base is securely installed, it’s time to check the infant carrier itself. This is the part where your baby actually sits.
When you place the carrier onto the base, it should click securely. Listen for that satisfying click. Then, give the carrier a gentle tug.
It should feel locked in place. Don’t be afraid to test this connection. It should feel solid and stable.
The harness straps on the carrier are designed to keep your baby safe inside. For newborns, the straps should come from slots that are at or slightly below their shoulders. As your baby grows, the slots should be at or slightly above their shoulders.
This ensures the harness is pulling down and back, which is the safest position.
Harness Fit Quick Check
Shoulder Slots: For newborns, at or below the shoulders. For older babies, at or above the shoulders.
Strap Snugness: Perform the pinch test. You should not be able to pinch any slack at the shoulder.
Chest Clip Position: For infants, the chest clip should be at armpit level. This helps keep the straps positioned correctly.
The harness itself needs to be snug. This is where the pinch test comes in. Place your fingers on your baby’s collarbone.
Try to pinch the harness webbing upwards. If you can pinch any slack, the harness is too loose. You need to tighten it.
You should not be able to fit more than one finger between the harness and your baby’s collarbone.
The chest clip is also important. For infants, the chest clip should be positioned at armpit level. This helps ensure the harness straps stay on the shoulders.
As babies grow into convertible seats, the chest clip position might change. But for infant carriers, armpit level is key.
When is it Time to Get it Checked?
Even after following all the steps, it’s natural to want a second opinion. Car seat safety is serious business. Many communities offer free car seat inspection stations.
These are staffed by certified Child Passenger Safety (CPS) technicians. They are trained experts who can check your installation. They can also teach you how to do it correctly.
I highly recommend finding a local inspection station. Even if you think you’ve done everything perfectly, a fresh set of eyes can catch subtle issues. I’ve had my car seats checked multiple times over the years.
Each time, I learned something new. It’s a great way to gain confidence and ensure your child is as safe as possible.
Where to Find a CPS Technician
Safe Kids Worldwide: Their website is a great resource for finding local inspection stations and events.
Local Fire Departments or Police Stations: Many offer car seat checks by appointment.
Hospitals: Maternity wards or pediatric departments may have resources.
Department of Motor Vehicles (DMV): Some states offer these services.
These technicians are not just there to point out flaws. They are there to educate and empower parents. They will explain why something needs adjustment.
They will show you how to fix it. This hands-on instruction is invaluable. It helps you learn the skills to check your own installation.
Don’t wait until you have a problem. Get your installation checked soon after you bring your baby home. You can also get it checked if you’re unsure after reading the manuals.
It’s a small step that provides a huge amount of peace of mind. Knowing that your car seat is installed correctly means you can focus on enjoying your new baby.
Dealing with Different Vehicle Types
Installing an infant car seat might feel different depending on your vehicle. Cars, SUVs, trucks, and minivans all have slightly different seating arrangements and features. This can affect how the car seat installs.
For instance, bucket seats in sports cars or trucks can be tricky. They might not provide a flat surface for the car seat base. This can make it hard to get the correct recline angle.
You might need to use approved pool noodles or rolled towels to bridge the gap and achieve the right tilt.
Larger vehicles like minivans often have captain’s chairs or bench seats with different contours. LATCH systems might be more accessible. However, ensure the anchor points are compatible with your car seat.
Always check your vehicle’s manual for specific LATCH system information.
Vehicle Specific Tips
Trucks/Sports Cars: Seat angles can be challenging. Use approved recline aids if needed.
Minivans/SUVs: Check LATCH anchor locations and weight limits carefully.
Leather Seats: Consider a seat protector to prevent damage and slippage. Ensure it doesn’t interfere with the installation.
Heated Seats: Always use car seats on top of the vehicle seat, not directly on top of a heating element without a protective layer. Check manufacturer guidelines.
Leather seats can also present challenges. They can be slippery, making it harder to get a tight fit. A car seat protector pad can help.
But make sure it’s approved. Some protectors can actually interfere with the seat belt or LATCH strap. They might also affect the seat’s stability.
Heated seats are another consideration. You generally want to place the car seat directly on the vehicle seat. However, for heated seats, manufacturers often recommend using a protective layer.
This layer prevents the car seat from overheating or the heating element from being damaged. Always check the car seat and vehicle manual for guidance on heated seats.
The key is to remain patient. What works in one vehicle might not work in another. Don’t get discouraged if it takes a little extra effort to get a secure installation in your specific car.
It’s worth the time and effort for your baby’s safety.
When is the Angle “Just Right”?
The recline angle for an infant car seat is critical for newborns. It’s all about keeping their airway open. A baby’s neck muscles are not strong.
If their head slumps forward, their chin can rest on their chest. This can compress their trachea. It can make it difficult for them to breathe properly.
Most infant car seats have a built-in level indicator. This is usually a bubble or a line. You need to make sure this indicator is in the correct zone specified in your car seat manual.
This zone typically corresponds to the recline angle needed for infants up to a certain weight or age.
Angle Indicators Explained
Bubble Level: A small bubble moves between two lines. The bubble needs to be within the indicated safe zone.
Spirit Level: Similar to a builder’s level, a small vial of liquid with a bubble.
Indicator Lines: Colored lines or markings on the car seat itself. Your baby’s weight determines which lines are safe.
If the angle isn’t right, you need to adjust it. Some car seat bases have a recline adjustment lever. You can often loosen the seat belt or LATCH straps, adjust the recline, and then retighten.
If your car seat doesn’t have this feature, you might need to use approved recline aids.
Approved recline aids can include things like pool noodles or tightly rolled towels. These are placed under the front edge of the car seat base. They help tilt the base back.
Always check your car seat manual to see if these are allowed. And ensure you use them correctly. They should not interfere with the seat belt or LATCH strap.
They should not make the seat unstable.
This angle check is not something to skip. It’s a fundamental aspect of infant car seat safety. When in doubt, get it checked by a CPS technician.
They can show you exactly how to achieve and verify the correct angle for your baby.
The “No-Wiggle” Rule: Ensuring a Secure Fit
We’ve mentioned the “one inch” rule a few times. Let’s really drive this home because it’s so important. The car seat base, once installed, should not move more than one inch in any direction.
This applies to side-to-side movement and front-to-back movement.
Why is this crucial? In a crash, the car seat needs to stay put. If it’s loose, it can shift.
This means it won’t be in the optimal position to absorb and redirect crash forces. It also means your baby could move excessively within the seat. This increases the risk of injury.
The “No-Wiggle” Test Steps
Locate the Belt Path: Find where the vehicle seat belt or LATCH straps go through the car seat base.
Grasp Firmly: Grab the base right at this belt path.
Wiggle Test: Try to move the base side-to-side and front-to-back.
Measure Movement: If the movement is more than one inch in any direction, it’s too loose.
To achieve this secure fit, you often need to use your body weight. When using the seat belt, push down hard on the car seat base with your body. While pushing down, pull the seat belt as tight as possible.
Let the seat belt retract fully. If using LATCH, apply downward force and pull the LATCH straps tight.
Sometimes, getting a secure fit requires a bit of trial and error. You might need to try different seating positions in your car. You might need to adjust how you’re routing the seat belt or LATCH straps.
Don’t be afraid to uninstall and reinstall if you’re not getting a tight fit on the first try.
If you consistently struggle to get the seat to pass the one-inch test, it’s time to seek professional help. A CPS technician can show you techniques specific to your car seat and vehicle. They can identify if there’s an incompatibility or if you’re missing a crucial step.
The Harness Fit: Snug is Safe
We’ve touched on harness fit when talking about the infant carrier. Let’s dive a little deeper. A properly fitting harness is just as important as a securely installed base.
The harness straps are what directly hold your baby. They need to be snug enough to prevent the baby from moving too much in a crash. But they can’t be so tight that they cause discomfort or restrict breathing.
The key is the “pinch test.” After you’ve buckled your baby and tightened the harness, try to pinch the harness webbing at their collarbone. If you can pinch any slack, it’s too loose. You need to tighten the harness further.
You should not be able to get your fingers between the webbing and your baby’s collarbone.
Harness Tightness Checklist
Shoulder Slots: Are they at or below the shoulders for infants?
Pinch Test: Can you pinch slack at the collarbone? If yes, tighten.
Chest Clip: Is it at armpit level for infants?
No Bunched Clothing: Is your baby wearing thin clothing? Bulky coats can prevent a snug fit.
It’s also vital to ensure the straps are flat. They shouldn’t be twisted. Twisted straps can reduce their strength.
They can also dig into your baby’s skin. Make sure the chest clip is positioned correctly. For infants, it should be at armpit level.
This ensures the harness is holding the baby securely.
Be mindful of clothing. Thick winter coats can prevent you from getting a snug harness fit. In very cold weather, it’s safer to place a blanket over your baby after they are buckled into a properly snug harness.
Never place blankets or padding under the harness straps.
As your baby grows, you’ll need to adjust the harness height. Most infant seats have multiple harness slots. You’ll move the harness up as your baby gets taller.
Always refer to your car seat manual for the correct harness slot position based on your baby’s height and weight.
What if My Car Seat Doesn’t Feel Right?
It’s completely understandable to have doubts. Car seat installation can be confusing. If your infant car seat doesn’t feel right after you’ve installed it, don’t just ignore it.
It’s better to be safe than sorry.
First, revisit your car seat manual. Read the installation section again, slowly and carefully. Sometimes, a small detail missed can make all the difference.
Pay close attention to diagrams and step-by-step instructions.
Next, check your vehicle’s owner manual. It will have specific information about your car’s seat belt system and LATCH anchors. It can also tell you which seating positions are recommended for car seats.
Troubleshooting Your Installation
Re-read Manuals: Both car seat and vehicle owner’s manuals.
Try the Other Method: If you used LATCH, try seat belt, and vice-versa (if allowed).
Check for Obstructions: Ensure nothing is preventing a tight fit (e.g., seat belt retractors, hard plastic parts).
Consult a Professional: Seek help from a Child Passenger Safety Technician.
If you’re still unsure, try the other installation method if your car seat allows. If you used the seat belt, try LATCH, or vice-versa. Sometimes, one method will provide a much more secure fit in your specific vehicle.
Make sure you are following the manual’s instructions for both methods.
Don’t underestimate the value of a professional check. Certified Child Passenger Safety Technicians are the experts. They see all kinds of car seats and vehicles.
They can identify issues you might miss. They can provide hands-on guidance. This is the best way to ensure your installation is correct.
It’s a vital step for your baby’s safety.

Frequent Questions About Infant Car Seat Installation
Can I use a pool noodle to get the right angle for my infant car seat?
Yes, you can, but only if your car seat manual specifically allows it. Pool noodles or rolled towels can be used to help achieve the correct recline angle if the car seat base doesn’t have enough adjustment. Always check your manual to ensure this is an approved method and use it according to the instructions.
How often should I check my car seat installation?
You should check your car seat installation periodically. Always check it after any incident, like a minor car bump, or if you’ve removed the car seat for any reason. It’s also a good idea to re-check it if you switch the car seat to a different vehicle.
Regular checks ensure it remains secure.
What is the difference between LATCH and ISOFIX?
LATCH is the system used in the United States. ISOFIX is the international standard for child restraint anchorage systems. They are very similar in concept, using lower anchor bars in the vehicle.
However, there can be differences in connector types and anchor point locations depending on the region and vehicle manufacturer.
Can I install an infant car seat in the front seat of my car?
It is strongly recommended that infant car seats are always installed in the back seat of the vehicle. The front passenger seat can be dangerous due to the airbag. If you absolutely must install a car seat in the front, turn off the airbag.
However, this is generally not advised and the back seat is always the safest option.
My car seat seems to wobble when installed with the seat belt, but it’s tight with LATCH. What should I do?
If the LATCH system provides a more secure installation than the seat belt in your vehicle, and you are within the LATCH weight limits, using LATCH is acceptable. Always follow the recommendations in both your car seat and vehicle manuals. If you are unsure, consult a Child Passenger Safety Technician.
What is the top tether, and do I need it for my infant car seat base?
The top tether is a strap that connects to an anchor point behind the car seat. It helps reduce forward head movement in a crash. For most infant car seat bases, a top tether is NOT used.
The carrier part of the seat is secured by the harness. Always refer to your specific car seat manual to confirm its use.
Final Thoughts on a Safe Ride
Installing an infant car seat correctly is a vital skill for any new parent. It might seem daunting at first, but with clear steps and a little patience, you can do it. Remember to always consult your car seat and vehicle manuals.
Perform the wiggle test to ensure a snug fit. Check the recline angle for your newborn’s safety. And don’t hesitate to seek professional help from a certified technician.
A correctly installed car seat means safer journeys for your little one. Enjoy those precious rides!