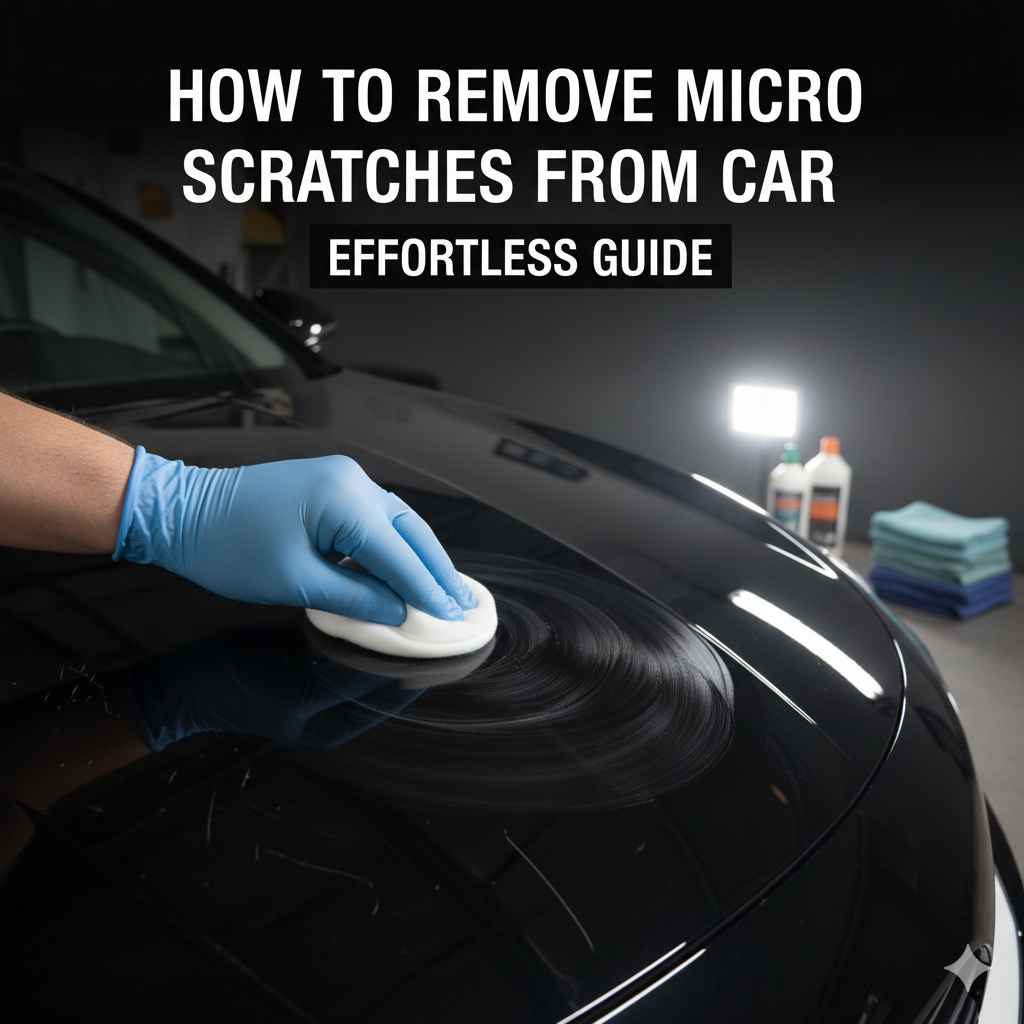
How To Remove Micro Scratches From Car: Effortless Guide
Removing micro scratches from your car is achievable for beginners! Using the right products like rubbing compounds and polishes, along with proper technique and a gentle touch, you can restore your car’s paintwork to a smooth, glossy finish. This guide offers simple, step-by-step instructions to help you achieve professional-looking results at home.
It’s a common sight for car owners: those tiny, almost invisible lines marring the shiny paintwork. We call them micro scratches, or swirl marks, and they can make even a well-cared-for vehicle look dull and aged. They often appear after washing or drying if done incorrectly, or from everyday wear and tear. But don’t worry! These aren’t permanent damage, and with the right approach, you can easily make them disappear.
This guide is designed to take the guesswork out of removing micro scratches. We’ll walk you through everything you need, from understanding what causes them to the simple, effective steps you can take right in your driveway. By the end, you’ll have the knowledge and confidence to bring back that showroom shine to your car’s finish.
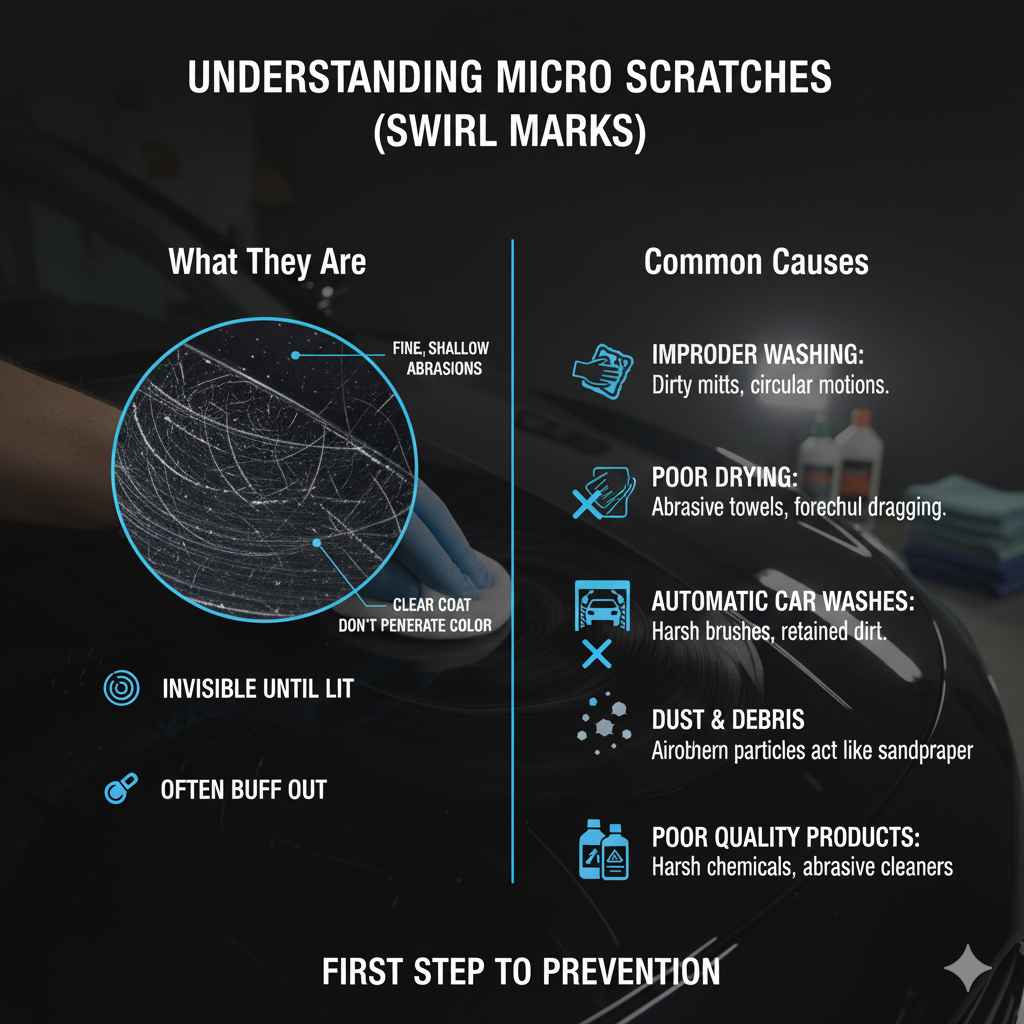
Understanding Micro Scratches (Swirl Marks)
Before we dive into the removal process, let’s quickly understand what micro scratches are. These are very fine, shallow abrasions on the clear coat layer of your car’s paint. They don’t penetrate the color layer, which is why they can often be buffed out. The most common culprits include:
- Improper Washing Techniques: Using dirty wash mitts, sponges, or towels can drag grit across the paint, creating scratches. Washing in circular motions can also contribute to swirl marks in a pattern.
- Poor Drying Methods: Using abrasive towels or dragging a drying towel forcefully can induce these tiny scratches.
- Automatic Car Washes: The brushes in many automatic car washes can be harsh and laden with dirt from previous cars, leading to widespread micro scratches.
- Dust and Debris: Simply driving your car exposes it to dust, pollen, and other airborne particles that can act like sandpaper under pressure.
- Poor Quality Products: Using harsh chemicals or abrasive cleaners not designed for automotive paint can damage the clear coat.
Recognizing these causes is the first step to preventing them in the future. But for now, let’s focus on how to fix what’s already there.
Tools and Materials You’ll Need
Having the right gear makes any DIY car care job much easier and more effective. For removing micro scratches, you don’t need a professional workshop, just a few key items. Here’s what I recommend:
Essential Products:
- Car Wash Soap: A pH-neutral car wash soap is crucial. Harsh detergents can strip wax and damage the clear coat. Look for something specifically designed for car washing.
- Microfiber Wash Mitts: These are much gentler on paint than regular sponges or brushes. Have at least two – one for the upper, cleaner parts of the car, and one for the lower, dirtier sections.
- Microfiber Drying Towels: Invest in high-quality, plush microfiber drying towels. They absorb water effectively without causing scratches.
- Rubbing Compound: This is a mildly abrasive polish designed to remove imperfections like clear coat damage. You’ll typically want a fine-cut or medium-cut compound for micro scratches.
- Polishing Compound (Polish): This is less abrasive than rubbing compound and is used after the compound to refine the finish and restore gloss.
- Applicator Pads: You’ll need foam or microfiber applicator pads for applying compounds and polishes.
- Microfiber Towels (for product removal): Have a good supply of clean, soft microfiber towels for wiping away excess compound and polish.
- Car Wax or Sealant (Optional but recommended): After removing scratches, protecting the fresh finish with a layer of wax or sealant is a great idea.
Optional but Helpful Tools:
- Orbital Polisher (Dual Action): While you can remove micro scratches by hand, a dual-action (DA) orbital polisher can make the job faster and yield more consistent results. For beginners, a DA polisher is much safer than a rotary polisher. Check out resources from reputable automotive detailing associations for safe power tool usage.
- Clay Bar Kit: If your paint feels rough even after washing, a clay bar can remove embedded contaminants that compounds might not fully address.
- Gloves and Eye Protection: Always a good idea when working with cleaning chemicals.
Don’t feel overwhelmed by the list! You can start with just the basic hand-application products, and as you get more comfortable, you can explore power tools.
Step-by-Step Guide to Removing Micro Scratches
Now for the part you’ve been waiting for! Follow these steps carefully, and you’ll be amazed at the results you can achieve. Remember, patience and a gentle touch are key.
Step 1: Thoroughly Wash Your Car
This is non-negotiable. You need a perfectly clean surface to work on. Any dirt or grit left on the paint will only create more scratches during the compounding and polishing stages.
- Pre-Rinse: Start by rinsing the entire car with water to remove loose dirt and debris.
- Two-Bucket Method: Fill one bucket with your car wash soap and water, and the other with clean water.
- Wash from Top to Bottom: Dip your microfiber wash mitt into the soapy water, wash a section of the car (e.g., the roof), then rinse the mitt thoroughly in the clean water bucket before dipping it back into the soap bucket. This prevents you from reintroducing dirt onto the paint.
- Rinse Thoroughly: Once a section is washed, rinse it with water to prevent soap from drying on the surface.
- Final Rinse: Rinse the entire car once more with clean water.
Step 2: Dry the Car Carefully
Again, the goal here is to avoid introducing new scratches.
- Use Plush Microfiber Towels: Gently lay a large, soft microfiber drying towel over a section of the car.
- Blot or Gently Drag: Lightly pat the towel to absorb water, or gently drag it across the surface. Avoid rubbing aggressively.
- Switch Towels as Needed: If a towel becomes saturated, switch to a dry one.
Step 3: Inspect for Scratches
Once the car is dry, inspect the paintwork in good lighting, preferably sunlight. You’ll be able to see the micro scratches more clearly now. This is also a good time to use a clay bar if the paint feels rough, following the product instructions carefully.
A clay bar can remove contaminants that are bonded to the paint. After claying, rewash and dry the car to remove any lubricant residue.
Step 4: Tape Off Trim and Plastics
To prevent compounds and polishes from staining or damaging black plastic trim, rubber seals, or emblems, use automotive masking tape. Cover these areas thoroughly. This step is crucial for a clean finish.
Step 5: Apply Rubbing Compound
This is where the scratch removal begins. Rubbing compound is designed to gently abrade the clear coat and level out the imperfections.
Applying by Hand:
- Work in Small Sections: Don’t try to do the whole car at once. Focus on a 2×2 foot section of paint.
- Apply Compound to Pad: Put a small amount of rubbing compound (about the size of a nickel) onto a foam or microfiber applicator pad.
- Work the Product: Apply the compound to the painted section with moderate pressure, using back-and-forth or overlapping motions. Avoid circular motions, as this can re-create swirl marks. Work the compound until it starts to dry or become clear.
- Wipe Off Residue: Using a clean microfiber towel, gently wipe away the excess compound. Inspect that section – the scratches should be significantly reduced or gone.
- Repeat: Move to the next section and repeat the process.
Applying with a Dual Action (DA) Polisher:
- Attach Appropriate Pad: Use a cutting or polishing pad suitable for your DA polisher.
- Apply Compound to Pad: Apply 3-4 small drops of compound directly onto the pad.
- Spread Compound: Before starting the polisher, spread the compound over the 2×2 foot section you’re working on at a low speed.
- Work the Section: Turn the polisher on to a medium speed and work the section with overlapping passes, holding the polisher flat against the surface. Apply light to moderate pressure. Work the compound until it becomes clear.
- Wipe Off Residue: Turn the polisher off, lift it off the paint, and wipe away the residue with a clean microfiber towel.
- Inspect and Repeat: Check the results and move to the next section.
Important Note on Compounds: Rubbing compounds vary in their abrasiveness. For minor micro scratches, a “fine cut” or “swirl remover” compound is usually sufficient. If the scratches are slightly deeper, you might need a “medium cut” compound. Always start with the least aggressive product first.
Step 6: Polish the Paintwork
After you’ve used the rubbing compound on all necessary areas, the paint might look a bit duller, even though the scratches are gone. This is where polishing comes in.
- Switch to Polishing Compound: Apply a small amount of polishing compound (which is less abrasive than rubbing compound) to a clean applicator pad or polishing pad on your DA polisher.
- Re-Polish Sections: Just like with the rubbing compound, work in small, manageable sections. Use light pressure and overlapping passes. The goal here is to refine the finish, remove any hazing left by the rubbing compound, and restore gloss.
- Wipe Off: Wipe away the residue with a clean microfiber towel.
Polish is designed to gently remove very fine imperfections and add depth and clarity to the paint’s shine. It’s the step that brings back that mirror-like finish.
Step 7: Inspect Your Work
Take a good look at the sections you’ve worked on. With sunlight or a strong light source, you should see a dramatic improvement. The micro scratches should be gone, and the paint should appear smooth and glossy.
Step 8: Protect the Finish (Optional but Highly Recommended)
Your paint is now clean and smooth, but it’s also exposed. Applying a layer of car wax or synthetic paint sealant will protect your hard work and add another layer of gloss.
- Apply Wax/Sealant: Follow the instructions for your chosen product. Typically, you’ll apply a thin, even layer with an applicator pad and then buff it off with a clean microfiber towel after it hazes.
- Use a Specific Wax Towel: It’s a good idea to use a dedicated soft microfiber towel for buffing off wax to avoid imparting any new scratches.
Comparing Hand Application vs. Orbital Polisher
Choosing between applying compounds and polishes by hand or using a machine is a common question for beginners. Both methods can work, but they have different advantages and considerations. Here’s a quick comparison:
| Feature | Hand Application | Orbital Polisher (DA) |
|---|---|---|
| Effort Required | Significantly more physical effort. Can be tiring for large areas or deep scratches. | Much less physical effort. Machine does most of the work. |
| Speed | Slow. Takes considerable time to cover the whole vehicle. | Much faster. Can complete the job in a fraction of the time. |
| Results Consistency | Can be inconsistent if pressure or technique varies across sections. | More consistent results as speed and motion are controlled by the machine. |
| Risk of Paint Damage | Lower risk of widespread damage due to less power. However, uneven pressure can still mar paint. | Low risk with a DA polisher, as it’s designed for safety. Rotary polishers carry a much higher risk of burning paint. |
| Cost | Lower initial investment (pads, compounds). | Higher initial investment (polisher, pads, compounds). |
| Learning Curve | Easier to get started with. Understanding pressure is key. | Slightly steeper curve to learn machine control, but DA is beginner-friendly. Reading about safe polishing techniques from resources like those from Chemical Guys can be very helpful. |
For beginners tackling micro scratches, both methods are viable. If you have a small scratch or just a few areas to address, hand application is perfectly fine. However, if your car has widespread micro scratches or you plan to do this more regularly, investing in a dual-action polisher can be a worthwhile upgrade.
Tips for Preventing Future Micro Scratches
Once you’ve successfully removed micro scratches, you’ll want to keep your car looking pristine. Prevention is always easier than correction! Here are some simple tips:
- Master the Two-Bucket Wash: This is the single most important habit to adopt. Always use two buckets and rinse your wash mitt frequently.
- Use Quality Microfiber: Invest in good microfiber wash mitts and drying towels. Wash them separately from other laundry, using a dedicated microfiber detergent and avoiding fabric softener.
- Avoid Swirling Motions: When washing and drying, try to use straight-line motions or a gentle blotting technique rather than aggressive circular scrubbing.
- Park Wisely: Try to park away from automatic car washes, busy entrances, trees that might drop sap, and areas prone to dust.
- Regularly Apply Protection: A good coat of wax or sealant creates a protective barrier that can absorb light scratches and make cleaning easier. Aim to reapply every 3-6 months, depending on the product and your environment. For a more durable option, consider a ceramic coating, though this often involves a steeper learning curve and more extensive prep work. Check out guides on proper coating application from automotive paint protection specialists for more detail.
- Be Gentle with Interior Surfaces: Even dusty dashboards can get swirled. Use a soft duster or damp microfiber cloth for interior cleaning.
By incorporating these simple habits into your car care routine, you’ll significantly reduce the chances of new micro scratches forming.
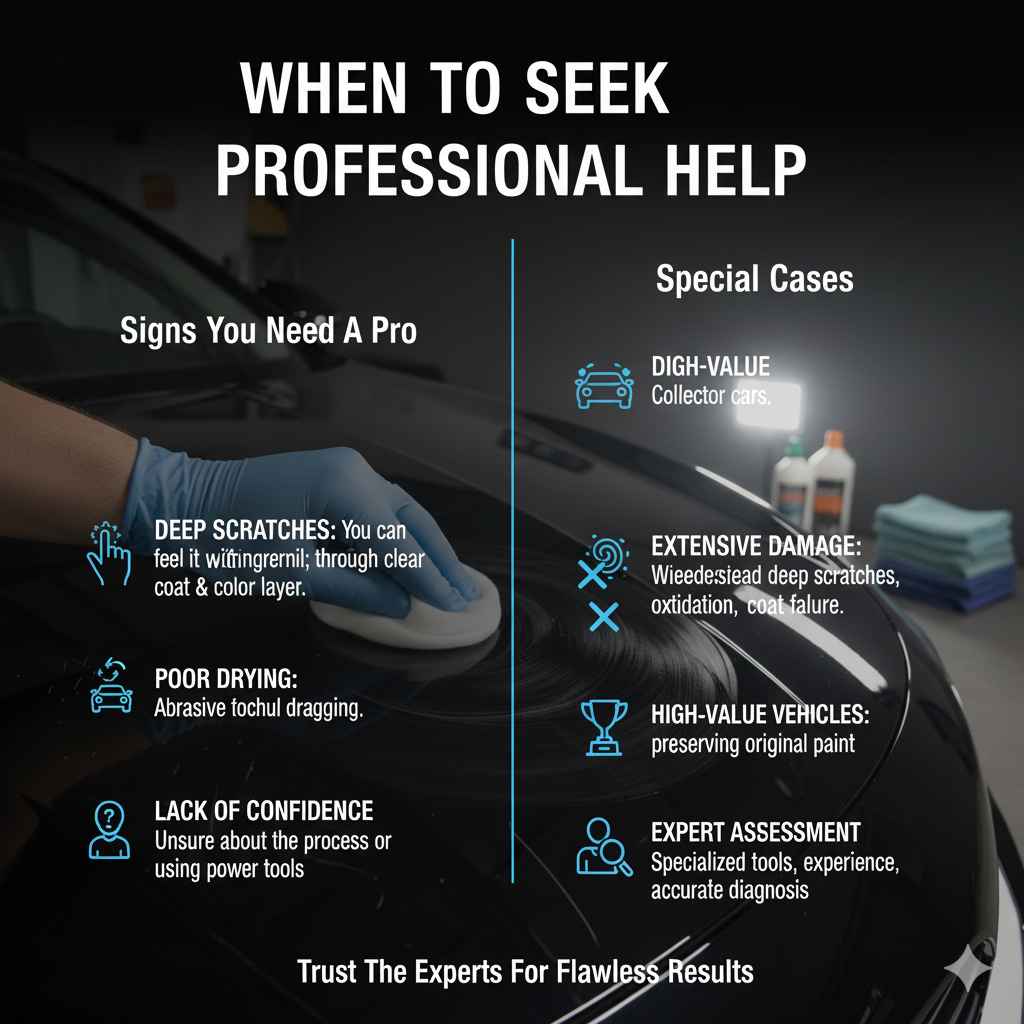
When to Seek Professional Help
While this guide covers how to tackle most micro scratches, there are times when it’s best to leave it to the pros. If you encounter any of the following, consider consulting a professional detailer:
- Deep Scratches: If you can feel a scratch with your fingernail, or if it’s more than just a surface blemish, it might have gone through the clear coat and into the paint color layer, or even the primer. These require more aggressive correction or potentially repainting.
- Extensive Damage: If your car’s paint is covered in very widespread, deep scratches, or if there are other significant paint defects like oxidation or clear coat failure, professional assessment is recommended.
- Lack of Confidence: If you’re uncomfortable with the process, especially with power tools, a professional can achieve excellent results safely and efficiently.
- High-Value Vehicles: For collector cars or vehicles where preserving original paint is paramount, seeking expert services is often the wisest choice.
Professional detailers have specialized tools, extensive experience, and a keen eye for identifying paint issues. They can diagnose problems accurately and apply the most effective correction methods.
Frequently Asked Questions
Q1: How long does it take to remove micro scratches by hand?
Removing micro scratches by hand can take several hours, depending on the size of your car, the number of scratches, and your pace. It requires consistent effort and breaks. A typical full-size car could take anywhere from 4-8 hours for a thorough hand correction.
Q2: Can I use household cleaners on my car’s paint?
No, it’s highly discouraged. Household cleaners often contain harsh chemicals that can strip protective waxes, damage the clear coat, or leave a dull finish. Always use products specifically designed for automotive paint.
Q3: Will a car wash wax or sealant fill in micro scratches?
Some “all-in-one” products might contain fillers that temporarily mask micro scratches and add gloss. However, they don’t truly remove the scratches. The scratches will likely reappear after the product wears off. True removal involves abrasion and leveling the clear coat.