How To Remove Small Dents In Your Car Without A Bodyshop
Small car dents can often be fixed at home with simple DIY methods and common household items. While major damage requires professional help, minor dings and creases can be surprisingly manageable using techniques like hot and cold temperature changes, suction cups, or basic pushing from behind. This guide explores effective, budget-friendly ways to remove small dents yourself, saving you time and money.
Understanding Small Car Dents
So, what counts as a “small” dent? Usually, these are shallow impressions. They are less than the size of a credit card.
The paint is also not damaged. If the paint is cracked or scratched, it’s a different story. That often needs more than a DIY fix.
Small dents typically happen from things like hailstones. They can also come from shopping carts. Minor bumps in parking lots can cause them too.
The metal is pushed inward, but the paint stays intact.
The key here is the metal. It’s usually just bent, not torn. This is good news for DIY repairs.
When the paint is okay, the metal is often still flexible. This flexibility is what allows us to reshape it. We can use different forces to pop it back out.
Think of it like gently bending a piece of plastic back into shape. It’s not always easy. But with the right approach, it’s definitely possible for many minor issues.
Why does the paint matter so much? Paint is like a protective shield. It also adds to the car’s look.
If the paint is broken, water and dirt can get in. This can lead to rust. Rust is a much bigger problem.
It weakens the metal. Fixing rust is complicated and costly. So, for DIY dent removal, we are looking for those dents where the paint is still smooth and shiny.
This is the biggest clue that a simple fix might be on the table.
My Own Close Call with a Minor Ding
I remember one sunny Saturday afternoon. I was unloading groceries. My car was parked close by.
I wasn’t paying full attention. I set a heavy bag of oranges down a little too hard. It rolled.
It bumped gently against my car door. My heart sank. I looked.
There it was. A small, noticeable dent right on the character line of the door. It wasn’t deep, but it was clear as day.
My first thought was dread. I pictured the bill from the auto body shop. It felt so unfair for such a small accident.
I just wanted to hide it. Or maybe pretend it wasn’t there. But it was.
I felt a bit foolish and very annoyed with myself. I knew I had to try something before calling a professional. I felt a mix of frustration and a tiny spark of hope.
I started searching online, just like you might be doing now. I found tons of advice. Some seemed too good to be true.
Others involved special tools I didn’t have. But I stumbled upon a method using heat and cold. The idea was to expand and contract the metal.
I decided to give it a shot. I grabbed a hairdryer and a can of compressed air. It felt a bit like a science experiment.
I carefully heated the dented area. Then, I sprayed the compressed air, which gets very cold, onto the spot. I held my breath.
I did this a few times. Slowly, almost magically, the dent seemed to pop out. It wasn’t perfect, but it was so much better.
The relief was incredible. It taught me that sometimes, simple tools can make a big difference. I felt empowered.
I learned that not every car problem needs a shop visit. It was a valuable lesson in DIY car care.
DIY Dent Removal: What You Need to Know
Patience is Key: Rushing can make things worse. Take your time with each step.
Assess the Damage: Only try DIY on small, shallow dents. If paint is damaged, consult a pro.
Cleanliness Matters: Always clean the area before you start. Dirt can cause scratches.
Test First: If you’re unsure, try a small, less visible area first. See how the paint reacts.
Know Your Limits: Some dents are simply too complex for home repair. Don’t be afraid to call a professional if needed.
The Magic of Temperature Changes
One of the most popular DIY methods involves playing with temperature. Cars are made of metal, and metal expands when it’s hot. It shrinks when it’s cold.
We can use this property to our advantage. The idea is to heat the dented area. This makes the metal expand.
Then, we rapidly cool it. This makes the metal shrink. The sudden change can cause the dent to pop back out.
It’s like giving the metal a little shock to help it return to its original shape.
For the heat part, a hairdryer is often used. You want to warm the metal around the dent. Don’t use a heat gun unless you are very careful.
A heat gun can get too hot very quickly. It can damage your car’s paint. Hold the hairdryer a few inches away.
Move it back and forth over the dented area. You’re looking for it to be warm to the touch, not scorching hot. About 30 seconds to a minute of heating should be enough.
You should be able to feel the warmth when you touch it.
After heating, comes the cold. The most common tool here is a can of compressed air. Turn the can upside down.
Spray the liquid propellant onto the dent. This liquid is very cold. It can freeze things.
You’ll see frost form. The rapid cooling causes the metal to contract quickly. You might hear a popping sound.
This is a good sign! It means the metal is moving. Repeat the heating and cooling process a few times.
Sometimes, one round isn’t enough. Be patient. Keep gently applying heat and then cold.
Watch the dent closely. It might slowly start to flatten out.
Another variation uses dry ice. Dry ice is even colder than compressed air. You must wear thick gloves when handling dry ice.
It can cause frostbite. Wrap a small piece in a cloth. Press it onto the dent after heating the area.
The extreme cold can also help pop the dent out. Remember, safety first. Always protect your skin.
And be mindful of the car’s paint. The goal is to encourage the metal to move, not to damage the finish.
Heat and Cold Method: A Quick Look
- Tools: Hairdryer, can of compressed air (held upside down), thick gloves (if using dry ice).
- Step 1: Clean the dented area thoroughly.
- Step 2: Heat the dent with a hairdryer for about 30-60 seconds.
- Step 3: Immediately spray the dent with compressed air (upside down) for several seconds.
- Step 4: Repeat steps 2 and 3 two to three times.
- Observe: Watch for the dent to pop out. You might hear a pop.
Caution: Do not overheat the paint. Wear gloves if using dry ice.
Using Suction Cups for Dents
Suction cups are another popular tool for pulling dents out. These are the same kind of cups you might use to hang things. For car dents, you’ll want a stronger, larger suction cup.
You can find dent puller suction cups online or at auto parts stores. They are designed to create a strong grip on the car’s surface. The idea is simple: stick the cup to the center of the dent.
Then, pull. The suction should pull the metal back into place.
To make this method work best, the area needs to be clean and smooth. Dirt or grime will prevent the cup from sticking. So, wash and dry the area around the dent.
Some people recommend lightly wetting the cup or the car’s surface. This can help create a better seal. You want a strong vacuum when you press the cup down.
Once the cup is firmly attached, you need to pull. For smaller cups, you might just pull by hand. For larger, more powerful ones, there might be a lever or handle to create more suction.
Pull steadily and firmly. You’re trying to create enough force to dislodge the dent. Sometimes, a single pull does the trick.
Other times, you might need to reposition the cup. You might need to try pulling from slightly different angles.
It’s important to pull straight out. If you pull at an angle, you could twist the metal or damage the paint. Be gentle but firm.
If the dent doesn’t budge, don’t force it too hard. You could make it worse. You might need to try heating the area slightly first.
This can sometimes make the metal more pliable. Then, apply the suction cup and pull. This combination can be very effective for certain types of dents.
One thing to be aware of is the type of dent. Suction cups work best on flat, relatively smooth surfaces. They aren’t as effective on sharp creases or dents that are right on a body line or curve.
The suction cup needs a good, even surface to grab onto. If the dent is too small or too complex, the cup might not get a good seal. Or, the force might not be concentrated enough to pull it out.
Still, for many common shallow dents, a suction cup is a great first step.
Suction Cup Dent Puller: Step-by-Step
- Gather Tools: A strong suction cup dent puller and a clean microfiber cloth.
- Clean Surface: Wash and dry the dented area. Ensure it’s free of dirt and wax.
- Apply Cup: Dampen the edge of the suction cup slightly. Press it firmly onto the center of the dent.
- Create Suction: Engage the suction mechanism (lever or handle). Ensure a strong seal.
- Pull Gently: Pull straight back on the handle. Use steady, firm pressure.
- Repeat if Needed: If the dent doesn’t pop out, reposition the cup and try again.
Tip: Warm the metal slightly with a hairdryer before using the suction cup for better results.
The “Pushing from Behind” Technique
If you can access the back of the dent, pushing is another effective method. This requires getting behind the dented panel. You might be able to reach it from the inside of the car.
For example, you might need to remove an interior trim panel or access a door handle mechanism. This method is very hands-on. It allows you to feel the metal as you work.
You’ll need something to push with. A blunt, rounded tool is best. You don’t want to use anything sharp.
A rubber mallet handle, a wooden dowel, or even your hand can work. The goal is to apply gentle, consistent pressure to the backside of the dent. You’re trying to push the metal back out to its original shape.
Start by locating the exact spot of the dent on the inside. You might need a flashlight. Feel for the indented area.
Then, begin to apply pressure. Start lightly. You want to feel the metal moving.
As you push, have someone watch the outside of the car. They can tell you when the dent is starting to come out. Or, you can periodically check yourself.
It’s important to work slowly. You don’t want to push too hard in one spot. This can create a bulge.
Instead, try to apply pressure around the edges of the dent first. Then, work your way towards the center. It’s like massaging the metal back into place.
You’re trying to avoid creating new imperfections.
This method is often used by professionals. It’s called Paintless Dent Repair (PDR). They use specialized tools.
But the basic principle is the same. If you can get to the back of the dent, you can often gently push it out. This is especially good for dents on door panels or fenders where access is possible.
Make sure you don’t apply too much force. You don’t want to crack the paint from the inside. If you feel a lot of resistance or hear creaking, ease up.
Sometimes, you might need to combine this with the temperature method. Heating the outside of the dent can make the metal more flexible. Then, you can push from the inside.
This can be a powerful combination. Always remember to reassemble any panels you removed correctly. Make sure all clips and screws are back in place.
This method requires a bit more effort and possibly some basic car interior knowledge.
Accessing the Back: Tips for Pushing Dents
- Identify Access: Determine if you can reach the back of the dent. Check door interiors, trunk lids, or under body panels.
- Use Blunt Tools: Employ tools with rounded or soft ends (e.g., rubber mallet handle, gloved hand).
- Gentle Pressure: Apply steady, light pressure. Avoid sudden force.
- Work Edges Inward: Start pushing from the outer edges of the dent.
- Monitor Progress: Have someone observe the outside or check frequently.
- Avoid Bulges: Push evenly to prevent creating new high spots.
Note: This works best on dents without sharp creases.
Dealing with Minor Hail Damage
Hailstorms can be a nightmare for car owners. They can leave dozens, sometimes hundreds, of tiny dents all over the vehicle. These are often called “door dings” or “hail dings.” They are usually small and shallow.
The paint is almost always intact. Fixing this type of damage can be daunting because there are so many dents.
For individual hail dings, the temperature method can be very effective. You can work on one dent at a time. Heat it with a hairdryer, then cool it with compressed air.
It’s time-consuming, but it can save you a lot of money compared to professional hail repair. You might need to go over each dent several times. Be patient with this process.
You’re essentially giving each little dent a nudge back into place.
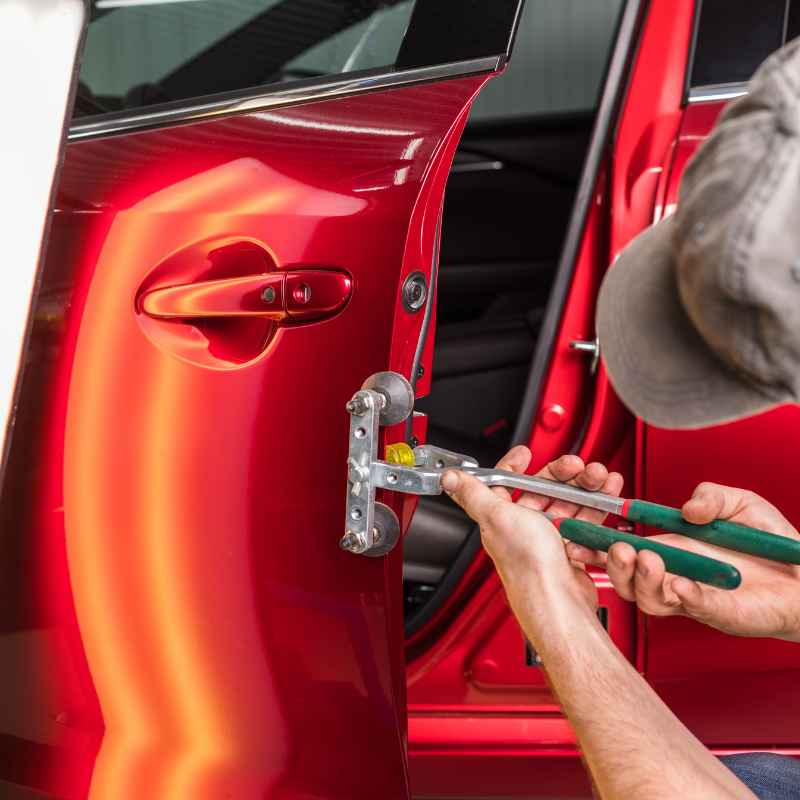
Some specialized tools exist for hail damage. These are often small glue-pulling tabs. You glue a tab to the center of the ding.
Then, you use a special pulling tool to gently lift the dent out. This is similar to suction cups but uses adhesive. After pulling, you can use a special plastic hammer to tap down any high spots.
This is a more advanced DIY technique. It requires buying specific kits.
Another approach is to use a PDR light. A PDR light casts a pattern of lines onto the dented surface. This makes the dents and high spots very visible.
You can then use rods or other tools to push the dents out from behind. This is how professionals work. You can buy basic PDR light kits for home use.
They help you see the imperfections more clearly.
It’s important to manage expectations with hail damage. It’s rare to get a perfectly flawless finish with DIY methods. The goal is to make the dents much less noticeable.
For a car that’s a few years old, a near-perfect finish might not be necessary. You might be happy if the dents are only visible when you look very closely. That’s a win for DIY.
If you want showroom quality, professional PDR is usually needed. But for most people, significantly reducing the visibility of hail dents is a great outcome.
Hail Dent Strategies:
- Individual Dents: Use the heat/cold method on each small ding.
- Glue Pulling Kits: Consider kits for stronger adhesion and pulling force.
- PDR Lights: Invest in a PDR light to clearly see all dents.
- PDR Rods: If you can access the back, use PDR rods for precise pushing.
- Patience: Hail damage is tedious; tackle it section by section.
Consideration: Aim to reduce visibility, not achieve perfection.
When DIY Isn’t Enough
It’s great to try fixing dents yourself. But there are times when you need to call in the experts. Knowing when to stop is important.
If the dent is large, deep, or has sharp creases, DIY methods are unlikely to work. These types of dents have stretched the metal significantly. They might also have damaged the paint structure.
Any dent where the paint is cracked, chipped, or scratched is a sign to stop. Trying to push or pull a dent with damaged paint can make the paint issue worse. Water can get under the paint.
This leads to rust and peeling. These problems require professional bodywork and repainting. The cost of fixing paint damage can be high, but it’s necessary for long-term protection.
If you try a DIY method and it doesn’t work, don’t keep forcing it. You could make the dent sharper. Or you could distort the metal panel.
This can make it harder and more expensive for a professional to fix later. It’s better to accept that some dents are beyond simple home repair. A professional Paintless Dent Repair (PDR) technician has specialized tools and skills.
They can often fix dents that seem impossible.
Another indicator is location. Dents on body lines, edges of panels, or areas with complex curves are tricky. The metal in these areas is stressed differently.
DIY tools like suction cups or simple pushing might not have the precision needed. Professionals use custom tools to access and manipulate these specific points. They understand how the metal will react.
Finally, consider the value of your car. If you have a classic car or a luxury vehicle, you might want to err on the side of caution. Even a small imperfection can significantly impact its value.
For these situations, professional restoration or repair is usually the best choice. They have the experience to ensure a perfect finish. Don’t be afraid to get a quote from a reputable bodyshop.
Sometimes, the peace of mind is worth the cost.
Signs You Need a Professional:
- Deep Dents: If you can fit your finger into the dent easily.
- Sharp Creases: Dents with hard lines or folds in the metal.
- Damaged Paint: Cracks, chips, or deep scratches within the dent.
- Stretched Metal: Dents that seem to have thinned the metal.
- Complex Areas: Dents on sharp body lines or panel edges.
- Failed DIY Attempts: If your own efforts make it worse or don’t help.
When in Doubt: Always get a professional opinion and quote.
Common Mistakes to Avoid
When you’re trying to fix a dent yourself, it’s easy to make mistakes. One of the biggest is using too much force. You might get impatient and try to yank the dent out quickly.
This can stretch the metal too much. It can also create a bulge where the dent was. Or worse, it can crack the paint.
Always use a gentle, steady approach. If it’s not moving, take a break and reassess.
Another common error is not cleaning the surface properly. Dirt, wax, or road grime can get trapped. When you apply heat or suction, these can bake into the paint.
They can cause micro-scratches. Always start with a clean car. Use a good quality car wash soap and water.
Dry the area thoroughly before you begin.
Using the wrong tools is also a problem. Sharp objects can scratch or puncture the paint. Excessive heat can bubble or discolor the paint.
For example, using a heat gun on its highest setting is risky. A hairdryer on a medium to high setting is safer for most situations. When pushing from behind, make sure your tool is blunt and smooth.
Avoid anything that has sharp edges or could snag.
Trying to fix a dent that’s too big or too complex is another pitfall. People see DIY guides and think they can fix anything. But some dents require specialized equipment and expertise.
Trying to tackle a major dent with home methods can actually make the professional repair more difficult. It can lead to higher costs down the line.
Finally, don’t forget about temperature. Trying to do these fixes in extreme weather conditions can be tricky. Very cold weather can make the metal brittle.
Very hot weather can make the paint soft and prone to damage. Mild temperatures are usually best. Aim for a comfortable room temperature if possible.
If working outside, choose a cloudy day or a shaded spot.
DIY Dent Fix Pitfalls to Dodge:
- Excessive Force: Don’t yank or push too hard.
- Dirty Surface: Always clean the area first.
- Wrong Tools: Use blunt, smooth tools; avoid sharp objects.
- Too Much Heat: Use hairdryers; avoid heat guns on high settings.
- Overly Ambitious Dents: Know when a dent is too big for DIY.
- Ignoring Weather: Work in mild temperatures for best results.
Key Takeaway: Be patient and use the right tools for the job.
Maintaining Your Car’s Finish After Repair
After you’ve successfully removed a small dent, it’s important to take care of your car’s paint. This helps maintain the repair and protect the finish. If you used heat, the paint might be a little stressed.
Give it some time to recover. Avoid washing the car immediately after a repair, especially if you used strong cleaners.
Regular washing and waxing are crucial. Wash your car with a pH-neutral car soap. Use a soft wash mitt and microfiber drying towels.
This prevents scratches. Applying a good quality wax or sealant provides a protective layer. This layer shields the paint from UV rays, dirt, and debris.
It also makes the surface slick, which helps prevent future minor damage.
Keep an eye on the repaired area. Sometimes, a dent might look fixed, but a slight imperfection remains. Over time, as the metal settles, it might become more noticeable.
If you see this happening, you might need to revisit the repair or consider professional help. But for most small dents, a good DIY fix is long-lasting.
Be mindful of parking. Try to park away from other cars in parking lots. This reduces the risk of door dings.
When washing your car, pay attention to the panels. Look for any new marks or dings. Catching them early makes them easier to fix.
Also, if you parked outside during a hailstorm, inspect your car soon after.
Think about protective coatings. Ceramic coatings offer excellent protection against scratches and environmental contaminants. They are more durable than traditional waxes.
While more expensive, they can be a worthwhile investment for keeping your car’s paint looking its best. It’s all about proactive care. By following these steps, you can keep your car looking great for years to come.
Post-Repair Car Care Checklist:
- Wait Before Washing: Give the paint time to settle.
- Gentle Washing: Use pH-neutral soap and soft materials.
- Regular Waxing: Apply a quality wax or sealant.
- Inspect Regularly: Check repaired areas and for new damage.
- Protective Coatings: Consider ceramic coatings for extra defense.
- Mindful Parking: Avoid high-traffic areas to prevent dings.
Goal: Preserve the repair and protect your car’s finish.

Frequently Asked Questions About Small Car Dents
Can I really remove dents with just a hairdryer and compressed air?
Yes, for small, shallow dents where the paint isn’t damaged, the rapid temperature change from a hairdryer (heat) and upside-down compressed air (cold) can often cause the metal to contract and pop the dent out. It requires patience and multiple attempts sometimes.
Will this method damage my car’s paint?
If done correctly, it shouldn’t damage the paint. Avoid overheating the area with the hairdryer – keep it moving and at a safe distance. Also, avoid using sharp tools or excessive force when pushing or pulling.
What kind of dents can suction cups fix?
Suction cups work best on relatively flat, smooth surfaces. They are good for shallow, round dents. They are less effective on sharp creases, dents on body lines, or very small dings that don’t provide enough surface area for the cup to create a strong seal.
How do I know if a dent is too big for DIY repair?
If a dent is larger than a silver dollar coin, has sharp creases, has cracked or damaged paint, or has significantly stretched the metal, it’s usually too big for DIY methods. These types of dents often require professional Paintless Dent Repair (PDR) or traditional bodywork.
What is Paintless Dent Repair (PDR)?
PDR is a method used by professionals to remove minor dents and dings without repainting the vehicle. They use specialized tools to massage the metal back into its original shape from behind the panel. Some DIY methods, like pushing from behind, are similar in principle.
Should I try DIY if my car is new or has special paint?
If your car is brand new or has a specialized or high-end paint finish (like a matte finish or a multi-stage metallic), you might want to be extra cautious. The risk of minor paint damage is higher. If you’re not confident, it might be safer to get a professional quote first, even for small dents.
Final Thoughts on Tackling Small Dents
Finding a small dent on your car can be upsetting. But you now know that many minor imperfections don’t require a costly body shop visit. With a little patience and the right approach, you can often fix them yourself.
Methods like using temperature changes, suction cups, or carefully pushing from behind can be very effective.
Remember to always assess the damage first. Make sure the paint is intact. Start with the simplest methods and work your way up.
Don’t force it if it’s not working. Know your limits and when to call a professional. Taking care of your car’s finish after a repair is also important.
Regular washing and waxing will keep your car looking its best. You can save money and feel good about keeping your car in great shape.
Products related to this article
Sponsored / affiliate links. As an Amazon Associate I earn from qualifying purchases. I may earn additional commission from eligible campaigns.
 Super PDR Dent Puller Kit Paintless Dent Repair Kit for Car – Slide Hammer Suction Cup and PDR Light for 98% Auto Body Dent Removal, Hail Damage & Appliance Dents or Vehicle Dent Removal
 Car Dent Repair Pen Tool for Auto Body Hail Damage Removal - Paintless Dent Puller Kit with Suction Cup for Door Dings on Trucks SUVs - Alloy Handle 5PCS Set