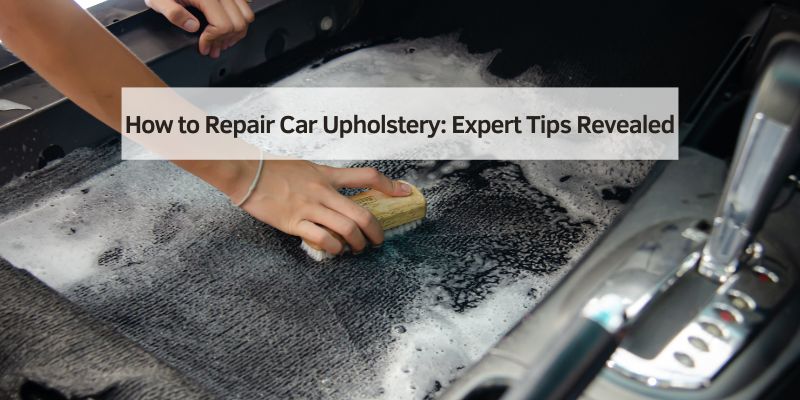
How to Repair Car Upholstery: Tears, Burns & Sagging Seats
Car upholstery repair depends entirely on the material — fabric tears can be sewn or patched at home, but leather and vinyl need a color-matched repair kit or professional help once damage exceeds about 2 inches. A DIY tear repair runs $10–$40 in materials versus $80–$550 professionally, depending on material. This guide covers fabric, leather, and vinyl repair steps, plus fixing sagging seat cushions and exposed springs.
Quick Answer
For small fabric holes and burns, apply a matching patch with heat-set fabric adhesive and an iron. Sew larger fabric tears with a curved upholstery needle. Leather and vinyl need a color-matched repair kit (like Coconix or 3M) for anything under 2 inches — beyond that, or if the foam or springs underneath are damaged, call a professional upholstery shop.
Assessing Upholstery Damage
Before you buy any repair supplies, figure out exactly what you’re dealing with. Stains, tears, cigarette burns, sun fading, loose threads, and sagging cushions are the most common upholstery problems, and each one calls for a different fix. A small stain might just need a mild cleaner, but a two-inch tear needs a patch, and a burn usually means cutting out the damaged fibers entirely and replacing them.
Size and depth matter more than most people expect. Damage under about 2 inches is almost always DIY-friendly with a patch or repair kit. Anything larger, or damage where the foam or seat frame underneath is also compromised, usually needs a professional — trying to patch over exposed foam or a cracked frame rarely holds up. Weigh the repair cost against a full reupholster before you start: a $20 patch kit only makes sense if the rest of the seat is still in good shape.
Essential Tools and Materials
A basic upholstery repair kit covers most jobs: a curved upholstery needle and heavy-duty polyester thread for sewing, sharp scissors, a screwdriver and wrench if you need to pull the seat for better access, a heat gun or household iron for heat-set adhesives, and a staple gun for reattaching loose fabric to the seat frame.
Match the replacement material to what’s already on the seat — fabric, vinyl, or leather each need their own patch and adhesive type. Keep a scrap of your seat fabric or a photo of the color on hand when shopping so the patch actually blends in. For foam work, buy high-density upholstery foam rather than generic craft foam; it holds its shape under repeated sitting instead of compressing flat within a few months.
Best Leather & Vinyl Repair Kit Pick
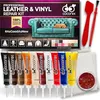
Coconix Leather & Vinyl Repair Kit
Fixes tears, holes, scratches, and peeling on leather and vinyl car seats with a color-matching compound and heat-set application.
- Best for: tears and holes under 2 inches on leather or vinyl seats
- Why we picked it: one kit works on both leather and vinyl, with mixable colors for a closer match
- Main drawback: color matching takes practice — test on a hidden spot first
Compare more upholstery repair options
 Option 1 Coconix Fabric & Carpet Repair Kit
|
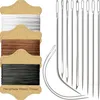 Option 2 VONEEDL Upholstery Sewing Kit
|
 Option 3 FoamTouch Upholstery Foam Sheet
|
As an Amazon Associate we earn from qualifying purchases.
Cleaning and Preparation
Every repair starts with a clean, dry surface — adhesive and patches won’t bond to dirt, oils, or dust. Vacuum the area first with a brush attachment to lift loose debris out of the fabric weave or leather grain, then wipe it down with a cleaner suited to the material (mild soap and water for fabric, a dedicated leather cleaner for leather, and an all-purpose interior cleaner for vinyl).
Always test any cleaner on a hidden spot first, like under the seat edge, since some products can fade color or dull a finish. Let the seat air-dry completely — a fan speeds this up and helps prevent mold from forming in damp foam underneath. Applying adhesive or a heat-set patch over even slightly damp fabric is one of the most common reasons DIY repairs fail early.
Repairing Fabric Upholstery
For small holes and cigarette burns under about 2 inches, cut a piece of matching fabric slightly larger than the damage, place fabric adhesive inside the hole, and set the patch on top. Run a household iron over the patch on a low, non-steam setting for 15–20 seconds — the heat activates the adhesive and bonds the new fabric to the surrounding material without visible edges. Let it cool fully before sitting on it.
For longer tears, sewing holds up better than glue alone. Use a curved upholstery needle (it lets you stitch without removing the whole seat cover) and heavy-duty polyester thread that matches the fabric color. Tie off a starting knot, sew small, tight stitches along the tear, and pull each stitch snug as you go so the seam doesn’t gap open again once you sit down. For tears longer than about 4 inches, back the seam with a fabric patch glued underneath before sewing — thread alone on a long tear tends to reopen within a few months of regular use.
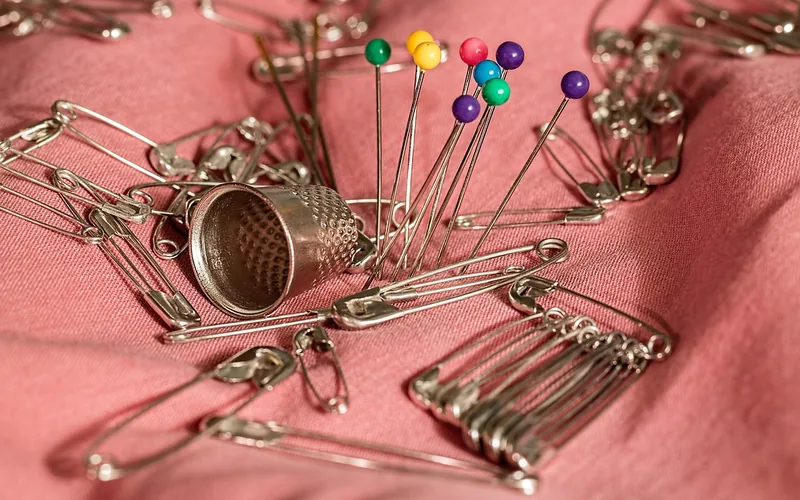
If your seat cover is fabric over exposed springs on an older car — a common issue on vehicles from the 1980s and 1990s — see the sagging seat and foam section below before you patch the surface fabric, since the underlying support usually needs attention too.
Fixing Leather Upholstery
Leather repair kits include a filler compound, color dyes you mix to match your seat, and an applicator. Clean the area first — a clean, oil-free surface is what lets the filler bond instead of peeling loose later. Apply the filler into the tear or crack, let it set, then sand it lightly flush with the surrounding leather.
Color matching is the step most DIYers underestimate. Mix the kit’s dye colors on a scrap surface first, and test on a hidden spot like the underside of the seat before applying anything visible. Apply the color with the kit’s sponge applicator in thin, even layers rather than one heavy coat, then seal it with the kit’s leather finish once it’s fully dry. That top coat is what keeps the color from rubbing off onto clothing.

“Many at-home fixes begin to peel, crack, or fade within a few months.”
That’s the real tradeoff with DIY leather kits: they’re genuinely useful for small scuffs and pinhole tears, but repairs on wider tears or heavily worn bolsters tend not to hold their color or texture as long as a professional job. If the damage is bigger than about 2 inches, or the leather has cracked all the way through rather than just scuffed, budget for a shop instead — see the cost breakdown further down. For a deeper walkthrough of leather-specific techniques, see our full leather car seat repair guide.
Dealing With Vinyl Upholstery
Fixing vinyl car upholstery uses the same basic idea as leather — clean the area thoroughly, then apply a vinyl repair kit to patch tears or holes and blend the finish. Vinyl is more forgiving than leather since it doesn’t have natural grain variation to match.
Vinyl Patch Application
Vinyl patches work well for small tears and holes. Clean the damaged area with soap and water or a dedicated cleaner, and let it dry completely — vinyl adhesive won’t bond to a damp surface. Cut the patch to fully cover the tear with some overlap, peel the backing, and press it firmly onto the damage. Smooth out any wrinkles as you go and let it cure for a few hours before sitting on it. A well-applied patch typically holds up for years rather than months.
Heat Repair Methods
Heat repair works well for small cracks and pinholes. Use a vinyl repair kit with a heat tool: clean and dry the area, select a compound that matches your vinyl’s color, and apply it over the crack or hole. Move the heat tool evenly across the repair to cure the compound and blend it into the surrounding texture. Let it cool, inspect the result, and repeat a thin second layer if the color or texture doesn’t fully match yet.
Addressing Foam and Padding
Old seat foam feels hard, lumpy, or crumbly because upholstery foam breaks down over time — most factory foam lasts around 15–20 years under regular daily use before it needs replacing. To replace it, remove the seat cover gently, check whether the foam is crumbling or just compressed, then cut new high-density upholstery foam to match the old piece using a sharp knife for clean edges. Glue the new foam to the seat frame so it can’t shift, and make sure it sits flush without gaps.
How to Fix a Sagging Car Seat Cushion (Foam and Springs)
A sagging driver’s seat is almost always a foam or spring problem, not a fabric problem — patching the surface won’t fix it. If you unzip the seat cover and find the foam crumbling into pieces rather than compressed, it needs full replacement, not just a topper. If the foam is intact but just flattened, a common fix is adding a layer of new foam or dense padding (like jute padding) between the seat springs and the existing foam to restore height and firmness.
If you can feel or see the metal springs through worn fabric — common on older vehicles where the seat covering has thinned to almost nothing over the springs — that’s a sign the padding layer has fully broken down, not just the outer fabric. Small spring or frame issues can be shored up with added foam and padding, but a broken spring, bent frame, or heavily sagging structural seat is usually a job for a professional upholstery shop, since fixing the frame itself requires reupholstering anyway.
📊 Repairing a single spot of sagging seat foam typically runs $80–$180 in labor at a shop (45–90 minutes), while a full foam replacement for one seat runs about $250. — Source: Car Upholstery Cost, 2026 Diagnostic Guide
What Does Car Upholstery Repair Cost by Material?
Repair cost depends far more on material than on how the job “feels” — a leather tear costs noticeably more to fix professionally than the same size tear in cloth, because color-matching leather dye is more labor-intensive than a cloth patch. Here’s what a single tear under about 2 inches typically costs, professionally, by material:
| Material | Professional Tear Repair | Typical DIY Kit Cost | Best For |
|---|---|---|---|
| Cloth / fabric | $80 – $200 | $10 – $25 | Small holes, burns, seam tears |
| Vinyl | $120 – $250 | $15 – $30 | Cracks, small tears, pinholes |
| Leather | $150 – $350 | $20 – $40 | Scuffs, small tears, worn color |
| Full seat reupholster | $250 – $750 per seat | $80 – $200 in materials | Damage that covers most of the seat |
Tears longer than about 4 inches tend to fail and reopen within six months even after a repair, which is usually the point where a full panel replacement makes more financial sense than another patch. If you’re weighing DIY against a shop, our step-by-step cloth seat tear guide covers three specific stitching and no-sew methods in more depth than we can fit here.
Maintenance and Prevention
Most upholstery damage is preventable with a few habits, and it overlaps a lot with routine car detailing. Regular cleaning keeps small stains from setting in permanently, and catching loose threads or small nicks early stops them from turning into full tears.
Regular Cleaning Tips
Clean car seats regularly with a vacuum to lift dust and crumbs, then wipe stains with a soft cloth and a mild soap suited to the material — harsh chemicals can dry out and crack both leather and vinyl over time. Leather seats specifically need a dedicated leather cleaner and conditioner, since plain soap strips the natural oils that keep leather from cracking. Keep seats dry to prevent mold, crack a window for airflow, and use sunshades — UV exposure is one of the biggest causes of fading and, over years, brittleness.
Preventive Measures for Longevity
Seat covers add a protective layer against dirt and spills, and parking in the shade keeps seats from baking and cracking in direct sun. Eating in the car is one of the most common sources of stains and crumbs that work into seams over time, and pets should have a dedicated cover or blanket to keep fur and claws off the factory upholstery. Check periodically for loose threads and fix them while they’re still small — a five-minute stitch now beats a full patch job in six months.
When to Seek Professional Help
Deep cuts, large holes, fire or chemical burns, and stains that won’t lift after cleaning are all signs a DIY kit won’t get you a lasting result. The same goes for torn fabric where the foam or springs underneath are also damaged, or frayed edges near a seam that keep unraveling despite repeated small fixes — those usually point to a structural issue rather than a surface one.
A professional shop has color-matching tools and materials that go beyond what’s in a $20 kit, and their repairs typically hold their color and texture much longer than a DIY patch. For anything beyond a small tear or scuff — especially on leather, where a mismatched dye job is hard to undo — the labor cost is usually worth it for a repair that doesn’t need redoing again in a year. Our full car seat repair guide also covers mechanical seat issues (recliners, tracks, motors) that go beyond upholstery if that’s what you’re actually dealing with.
If your goal is cleaning rather than repairing damage, see our guide to cleaning fabric car seats instead — a deep clean won’t fix a tear, but it’s the right first step before you decide whether a patch is even worth it.
Frequently Asked Questions
How Do You Fix Torn Upholstery in a Car?
Clean the torn area with a fabric cleaner and let it dry fully. For small tears, glue a matching patch underneath and heat-set it with an iron. For larger tears, sew the seam closed with a curved upholstery needle and heavy-duty thread, backing it with a glued patch if it’s longer than about 4 inches. Match the color and texture as closely as possible, and keep up with regular cleaning afterward to prevent it from tearing again nearby.
How Much Does It Cost to Repair Car Upholstery?
A professional tear repair typically runs $80–$200 on cloth, $120–$250 on vinyl, and $150–$350 on leather, according to 2026 industry pricing. DIY kits cost $10–$40 in materials for the same repair. A full seat reupholster runs $250–$750 per seat professionally, or roughly $80–$200 in materials if you do it yourself. Always compare a few quotes before committing to a shop.
How Do You Fix Fabric on a Car Seat?
Clean the damaged area first and let it dry completely. Use fabric glue to secure loose fabric, press it down firmly, and let it cure before trimming excess threads with scissors. For larger tears, use a patch and sew it onto the seat with a curved upholstery needle, keeping the stitches tight so the seam doesn’t reopen once you sit down.
How Do You Repair a Cigarette Burn in a Fabric Car Seat?
Cut a small fabric patch that matches the seat’s color and texture. Apply fabric adhesive to the patch and the area around the burn, then press the patch into the hole. Heat-set it with an iron on a low, non-steam setting for about 15–20 seconds to bond the adhesive, let it cool completely, and trim any excess fabric for a smooth, flush finish.
How Do You Fix a Sagging Car Seat Cushion?
Unzip or remove the seat cover and check the foam. If it’s crumbling apart, replace it with new high-density upholstery foam cut to match the original shape. If the foam is intact but just flattened, add a layer of new foam or dense padding between the springs and the existing foam to restore firmness. If you can see or feel the metal springs through the fabric, or the frame itself is bent, that’s usually a job for a professional upholstery shop.
Can You Use a Leather Repair Kit on Vinyl (or Vice Versa)?
Some kits, like Coconix’s leather and vinyl repair kit, are formulated to work on both materials, but they’re not universally interchangeable. A kit made specifically for leather may not flex the same way vinyl needs to, and a vinyl-specific compound can look flat or plasticky on leather’s natural grain. Check the product label before buying — if it’s not explicitly rated for both materials, use a kit matched to your actual seat material instead.
Conclusion
Most car upholstery damage is fixable at home once you know which material you’re working with and how big the damage actually is. Fabric tears and burns respond well to a patch and either heat-set adhesive or hand-sewing. Leather and vinyl need a color-matched repair kit, and sagging cushions usually come down to worn-out foam rather than the fabric itself. When the damage goes past what a $20–$40 kit can fix — deep cuts, exposed springs, a cracked frame — a professional shop is worth the cost for a repair that actually holds up.
Products related to this article
Sponsored / affiliate links. As an Amazon Associate I earn from qualifying purchases. I may earn additional commission from eligible campaigns.