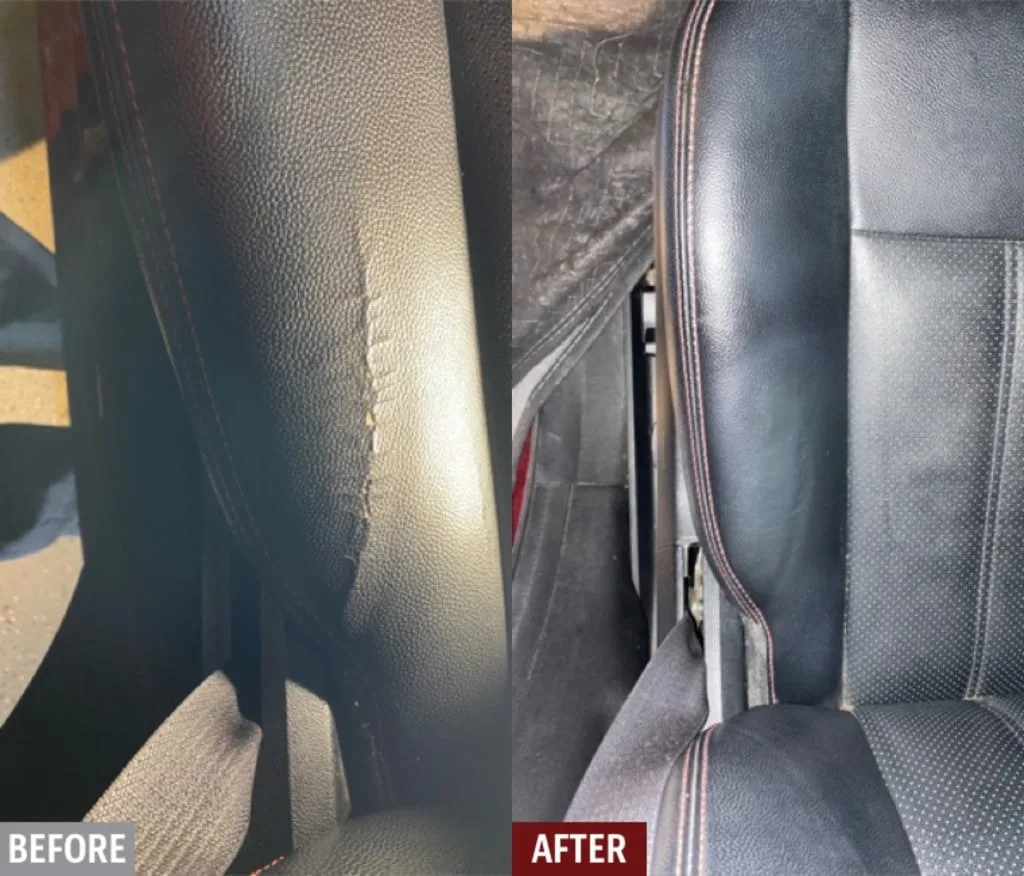
Leather Repair Kit vs Professional Upholstery Repair Costs
A moderately priced leather repair kit can be enough for small scuffs, cracks, and holes around 1 inch or less on low-visibility seats; choose a pro upholsterer for open seams, torn foam, split bolsters, or damage you can see every time you drive. Bad DIY repairs can harden the leather, spread the tear, and make the seat look worse. This guide shows the exact threshold for kit vs shop, plus what each option usually costs and how long the repair lasts.
| Decision factor | Leather Repair Kit | Professional Upholstery Repair | Winner |
|---|---|---|---|
| Up-front cost | Usually $15–$50 for materials | Higher labor cost and shop overhead | Leather Repair Kit |
| Best damage type | Light scratches, shallow wear, small cosmetic loss | Deep tears, cracks, stretched seams, exposed substrate | Professional Upholstery Repair |
| Color match in direct light | Near-match is common; sheen mismatch can still show | Bench color matching and controlled finish work | Professional Upholstery Repair |
| Durability on high-wear seats | Good when the damage is shallow and prep is solid | Better on bolsters, seams, and flex points | Professional Upholstery Repair |
| Time to complete | About 1–3 hours | Longer, with shop scheduling and cure time | Leather Repair Kit |
Leather repair kit vs professional upholstery repair: the short answer
The right call depends on how deep the damage goes. A kit usually works for protected automotive leather with shallow surface wear; once the damage reaches seams, bolsters, stretched leather, or exposed backing, a pro upholsterer is the better buy.
Where the line usually falls on cost, visibility, and durability
Leather repair kits can cost $15–$50 per kit, and DIY repair may take 1–3 hours. That makes a kit a smart pick for driver-seat scuffs and small worn spots, especially when a near-match is acceptable. But a shop quote buys color matching, stitch work, and a finish that tends to hold up better under flexing and friction.
How automotive leather changes the answer
Car seats take a beating that furniture never sees. Driver-seat bolsters get scraped on every entry and exit, then baked by UV and bent every time you settle in. Coated or protected leather usually accepts repair better than aniline or lightly finished leather, because the topcoat gives the repair material something steady to bond with.
According to Furniture Clinic – Specialists in Wood and Leather Repair, Cleaning & Restoration – Car Interior & Furniture Restorations — Furniture Clinic says its Leather Easy Restoration Kit starts from $39.95.
What each repair path actually includes
DIY leather repair kit: cleaner, filler, colorant, sealer, and tools
A proper kit usually includes a cleaning solution, filler or putty, colorant or dye, a topcoat sealer, and application tools. That package is aimed at surface scratches and light-to-moderate damage, where you can clean the leather, rebuild the missing surface, recolor it, and lock the finish down with a protective layer.

ARCSSAI ARCSSAL Leather & Vinyl Repair Kit is a straight DIY choice for small car-seat jobs where a liquid repair formula and multiple colors matter more than a perfect factory finish. The drawback is obvious: the more custom the seat color and sheen, the more likely the repair will read as “close enough,” not invisible.

HHGFCLTRS Leather & Vinyl Repair Kit leans toward heavier cosmetic fixes in brown interiors and claims coverage for deep scratches, tears, and burns. Based on the listing and typical kit limits, the drawback is color specificity; it may fit a brown seat better than a black, gray, or two-tone cabin, but it still depends on prep and layering.

FORTIVO Leather Recoloring Balm fits faded panels and scratch-heavy surfaces when recoloring is the main job. Its weakness is scope: a balm can improve appearance, but it is not the right tool for torn seams, missing material, or anything that needs true structural repair.
Professional upholstery repair: color matching, stitching, panel work, and finish control
Professional upholstery repair adds bench color matching, restitching, panel replacement, and controlled sheen matching. That matters because a shop can blend edges, match gloss, and repair the structure behind the leather, not just the visible top layer. Deep tears and extensive cracking fall squarely into this camp.
Why shop work usually lasts longer on high-wear seats
High-wear seats fail from flex, not just from color loss. When a bolster is stretched or a seam is opening, filling the visible damage without restoring the underlying structure is temporary. A shop repair lasts longer because it fixes the stress point instead of coating over it.
How bad is the damage?
Severity decides the method. Light scuffs are a kit job; deep gouges, fissures, cracks, and exposed substrate push the repair toward a professional. If the leather has lost structural integrity, a cosmetic fix may buy time, but it will not stop the failure from progressing.
Surface scratches and scuffs
These are the best candidates for DIY. If the topcoat is marked but the leather is still intact, a cleaner, light sanding where needed, filler, colorant, and sealer can bring the area back to a usable finish. Repair kits work best on light scratches.
Deep scratches, gouges, fissures, and cracks
Deep scratches and gouges may expose substrate, which changes the repair from cosmetic to rebuild work. Fissures and cracks are often linked to aging or poor maintenance, and they tend to reopen if the area flexes under load. At that point, a shop has a real advantage in both prep and finish control.
Tears, stretched seams, and exposed substrate
Once the leather is torn, stretched, or split along a seam, the repair is no longer just about color. The backing, foam, or stitching may need attention too. That is where professional intervention may be needed for deep tears or extensive cracking.
Does the leather finish change the answer?
Yes. Protected or coated automotive leather is more forgiving because the topcoat hides some repair blending and accepts fresh finish more evenly. Aniline and lightly finished leather are more sensitive, and the repaired area can stand out in direct light even when the color looks acceptable indoors.
Protected or coated automotive leather
This is the easiest seat material to repair in common cars. The coating helps with adhesion, makes cleaning more predictable, and gives you a better shot at a blended repair. Even here, contamination from oils or grime can ruin adhesion and cause the patch to lift later.
Aniline and lightly finished leather
These finishes absorb and reflect differently, so a DIY color pass can flash brighter, darker, or flatter than the surrounding panel. They also reveal edge haloing more easily. If the seat is a delicate finish and highly visible, professional color matching is usually the safer choice.
Why direct light exposes repair edges and sheen mismatch
Sunlight is unforgiving. Dry-down can change the apparent color after the product cures, and a sheen mismatch can make a small repair obvious from the driver’s door. A repair that looks acceptable in a garage may read very differently at noon.
Seat by seat: when DIY stops making sense
Driver-seat bolsters and entry wear
Bolsters are the first place to fail because they take the most friction. If the wear is shallow, a kit can hold up well enough. If the bolster is stretched, split, or softened by repeated flexing, a pro repair is the better buy.
Seams, piping, and stitched edges
Anything that involves stitching moves the job out of simple recoloring. A filler can hide a crack for a while, but it does not restore a failing seam. Once the seam line is opening or the piping is distorting, restitching is usually the right fix.
Sun-faded panels and high-contrast interiors
Black-on-gray, tan-on-black, and two-tone interiors are less forgiving because the eye catches contrast fast. If the seat panel is faded or the cabin gets strong sun, a DIY repair may look fine from five feet and wrong from the driver’s seat. That is a classic pro-repair case.
Decision matrix: DIY vs pro for four damage levels

| Damage level | Typical seat condition | Estimated DIY material cost | Expected result quality | DIY vs pro |
|---|---|---|---|---|
| Level 1 | Light scuffs and surface scratches | $15–$50 | Good cosmetic result if the color is simple and prep is clean | DIY |
| Level 2 | Deeper marks with no structural loss | $15–$50 | Moderate result; near-match may show in sunlight | DIY if low visibility; pro if front-and-center |
| Level 3 | Cracks, gouges, and visible backing | $15–$50, plus rework risk | Patchy if prep or color layering is off | Pro |
| Level 4 | Tears, seam failure, or stretched leather | Usually not the right spend for DIY | Poor to temporary | Pro |
Level 1: light scuffs and surface scratches
This is the sweet spot for a kit. The substrate is intact, the repair area is small, and the visual standard is usually “better, not perfect.” If the seat is coated leather and the shade is simple, the odds are good.
Level 2: deeper marks with no structural loss
DIY can still make sense here, but only if the seat is not a focal point every time the door opens. A kit may need layered application, blending edges, and a careful sheen match to keep the repaired area from reading as a flat spot in bright light.
Level 3: cracks, gouges, and visible backing
Once backing shows, the filler has to bridge a missing surface and survive movement. That is where rework risk goes up fast. If the color is complicated or the panel is highly visible, the hidden cost of a second pass can erase the savings.
Level 4: tears, seam failure, or stretched leather
This is pro territory. A cosmetic patch may buy time, but it does not restore strength or stop the split from spreading. If the leather is stretched around a bolster or seam, upholstery repair is the correct threshold, and replacement can become the next step if the panel is too far gone.
Choose Leather Repair Kit if… / choose Professional Upholstery Repair if…
Choose a kit when the damage is shallow, the seat is coated leather, the color is simple, and you can live with a close match. Choose a pro when the damage is on a bolster, seam, or visible driver-side panel, or when the leather has cracked through, exposed backing, or lost structural integrity.
Choose Leather Repair Kit if…
- The damage is limited to surface scratches, scuffs, or a small worn spot.
- The seat is protected or coated automotive leather, not a delicate aniline finish.
- You can clean the area thoroughly and wait for full dry time before coloring.
- A near-match is acceptable and the repair will not be inspected in direct sun every day.
Choose Professional Upholstery Repair if…
- The tear reaches a seam, bolster, or stretched section.
- There is exposed substrate, torn foam, or visible structural damage.
- The seat color is complex, sun-faded, or high contrast.
- You want the best chance at a controlled sheen and a longer-lasting finish.
How much does a leather repair kit cost compared with upholstery repair?
Leather repair kits can cost $15–$50 per kit, and that usually covers the cleaner, filler, colorant, sealer, and tools needed for a first pass. Upholstery repair costs more because you are paying for labor, matching, stitching, and sometimes panel work; the hidden cost on DIY is rework if the first color pass misses.
For a low-visibility scuff, the kit usually wins on cost. For a visible tear, the shop quote often wins on total value because one correct repair is cheaper than two failed DIY attempts.
What should I test before coloring a repaired leather area?
Test color, sheen, and dry-down on an inconspicuous area before you commit. A good test spot shows whether the tone shifts after curing, whether the edge blends cleanly, and whether the finish reads too glossy or too flat in daylight.
Apply in layers, not one heavy coat, and let each step dry fully. Cleaning oils and grime first is non-negotiable; contamination is one of the main reasons repairs fail to bond.
Frequently asked questions
Is a leather repair kit worth it for car seats?
Yes, when the damage is shallow and the seat is coated leather with a simple color. A kit is a practical fix for light scratches, small scuffs, and minor surface loss. If the repair area is highly visible or the leather is cracked through, the value drops fast.
When should I use a professional upholstery repair shop instead of a kit?
Use a shop when the damage reaches a seam, bolster, or stretched panel, or when the leather has exposed backing. Professional work is also the better choice for complex colors, sun-faded interiors, and repairs that need structural restitching rather than just a cosmetic fill.
Can a repair kit fix deep scratches and gouges in car leather?
Sometimes, but only if the damage has not crossed into structural loss. Deep scratches and gouges may expose substrate, which makes adhesion and color blending much harder. At that point, a kit is usually a patch, not a lasting fix.
Will a DIY leather repair look noticeable in sunlight?
It can. Direct light exposes color shift after dry-down, edge haloing, and sheen mismatch much more than garage light does. A careful test spot helps, but a near-match is still a near-match, not a factory blend.
How long does a repaired leather seat usually last?
It depends on the damage depth and the seat location. A shallow cosmetic repair can hold up well for a long time on a low-wear area, while a high-friction bolster or failing seam may reopen sooner. Shop repairs usually last longer on stressed areas.
Does reupholstery make more sense than patching damaged leather?
Yes, when the panel is too damaged for a stable surface repair or when the leather has failed in multiple places. If a seat needs repeated patching, reupholstery often becomes the cleaner long-term choice because it restores the panel instead of chasing separate defects.
Products related to this article
Sponsored / affiliate links. As an Amazon Associate I earn from qualifying purchases. I may earn additional commission from eligible campaigns.
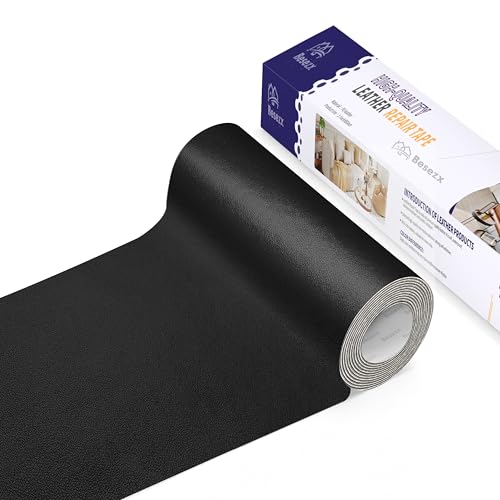
 Leather Repair Patch Tape 4×60 inch Furniture Leather Strong Self Adhesive Tape for Sofas Couch Car Seats Cabinets Bags Anti Scratch Patches First Aid Patch Fixing Leather Black Brown
 Leather Repair Patch Tape 8×12 inch 2 pcs Furniture Leather Strong Self Adhesive Tape for Sofas Couch Car Seats Cabinets Bags Anti Scratch Patches First Aid Patch Fixing Leather Khaki1.0