Automotive Air Conditioning Service: DIY Steps, Cost & EPA Rules
Servicing automotive air conditioning means identifying the refrigerant type, checking the system for leaks, pulling a vacuum to remove air and moisture, then recharging to the manufacturer’s spec — not just adding refrigerant until the vents feel cold. Skipping the vacuum step or overcharging the system can burn out the compressor, and venting refrigerant into the atmosphere is illegal under the Clean Air Act. This guide covers the full service process, a maintenance schedule, real repair costs, and the EPA rules that apply to DIY recharging.
[Insert your Affiliate Disclosure reusable block here]
Quick Answer
To service automotive air conditioning: identify the refrigerant (R-134a or R-1234yf), inspect the system for leaks and damage, recover any remaining refrigerant, pull a vacuum to 29–30 inHg for 30–45 minutes, recharge to the exact factory-specified weight, then verify vent temperature and pressures. A basic professional service costs $235–$500; a DIY recharge kit runs $30–$60, but only for R-134a systems using a small self-sealing can.
The 6-Step Car AC Service Process (Overview)
Every automotive AC service — whether done in a shop or in your own driveway — follows the same six-step sequence. The sections below cover each step at a high level; for full walkthroughs of the vacuum and recharge steps specifically, see our dedicated vacuum guide and recharge guide.
- Identify the refrigerant: Check the underhood A/C label for R-134a or R-1234yf before connecting any gauges — the two use different fittings and mixing them contaminates recovery equipment.
- Inspect and assess: Visually check the compressor, condenser, and hose fittings for oil residue or corrosion, then attach a gauge set to read the high- and low-side pressures.
- Recover the refrigerant: Pull out any remaining refrigerant with a recovery machine before opening the system. Never vent refrigerant into the air — it’s illegal and it’s also why any low-side refrigerant is already gone if the system is empty.
- Pull a vacuum: Run a vacuum pump for 30–45 minutes until the gauge holds 29–30 inHg, which removes trapped air and moisture that would otherwise freeze inside the expansion valve.
- Recharge to spec: Add the exact refrigerant weight listed on the underhood label — usually by scale, not by “feel” — plus a measured dose of compressor oil and UV dye if you’re planning to leak-test later.
- Test and verify: Start the engine, run the AC on max, and confirm vent temperature (35–45°F is typical) and system pressures match spec before calling the job done.
What Tools and Materials Do You Need?
A full service requires a refrigerant recovery machine, a manifold gauge set, a vacuum pump, the correct refrigerant type, compressor oil, UV dye, and a replacement cabin air filter. A basic DIY recharge — topping off a system that isn’t fully empty — only needs a small self-sealing recharge can with a built-in gauge.
- Manifold gauge set (reads high-side and low-side pressure)
- Vacuum pump (removes air and moisture before recharge)
- Refrigerant matched to your vehicle’s label (R-134a or R-1234yf)
- Compressor (PAG or POE) oil, matched to your system type
- UV dye kit and UV flashlight, for leak detection
- Cabin air filter, replaced during the same service
- Safety goggles and nitrile or refrigerant-rated gloves
Best AC Recharge Kit Pick
InterDynamics Car Air Conditioner Gauge and Hose Kit
A built-in pressure gauge takes the guesswork out of topping off an R-134a system that still holds some charge.
- Best for: Topping off a low-but-not-empty R-134a system
- Why we picked it: The gauge reads directly on the low-side port, so you can match the charge to your car’s actual pressure spec instead of guessing “cold enough”
- Main drawback: Not compatible with R-1234yf systems, which use a different fitting
Compare more AC service tool options
 Option 1 Vansky UV Dye Leak Detector Kit
|
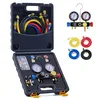 Option 2 OMT 4-Way Manifold Gauge Set
|
 Option 3 Bosch Cabin Air Filter
|
As an Amazon Associate we earn from qualifying purchases.
How Often Should You Service Your Car’s AC?
Most manufacturers recommend a full AC inspection every 1–2 years, or once a year before summer if you live somewhere hot. The cabin air filter should be replaced roughly every 12,000–15,000 miles regardless of how the system is performing, since a clogged filter is one of the most common causes of weak airflow that has nothing to do with the refrigerant charge.
📊 Refrigerant naturally leaks out of an AC system at roughly 10–20% per year through hose fittings and seals, even with no visible damage — which is why a system that felt cold last summer can need a recharge this summer with no obvious leak. — Source: ConsumerAffairs, Cost of Car AC Repair (2026)
Is It Legal to Recharge Your Own Car’s AC? EPA Rules Explained
Yes — recharging your own vehicle’s AC is legal without any certification, as long as you buy a small (2 lb or less) self-sealing can of R-134a. Certification is only required to service someone else’s vehicle for payment, or to buy larger bulk refrigerant containers.
Under Section 609 of the Clean Air Act (40 CFR Part 82, Subpart B), the EPA requires certification for anyone who services a motor vehicle AC system commercially, but it carved out a specific exemption for home mechanics: small, self-sealing refrigerant cans sold at auto parts stores don’t require the buyer to show certification. That’s the entire reason DIY recharge kits are legal to sell over the counter.
“CAA Section 609 requires that any person who repairs or services a MVAC system for payment must be properly trained and certified by an EPA-approved program.”
Two exceptions to know before you buy a kit:
- Never vent refrigerant into the air. Intentionally releasing refrigerant during a repair is illegal under the Clean Air Act regardless of who’s doing the work — any refrigerant removed from the system must go into a recovery machine.
- The small-can exemption only covers R-134a. Most 2021-and-newer vehicles use R-1234yf, which is mildly flammable (rated A2L), uses different service fittings, and is rarely sold in small DIY cans — most R-1234yf work still goes to a shop. Check your underhood label, and see our refrigerant type guide if you’re not sure which one your car takes.
DIY vs. Professional AC Service: What’s the Cost Difference?
A DIY top-off with a small recharge can costs $30–$60 but only works on an R-134a system that isn’t fully empty. A professional service includes recovery, a vacuum test for leaks, and a scale-measured recharge — the extra cost buys equipment most driveways don’t have.
| Service | Typical Cost | What’s Included |
|---|---|---|
| DIY recharge can (R-134a only) | $30–$60 | Top-off only; no leak test, no vacuum, no recovery |
| AC diagnostic | $122–$179 | Pressure test, leak check, visual inspection |
| Professional recharge/inspection | $235–$500 | Recovery, vacuum, scale-measured recharge, leak dye |
| Expansion valve or orifice tube | $200–$450 | Parts and labor |
| Evaporator replacement | $750–$1,300 | Parts and labor |
| Compressor replacement | $900–$1,500 | Parts and labor |
Cost ranges sourced from ConsumerAffairs’ 2026 car AC repair cost guide. Exact pricing varies by shop, region, and vehicle.
Safety First: Preparing to Service Your AC
Before touching any AC component, put on safety goggles and refrigerant-rated gloves, and work in a ventilated space. Refrigerant vapor displaces oxygen in enclosed areas and can cause frostbite on skin contact when it expands out of a hose fitting.

Wear Protective Equipment
Always wear safety goggles and refrigerant-rated or nitrile gloves. Use a respirator or work in an open garage when handling refrigerant, oil, or UV dye.
Understanding the Risks
Avoid direct skin contact with refrigerant — it evaporates instantly and can cause frostbite. Never inhale refrigerant vapors, and never work near an open flame; some refrigerants decompose into toxic gas when burned.
Assessing Your AC System’s Health
Before servicing anything, assess the system’s actual condition with a visual inspection and a pressure check. This tells you whether you’re dealing with a simple top-off or a leak that needs finding first.
Visual Inspection
Check the compressor, condenser, evaporator, and refrigerant lines for oily residue (a sign of a leak), corrosion, cracked hoses, or physical damage. Oily film around a fitting almost always means refrigerant has been escaping there.
Checking System Pressure
Attach a manifold gauge set to read the high- and low-side pressures with the engine and AC running. Compare the readings to your vehicle’s manufacturer specification — low pressure on both sides usually means low refrigerant, while high low-side pressure can point to a bad compressor. For a full walkthrough of what each reading means, see our AC gauge reading guide.
The Refrigerant Recharge Process
Once you know the system needs refrigerant, check your owner’s manual or the underhood label for the exact type and weight required — never guess. For the complete step-by-step recharge walkthrough, including how to read the low-pressure port and how much to add, see our dedicated recharge guide.
How to Determine Refrigerant Needs
- Check the vehicle’s owner’s manual or underhood label for the specific refrigerant type and capacity.
- Use a manifold gauge to measure the current refrigerant level before adding anything.
- Follow the manufacturer’s exact weight specification — most factory specs are given in ounces or grams, not “until it feels cold.”
Step-by-Step Guide to Adding Refrigerant
- Turn off the engine and let it cool.
- Locate the low-pressure service port under the hood.
- Attach the refrigerant gauge to the low-pressure port.
- Start the engine and set the AC to max cold with the fan on high.
- Add refrigerant slowly, watching the gauge as you go.
- Stop once the reading matches the manufacturer’s specified pressure.
- Secure the port cap and confirm there’s no hissing or leak at the fitting.
Vacuuming the AC System
Vacuuming removes trapped air and moisture from the system before a full recharge. Skipping this step is one of the most common DIY mistakes — moisture left in the system can freeze inside the expansion valve and block refrigerant flow entirely. For the complete setup and timing walkthrough, see our AC vacuum guide.
Setting Up the Vacuum Pump
- Attach the vacuum pump to the manifold gauge set.
- Connect the blue (low-side) hose to the low-pressure service port.
- Connect the yellow hose to the vacuum pump.
- Connect the red (high-side) hose to the high-pressure service port.
Ensuring a Proper Vacuum
- Open both valves on the manifold gauge set.
- Turn on the vacuum pump and let it run for at least 30 minutes.
- Check that the vacuum gauge holds at least 29–30 inches Hg.
- Close both valves, then turn off the pump and watch the gauge for 10–15 minutes — if it holds steady, the system is leak-free and ready to recharge.
Common AC Problems and How to Fix Them
Not every AC problem is a refrigerant issue. Blown fuses, a dirty condenser fan, or a failing compressor can all mimic a low-charge symptom. If you’ve confirmed the charge is correct and it’s still not cooling, see our weak-cooling troubleshooting guide or our compressor testing guide.
Replacing Fuses and Relays
Blown fuses or a faulty AC relay will kill cooling entirely, even with a full refrigerant charge. Locate the fuse box, find the AC-related fuses and relays, check for discoloration or damage, and replace any that are blown with one of the same amperage. Test the system afterward.
Cleaning or Replacing the Condenser Fan
The condenser fan pulls heat out of the refrigerant, and a fan clogged with dirt or road debris hurts cooling even when the charge is correct. Clean the fan blades with a soft brush or compressed air; if the fan motor itself is dead, it needs replacing. For a full condenser walkthrough, see our condenser replacement guide.
Enhancing AC Efficiency (Ducts, Filters, and Airflow)
A correctly charged system can still blow weak air if the cabin filter or ducts are clogged. Cleaning these components restores airflow without touching the refrigerant side of the system at all.
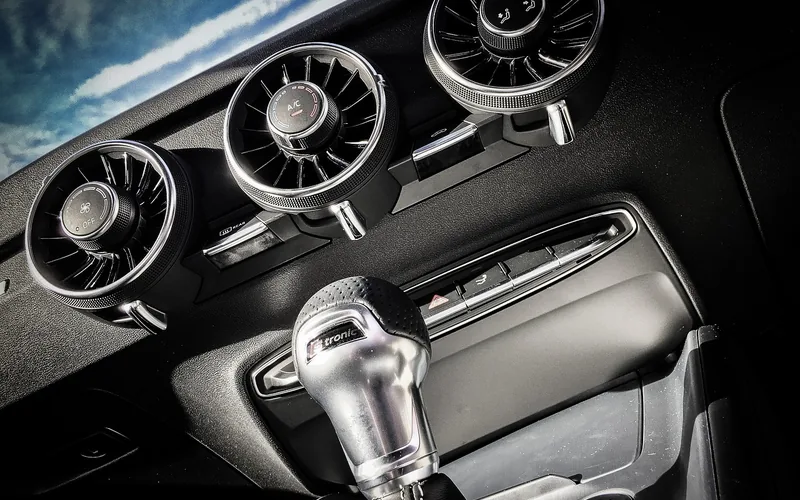
Cleaning Interior Ducts and Filters
Replace or clean the cabin air filter roughly every 12,000–15,000 miles. Dust and debris trapped in the filter and ducts restrict airflow and force the blower motor to work harder, which reduces both cooling capacity and fuel economy slightly.
Ensuring Adequate Airflow
Check that the exterior air intake, usually at the base of the windshield, isn’t blocked by leaves or debris. Also confirm the condenser (mounted in front of the radiator) is clear and level so outside air can pass through it freely.
Final Checks and Performance Testing
After recharging or repairing, run the system and confirm it’s actually fixed before calling the job done — not just “it feels cooler than before.”
- Check vent temperature — 35–45°F at the center vent is typical for a healthy system.
- Listen for unusual noises (clicking, squealing, or grinding from the compressor clutch).
- Check for odors, which often point to mold in the evaporator housing rather than a refrigerant issue.
- Recheck gauge pressures after 10–15 minutes of run time to confirm they’ve stabilized within spec.
When to Seek Professional Help
DIY troubleshooting and a basic recharge cover a lot of ground, but some problems need a shop’s equipment and EPA-certified technician. Refrigerant leaks that aren’t visible, compressor failure, electrical faults, or any R-1234yf work are all cases where the diagnostic tools and legal requirements go beyond what a home garage can handle.
Identifying Complex AC Problems
Refrigerant leaks, compressor failure, and electrical faults are hard to pin down without specialized diagnostic equipment. A shop can pressure-test the full system and pinpoint the exact failure point instead of guessing.
Benefits of Expert Servicing
A certified technician has recovery equipment, the correct refrigerant identification tools, and the training required to legally service someone else’s vehicle. That combination catches problems a driveway recharge kit simply can’t diagnose.
Frequently Asked Questions
How Do You Service Air Conditioning in a Car?
Identify the refrigerant type, inspect the system visually, check the pressure, recover any remaining refrigerant, pull a vacuum for 30–45 minutes, recharge to the exact factory spec, then verify vent temperature and pressures. Cleaning the cabin filter and intake vents during the same visit restores airflow that a recharge alone won’t fix.
What Maintenance Does a Car AC Need?
A car AC needs a cabin air filter replacement roughly every 12,000–15,000 miles, a full system inspection every 1–2 years, and periodic condenser cleaning to remove road debris. Since refrigerant naturally leaks out over time, most systems also need a recharge every couple of years even with no visible damage.
Can I Fix My Car AC Myself?
Yes, for basic issues — you can legally recharge an R-134a system yourself with a small self-sealing can, replace fuses, clean the condenser fan, or swap the cabin filter. Refrigerant leaks, compressor failure, and any R-1234yf work generally require a shop with recovery equipment and EPA certification.
Do You Need EPA Certification to Recharge Your Own Car’s AC?
No — EPA Section 609 certification is only required to service someone else’s vehicle for payment. Small (2 lb or less) self-sealing cans of R-134a can legally be sold to and used by uncertified individuals on their own vehicle, which is why DIY recharge kits are available at auto parts stores.
How Often Should You Service Your Car’s AC?
Most manufacturers recommend a full AC inspection every 1–2 years, or annually before summer in hot climates. The cabin air filter should be replaced roughly every 12,000–15,000 miles on a fixed schedule, separate from how the AC is performing.
What’s the First Step When Servicing a Vehicle’s AC System?
Identify the refrigerant type before connecting any equipment. Attaching gauges or a recovery machine to a system without confirming whether it holds R-134a or R-1234yf risks cross-contaminating your equipment with the wrong refrigerant, which can damage both the tools and the vehicle’s system.
Is R-1234yf the Same as R-134a Refrigerant?
No. R-1234yf is used in most vehicles built 2021 and later, uses different service port fittings than R-134a, and is mildly flammable (rated A2L), while R-134a is non-flammable. The two are not interchangeable, and small DIY recharge cans are almost exclusively made for R-134a — most R-1234yf service still goes through a shop.
Conclusion
Servicing automotive air conditioning comes down to identifying the refrigerant, checking the system honestly before you recharge it, vacuuming out air and moisture, and refilling to the exact factory spec rather than “until it’s cold.” Basic maintenance — cabin filter swaps, condenser cleaning, and a small R-134a top-off — is legal and straightforward to do yourself. Leaks, compressor failure, and any R-1234yf work are worth handing to a certified shop.
Products related to this article
Sponsored / affiliate links. As an Amazon Associate I earn from qualifying purchases. I may earn additional commission from eligible campaigns.