Leather Car Seat Care and Repair Guide for Owners
Start leather car seat care and repair by diagnosing dirt, transfer dye, sticky buildup, scuff, crack, tear, or failed coating; if damage catches a fingernail, reaches foam, or crosses perforations, stop at DIY cleaning and send it out. Get the diagnosis wrong and you can strip color, harden the leather, spread a small tear, or spend hundreds fixing a seat that really needed proper cleaning from the start. This guide sorts symptoms first, then matches each one to safe care, light repair, or upholstery-shop work.
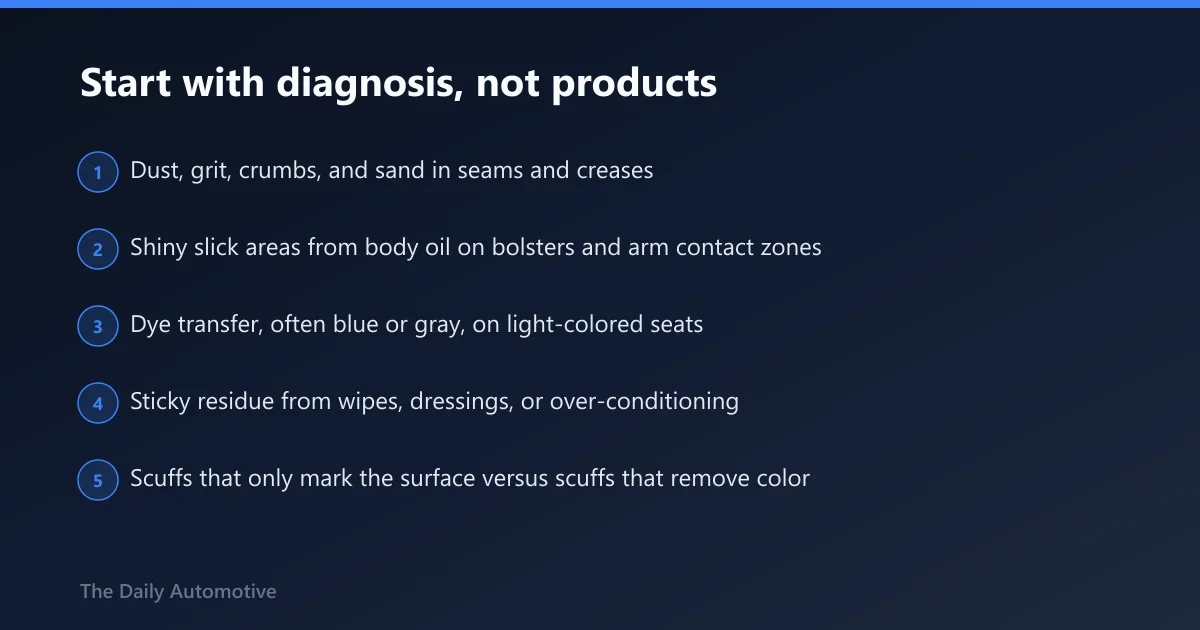
Start with diagnosis, not products


Most factory leather seats are coated automotive leather: leather with a protective color and clear finish on top. That matters because coated leather usually handles a dedicated leather cleaner, light brushing, and careful recoloring well. More delicate, lightly finished, or untreated leather can darken, absorb liquids quickly, and react badly to aggressive cleaning.
Before you open any bottle, inspect key areas such as the driver bolster, seat base front edge, seams, perforated inserts, and any panel near airbags or heating and ventilation hardware. Then classify the problem. Dirt and body oil are maintenance issues. Color wear, scuffs through the finish, cracks, and cuts are repair issues. Split seams, detached panels, and damage over airbag seams belong with an upholstery repair shop.
How to tell coated automotive leather from a delicate finish
Coated automotive leather usually has an even sheen, sheds small spills instead of soaking them in, and shows wear as color loss or a slick shiny patch before the leather itself starts to fail. Delicate finishes usually darken fast with moisture and can absorb cleaner if you apply too much.
Test every cleaner, conditioner, recoloring product, or adhesive on a hidden area around coin size, such as a lower rear skirt or under a headrest post trim line, then let it dry fully before you judge it. If that test spot turns darker and stays darker, pulls color onto the towel, or feels tacky once dry, stop and treat the seat as a more delicate finish.
What to inspect before any cleaning or repair
- Dust, grit, crumbs, and sand in seams and creases
- Shiny slick areas from body oil on bolsters and arm contact zones
- Dye transfer, often blue or gray, on light-colored seats
- Sticky residue from wipes, dressings, or over-conditioning
- Scuffs that only mark the surface versus scuffs that remove color
- Cracks that are visual only versus cracks that catch a fingernail
- Tears, seam splits, loose piping, and detached panels
- Perforations, heated sections, ventilated sections, and airbag-integrated panels
- Any sign of liquid intrusion, recurring dampness, odor, or mildew risk
What is actually wrong with your leather seat?

If the seat looks dull, dusty, or lightly grimy, it usually needs cleaning only. If it feels slick, sticky, or keeps smearing onto towels, it likely needs de-greasing and residue removal. If color is missing, cracks catch a nail, or the leather is cut, that is repair work, not routine care.
Symptoms that mean clean only
Dry dust, fresh spills, light grime in grain texture, and mild dye transfer on coated leather usually respond to a proper leather cleaner and controlled agitation. These issues sit on or near the finish. They do not need filler, color, or glue.
Fresh spills are a separate case. Blot first. If liquid has entered stitching, perforations, or foam, cleaning the surface is not enough. Extraction may be needed before any conditioner goes on.
Symptoms that mean de-grease or strip residue
Shiny slick patches on the driver bolster, a tacky feel after earlier detailing, or recurring gray smears on a towel point to body-oil buildup or product residue. I see this a lot on driver seats that were “conditioned” over dirt. They often look dirty again right after conditioning because the real problem never came off.
Over-conditioned seats also fit here. They feel greasy, attract lint, and can streak. The fix is usually a leather-safe cleaner used with very little moisture, then dry wiping until the surface feels neutral again.
Symptoms that mean repair
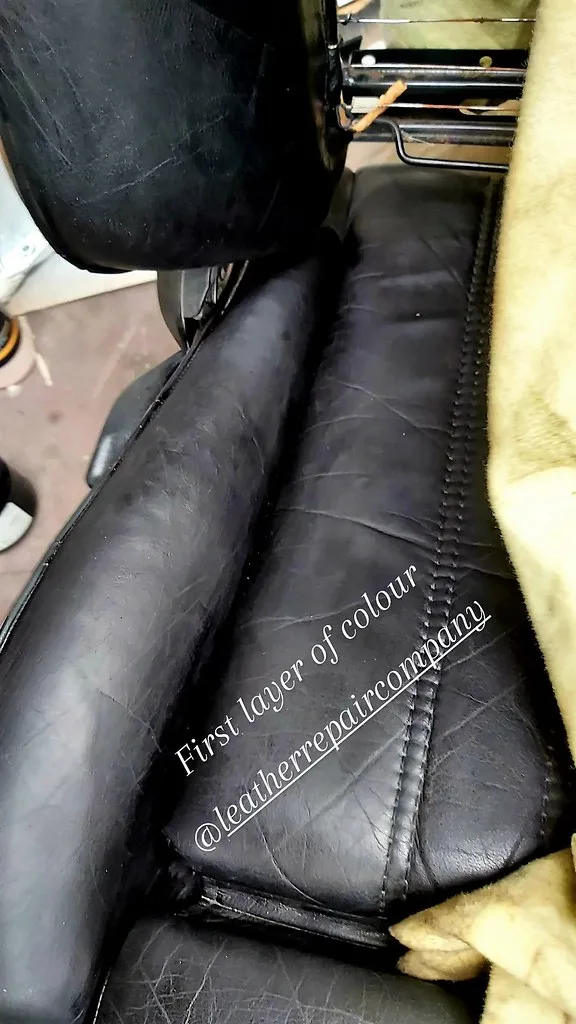
Scuffs through the top color, lifted finish at an edge, cracking that catches a fingernail, cuts, torn perforations, and seam failure are repair problems. Conditioner will not restore missing color. Cleaner will not close a split seam. Filler and recolor can help some surface damage on coated leather, but they are poor choices on stressed seams, airbag sections, or ventilated panels.
Tools and products that are safe for automotive leather
Cleaner formats, ingredients, and moisture control
Leather foam cleaners are recommended because they stay on the surface. That makes them especially useful on perforated panels and stitched seams. Sprays can work on solid panels, but they should be applied to a towel or brush first rather than flooded onto the seat.
Cleaner should not soak into the leather excessively. The goal is to dampen the soil, not saturate the cover or the foam beneath it. Safe leather cleaning solutions should exclude alcohol, bleach, ammonia, and acetone. Those ingredients can weaken the finish, dry the leather, or smear color.
Brushes, towels, pads, and extraction tools
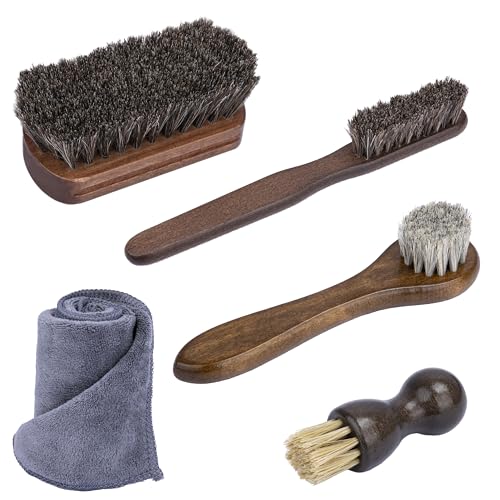
Horsehair brushes are suggested for leather cleaning. A soft-bristle or horsehair brush is often a good choice for seams, grain texture, and stubborn grime because it can clean without the higher scratching risk of stiffer brushes or abrasive pads.
Microfiber towels and applicator pads should have a short or medium nap, a tag-free edge, and no scrub weave, because the cheap rough ones can burnish a coating or leave tiny snags on worn bolsters. Keep one towel only for lifting cleaner residue, a second cloth only for conditioner, and a dry towel for final buffing; I do not mix them because cleaner left in a cloth can streak a fresh conditioner coat, and conditioner in a cleaning towel leaves the seat tacky.
A vacuum with a soft brush attachment is recommended for cleaning leather seats. Use it before any wet product, then again after brushing loosened dirt from seams and perforations. Painter’s tape can be wrapped around a vacuum nozzle to smooth the edges.
Compressed air is useful when brushing would pack debris deeper into perforations. Keep the nozzle at a sensible distance from the leather and aim across the holes, not straight down into them. For liquid intrusion, a wet vacuum can remove excess solution after spills.
Affordable cleaners that protect factory leather
Factory-finished car seats need a pH-neutral cleaner that costs roughly fifty cents or less per use. Cheap all-purpose sprays often strip the protective topcoat, leaving leather sticky and requiring expensive rework. Choosing a bottle rated for finished leather with at least twenty cleanings keeps long-term costs down while preserving the surface.
The guide to budget leather seat cleaners breaks down true cost-per-cleaning calculations, compares sprays, wipes, concentrates, and all-in-one kits, and identifies formulas to avoid on automotive leather so you can maintain your interior without overspending.
Choosing the Right Leather Care Kit for New Cars
New‑car owners often wonder whether they need a full‑service leather kit or just a simple cleaner. The Daily Automotive roundup breaks down the most popular starter kits, explains the difference between coated, semi‑aniline and full‑aniline leathers, and highlights which add‑ons—such as microfiber towels or soft brushes—actually improve results.
Following its guidance helps you avoid common pitfalls like staining fresh leather, stripping the factory protection layer, or leaving a slick residue that attracts grime. For a quick, side‑by‑side comparison of the top products and a clear recommendation for first‑time buyers, see the leather care kit guide.
Wipe-on gels for sealed leather: The Armor All option
Armor All’s Leather Care Gel targets sealed automotive interiors where a wipe-on application is preferred over spray. It delivers light cleaning and conditioning with a satin finish, staying on the surface longer than the spray variant, which makes it suitable for daily drivers needing steady maintenance without frequent reapplication. However, it can leave a slick film on high-touch points if overused. Armor All gel review details its performance on specific seat types, cost-effectiveness per seat, and direct comparisons to the spray version to help you decide if this all-in-one formula fits your maintenance routine.
Is Lexol a safe bet for routine maintenance?
Lexol is a mild cleaner best suited for light dirt and body oils, rather than heavy grime packed into seams. It offers solid results for routine upkeep but can leave residue or darken stitching if applied aggressively. For a detailed breakdown of its limitations and application tips, check our Lexol cleaner review. This guide explains exactly who benefits from this product, how to use it without damaging the finish, and where it falls short compared to more robust solutions. Understanding these specifics helps you decide if it fits your specific seat condition before you spend money.
How do you clean leather car seats without damaging them?
Clean leather seats by removing dry debris first, then using the least moisture needed with a leather-safe cleaner on a towel or soft brush instead of soaking the seat. Work in small sections, wipe residue fast, and stop if color transfers, the surface turns tacky, or moisture starts entering seams or perforations.
Safe cleaning sequence
- Vacuum the seat with a soft brush attachment, including seams, creases, and the junction between bolster and insert.
- Brush dry grime lightly from grain texture and stitching, then re-vacuum what comes loose.
- Spot-test the cleaner in a hidden area and let it dry fully.
- Apply foam cleaner to a microfiber towel or horsehair brush. For spray cleaner, mist the towel or brush, not the seat.
- Work one small area at a time with light pressure. Let the cleaner do the lifting.
- Wipe immediately with a clean microfiber towel to remove suspended grime.
- Repeat only where needed. Do not chase one mark until the surface gets wet or hot from friction.
- Air dry out of direct sun, then inspect for residue, grease, or remaining dye transfer before deciding on conditioner.
How much moisture to apply
Use enough product to create slip on the towel or brush, then stop. On coated leather, the right amount leaves the surface lightly damp for a short period, not visibly wet. Excess moisture can pool in seams, wick into perforations, and soften adhesives under the trim.
Where people damage seats during cleaning
The usual mistakes are over-wetting, spraying directly into perforations, scrubbing one spot hard enough to burnish the finish, and using household cleaners. Magic erasers, stiff brushes, solvent-based spot removers, and aggressive steam create repair work where none existed.
Dedicated Leather Cleaner vs. All-Purpose Interior Formulas
Finished automotive leather requires a cleaner formulated to protect its factory coating. A dedicated leather cleaner is the safer default because all-purpose interior formulas can strip dye, leave streaks, or dry out the surface if they lack specific approval for coated leather or leatherette.
The comparison between leather versus all-purpose cleaners breaks down how these products differ in chemical makeup, stain removal power, and overall risk to your seats. It also outlines four common scenarios to help you decide which bottle belongs in your detailing kit, along with a reliable method for spot-testing any new product on a hidden area before treating the entire cabin.
What should you use on perforated leather seats?
Use dry vacuuming first, then a foam leather cleaner, a soft brush, microfiber towels, and, when needed, compressed air directed across the holes. Perforated leather seats have small holes, and heavy liquid can carry dirt below the surface, leave residue trapped in the holes, or wet the foam under the cover.
Why perforations need a different method
Perforations help reduce slipperiness and improve airflow. Perforated seats can help keep occupants cooler and less sweaty. Those same holes also collect grit, skin oils, crumbs, and cleaner residue. That is why foam is usually safer than a wet spray on the insert area.
How to clean the holes without packing them
Vacuum first. Use the soft brush attachment and slow passes over the insert. For narrow crevice work, smooth the nozzle edge with painter’s tape if needed. Then agitate lightly with a horsehair brush, moving across the perforation field rather than grinding down into it.
If debris remains, use compressed air as an alternative to more brushing. Keep the air stream at a moderate distance and sweep sideways so loosened particles move out where the vacuum can catch them. Do not blast cleaner or air straight into each hole.
What to do if liquid has entered the seat
If a spill or over-application has soaked into perforations, blot the surface, then extract what you can with a wet vacuum. A wet vacuum can remove excess solution after spills. After extraction, let the seat air dry and avoid sun. If dampness, odor, or fogging returns, the foam likely stayed wet and the job should move to a shop.
When to use leather wipes instead of sprays
Pre-moistened leather cleaner wipes remove dust, fingerprints, and light grime from sealed automotive surfaces in seconds without the overspray risk of liquid cleaners. They work best on bolsters, dash trim, and lightly soiled seats where a full spray-and-brush routine is unnecessary. Choosing the wrong formula can leave streaks, over-wet seams, or strip protective coatings.
Wipes are not a substitute for deep cleaning heavily soiled or neglected upholstery. For transfer marks, embedded dirt, or unsealed leather, a dedicated spray or kit delivers better results. This breakdown of leather cleaner wipes compares formulas, explains when wipes outperform sprays, and provides a decision checklist to match your specific interior maintenance needs.
When should you condition leather car seats?
Condition leather after the seat is actually clean, dry, and free of oily residue. Conditioner can help keep leather hydrated and soft, and it may help reduce cracking from dryness, but it usually cannot fix tears, missing color, or finish failure. If the seat still feels greasy, conditioning should wait.
What conditioner can and cannot do
Leather conditioner is for hydration and softness, mainly on coated leather that has been cleaned correctly. It helps reduce dryness-related stiffness. It does not replace topcoat, fill cracks, glue a tear, or remove dye transfer.
How often to condition
How often you condition depends on climate, use, and finish. Seats in dry heat, high UV exposure, or daily-driver service usually need attention sooner than garage-kept weekend cars. The better rule is condition by feel and appearance after cleaning, not by habit alone. If the leather already feels supple and even, skip it.
How to apply it without causing a greasy seat
Apply a small amount to an applicator pad or microfiber towel, spread a thin film on a cleaned section, and let it settle briefly. Then buff off all excess with a separate dry microfiber towel. Any product left sitting on the surface becomes dust bait and can create the slick shine many owners mistake for healthy leather.
How to correct over-conditioning or streaking
If the seat stays greasy, shiny, or streaky after drying, clean it again with a leather-safe cleaner using minimal moisture and several dry towels. The goal is to remove residue, not add more conditioner. Recondition only after the surface feels neutral and no longer smears.
Budgeting for professional leather seat services
Deciding whether to tackle deep stains or worn trim yourself or hire a professional depends heavily on the specific condition of your upholstery. A basic detail typically runs $75 to $150, while heavy soil or stain treatment costs between $150 and $300. If the leather is cracked or requires restoration, expect quotes to range from $300 to over $800. Ignoring these warnings can turn a simple cleaning into a costly repair job due to permanent damage or cracking. Our detailed breakdown of leather seat cleaning costs helps you compare quotes and determine if DIY methods are actually sufficient for your vehicle’s current state.
Budgeting for professional leather seat conditioning
When home maintenance isn’t enough, knowing what to expect at the shop prevents budget shock. Most owners pay between $50 and $150 for a standard conditioning service, though prices spike when the job includes repairing cracked bolsters or reversing dye transfer. Understanding the specific scope of work helps you decide whether a quick refresh or a full restoration is necessary to protect your investment in automotive leather.
See the detailed cost matrix to understand exactly where your money goes and when it is time to skip conditioning for a full repair. Review the guide on leather seat conditioning pricing to determine if a professional service fits your current seat condition.
Matching Cleaner Format to Seat Condition and Finish
Wipes handle light grime and quick touch-ups, while spray cleaners deliver the deeper penetration needed for heavy soil. Choosing the wrong format risks streaks, over-wetting perforated panels, or grinding dirt into the grain. The right decision depends on your seat’s finish—coated, semi-aniline, or full-aniline—and how much product control you need.
This breakdown of wipes versus spray cleaner explains exactly when each format fits, how different leather finishes change the approach, and which mistakes cause permanent damage. It provides a clear framework so you stop guessing at the bottle and start matching the application method to the specific condition of your seats.
Choosing a conditioner for your specific driving routine
The right leather conditioner depends on how you use your car. Water-based, matte-finish formulas work well for standard daily commutes, while dirtier routes benefit from dedicated cleaner-conditioner pairs. Residue-free products are essential for perforated seats to prevent clogging and maintain airflow.
Using the wrong formula leaves seats shiny, slick, or prone to dust buildup, and can darken factory dye. Our guide ranks the best leather conditioners across commute-heavy, hot-climate, family-hauler, low-maintenance, and perforated-seat setups so you can match the product to your exact interior needs.
All-in-One Cleaner-Conditioner: When It Works and When It Doesn’t
Not every leather maintenance job needs a two-step process. A single bottle can handle light-duty refresh, but combining cleaner and conditioner in one product means neither task gets full attention—especially when grime is built up or the surface looks slick from old residue. Understanding where a 2-in-1 formula falls short saves you from chasing the same dullness on repeat.
The Meguiar’s leather conditioner review walks through exactly when this product earns its keep and when swapping to a dedicated cleaner plus separate conditioner is the smarter move, including what ingredients do and don’t belong on your seats.
Seat-damage decision table: match the symptom to the fix
| Symptom | Likely failure mode | Correct action | Safe DIY materials | Do not use |
|---|---|---|---|---|
| Dry dust, crumbs, sand in seams | Surface debris | Clean | Vacuum with soft brush attachment, horsehair brush, microfiber towel | Stiff brush, aggressive crevice nozzle edge |
| Light grime or fresh spill on coated leather | Surface soil | Clean | Foam leather cleaner, microfiber towel, soft-bristle brush, spot test first | Bleach, ammonia, acetone, heavy soaking |
| Shiny slick bolster, sticky feel, recurring smears | Body-oil buildup or residue from products | De-grease | Leather-safe cleaner, multiple clean microfiber towels, light brush agitation | Dish soap, solvent cleaners, more conditioner |
| Seat feels dry but color and finish are intact | Loss of suppleness | Condition | Leather conditioner on applicator pad, separate dry towel for buffing | Thick over-application, oily dressings |
| Scuff that removed top color but did not cut the leather | Color loss or finish wear | Recolor | Leather-safe cleaner, prep towel, matched recolor product, applicator sponge, spot test | Marker pens, shoe polish, heavy solvent prep |
| Fine surface cracks that catch slightly, no open tear | Finish cracking | Fill | Cleaner, leather filler for coated leather, recolor/topcoat system, microfiber towel | Conditioner as a crack fix, glue in the crack |
| Small non-structural cut away from seams, airbags, and perforations | Localized tear | Patch | Leather repair sub-patch, leather adhesive rated for upholstery, color repair system, spot test | Household super glue, tape, repairs across perforations |
| Seam split, foam visible, tear across perforations, damaged airbag seam, recurring dampness | Structural or safety-related damage | Refer to upholstery repair | Vacuum, blotting towels, wet vacuum for extraction only | DIY glue, filler, stitching over airbag seam, soaking cleaner into foam |
How do you repair scuffs, cracks, color loss, and small tears?
Repair starts after the seat is fully cleaned and diagnosed. Scuffs that only sit on the finish may clean off; scuffs that expose lighter leather need recoloring. Cracks that catch a fingernail may need filler and color. Small tears have strict limits and should stay away from seams, perforations, heaters, and airbags.
Scuffs versus color wear
A black shoe scuff on a light seat can look like damage and still wipe away with proper cleaner. True color wear leaves the panel lighter, rougher, or duller even after cleaning. If the color is gone, recolor is the right category. Conditioning alone will only darken the surrounding area and make the worn spot stand out more.
When filler makes sense
Fine finish cracks on coated leather can sometimes be leveled with a leather filler, then recolored. This is cosmetic repair, not structural repair. If the crack opens, exposes backing, runs along a seam, or sits on a high-flex perforated insert, filler is a short-lived answer and often a bad one.
Patch limits for small tears
A small cut on a plain side panel can sometimes take a sub-patch and upholstery adhesive. A tear on a driver bolster, across perforations, near a seam, or on a heated or ventilated panel is another matter. Flex and heat work against the repair. Those cases usually belong in a trim shop.
Blending the repair
The hardest part of DIY repair is sheen matching. A patch or recolor that is the right color but too glossy looks obvious from the next parking space. Keep product thin, test sheen in a hidden area, and stop short of building a hard shiny island around the repair.
When should you skip DIY and call an upholstery repair shop?
Skip DIY when the damage affects structure, safety, or anything below the surface. That includes airbag seams, heated or ventilated seat sections, seam separation, detached panels, foam exposure, tears crossing perforations, recurring dampness, mildew odor, or repairs that need sewing, panel replacement, or precise color and grain matching.
Safety and seat-system red flags
Airbag-integrated seat panels are not casual repair territory. Neither are heated and ventilated inserts. Over-wetting, gluing, or stitching in those areas can interfere with how the seat functions or how trim releases under load.
Structural damage that needs trim-shop work
Loose seams, detached listing channels, stretched panels, broken piping, and tears that keep growing need proper upholstery methods. DIY fillers and patch compounds can hide the edge for a while, but they do not restore strength where the seat flexes every day.
Moisture, odor, and contamination below the cover
If a seat stays damp, smells sour after drying, or keeps pushing contamination back to the surface, the issue has moved under the leather. Surface cleaning cannot fix wet foam. Extraction, cover removal, or foam replacement may be needed.
How much should a leather repair kit cost?
Most leather repair kits fall in the $10 to $60 range, but the right budget depends on the damage you’re fixing. Simple scuffs and small cracks can often be handled with a basic dye-and-filler kit, while larger worn areas usually need a more complete color-matching set that costs more. If the seat has a tear, DIY kits may stop being the cheapest option once you add the tools and time needed for prep, filling, and recoloring. The full leather repair kit cost breakdown helps you match the price to the problem so you don’t overbuy—or end up with a kit that can’t realistically finish the job.
Frequently asked questions
How do you get grime out of leather seat perforations?
Start with a vacuum and soft brush attachment, then loosen debris with a horsehair brush using light passes across the holes. Follow with foam cleaner, not a wet spray, and wipe residue fast. Compressed air can help move stubborn grit out, but it should be directed across perforations, not forced straight into them.
Can you use dish soap on leather car seats?
Dish soap is a poor default choice because it can leave residue, cut through surface oils too aggressively, and behave unpredictably on coated or delicate leather finishes. A pH-appropriate leather cleaner is safer. Homemade solutions should avoid alcohol, bleach, ammonia, and acetone, and every product should be spot-tested first.
Should you vacuum leather seats before cleaning them?
Yes. A vacuum with a soft brush attachment is recommended for cleaning leather seats because dry grit scratches while you wipe. Vacuum seams, creases, and bolsters first, brush loose dirt from texture and perforations, then re-vacuum. That step reduces muddy residue and lowers the temptation to scrub hard.
How do you dry leather seats after cleaning?
Blot remaining moisture with a clean microfiber towel, then let the seat air dry and avoid sun. Heat can set streaks, harden residue, and stress the finish. If moisture entered perforations or foam, use a wet vacuum to extract what you can before air drying and checking for lingering dampness.
What is the best way to keep leather seats from cracking?
The best prevention is controlled maintenance: remove grit before it grinds, clean body oils before they turn slick, condition only when the leather is clean and truly dry, wipe away all excess product, respond to spills quickly, and reduce heat and UV exposure with shade whenever practical.
When should you use professional upholstery repair instead of a DIY kit?
Use a shop when damage catches a fingernail deeply, exposes foam, crosses perforations, splits a seam, affects an airbag seam, or sits on a heated or ventilated panel. Also refer out for recurring dampness, mildew odor, detached panels, and any repair that needs stitching, panel replacement, or exact sheen matching.
Products related to this article
Sponsored / affiliate links. As an Amazon Associate I earn from qualifying purchases. I may earn additional commission from eligible campaigns.