Best Method to Clean Interior Car Windows Without Marks
It’s a common annoyance, isn’t it? You’ve detailed the outside of your car, it’s gleaming. But then you look inside, and those stubborn streaks on the windshield mock your efforts.
They catch the sun just wrong and make it hard to see. It’s frustrating when you’ve put in the work, but something so small can ruin the view.
You want that clear, crisp view of the road. Not just for looks, but for safety too. Blurry windows can be a real hazard, especially when driving into the sun or at night.
Let’s figure out how to get those inside car windows looking perfect, every single time. We’ll go through simple steps and common pitfalls.
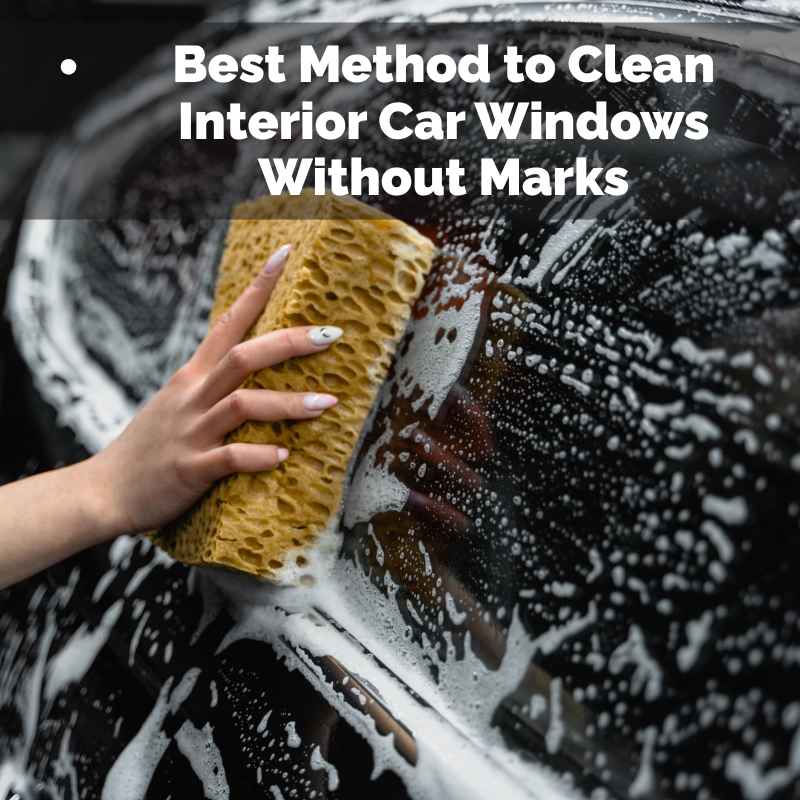
Cleaning the inside of car windows without streaks involves using the right tools, the correct cleaning solution, and a specific wiping technique. Key steps include preparing the surface, applying the cleaner sparingly, and using two different cloths for initial cleaning and final buffing to achieve a spotless finish.
Understanding Why Inside Windows Get Dirty
Think about your car’s interior. It’s a small, enclosed space. Over time, many things can build up on your windows.
It’s not just dust from the outside. Things like off-gassing from your dashboard plastics can leave a film. This film can be oily or sticky.
Your breath, especially in cooler weather, adds moisture that can leave water spots when it dries.
And then there are the things we bring into the car. Food spills, makeup, hairspray, even sticky fingers from kids. All these leave residue.
This residue sticks to the glass. Trying to wipe it away with just a dry cloth often just smears it around. This is where the dreaded streaks come from.
It’s a combination of contaminants and the wrong cleaning approach.
The Tools You’ll Need for a Streak-Free Shine
Getting a perfect finish isn’t about having a ton of fancy gadgets. It’s about using the right basic tools. First, you’ll want a good quality microfiber cloth.
And not just any microfiber cloth. Look for ones that are specifically designed for glass. These tend to be thinner and have a tighter weave.
They are excellent at picking up grime without leaving lint behind.
You’ll actually need two of these cloths. One for the initial cleaning and one for drying and buffing. This is a crucial step that many people miss.
A second, clean, dry cloth is essential for that final polish. For tougher films, you might also consider a glass-specific cleaner. Some people swear by a simple mix of water and white vinegar.
Others prefer dedicated automotive glass cleaners.
Essential Cleaning Supplies Checklist
- Two High-Quality Microfiber Glass Cloths: One for cleaning, one for buffing.
- Glass Cleaner: Either a commercial spray or a DIY mix (water and vinegar).
- Spray Bottle: If making your own cleaner.
- Gloves (Optional): To keep your hands clean.
- Towel or Paper Towels (Optional): To protect the dashboard.
Having these items ready before you start makes the whole process much smoother. You won’t be scrambling for a clean rag mid-way. This simple preparation saves time and frustration.
It ensures you can complete the task efficiently. Getting the right supplies is the first step to success.
Your DIY Glass Cleaner Recipe
For those who like to keep things simple and cost-effective, a DIY glass cleaner is a fantastic option. It works just as well, if not better, than many store-bought versions. The magic ingredients are really just two things: distilled water and white vinegar.
Distilled water is important because it doesn’t have minerals. Minerals in tap water can leave spots behind when the water dries.
So, grab a clean spray bottle. Pour in about a cup of distilled water. Then, add about a quarter cup of plain white vinegar.
That’s it! You can give it a gentle swirl to mix. Some people add a tiny drop of dish soap, but be careful.
Too much soap will cause suds and make streaks worse. Stick to the simple water and vinegar for best results. This mix is tough on grime but gentle on your car’s interior.
DIY Glass Cleaner Ratio
Ratio: 4 parts distilled water to 1 part white vinegar.
Example: 1 cup water + 1/4 cup vinegar.
Note: Use a clean spray bottle. Shake gently before use.
This homemade cleaner is great because it’s non-toxic and readily available. It breaks down that oily film effectively. You avoid harsh chemicals too.
It’s a win for your car and for you. Test it out; you might be surprised at how well it works.
The Step-by-Step Process for Streak-Free Windows
Okay, let’s get down to the actual cleaning. First, you need to prepare your car. Park it in a shady spot.
Cleaning in direct sunlight can cause the cleaner to dry too quickly. This leads to streaks and water spots. It also makes the glass too hot to touch comfortably.
Open all your car doors so you can reach every part of the window easily.
Next, protect your dashboard and seats. You can lay down an old towel or some paper towels. This will catch any drips.
Now, take your first microfiber cloth. If the windows are very dirty, you might want to wipe them down with a damp cloth first. This removes loose dust and dirt.
It prevents you from just pushing a big pile of grime around with your cleaner.
Step 1: Pre-Wipe (If Needed)
If your windows have a lot of dust or debris, a quick pre-wipe is helpful. Use a clean, damp cloth or even a damp paper towel. Gently wipe down the entire inside surface of the window.
This removes loose particles. It makes the main cleaning step much more effective. You’re essentially giving the glass a quick rinse before the proper wash.
Step 2: Apply the Cleaner
Now, take your spray bottle with the cleaner. Don’t drench the window. A light mist is all you need.
Spray it directly onto the glass. Some people prefer spraying the cloth instead of the glass. This gives you a bit more control.
It also helps prevent overspray onto your car’s interior surfaces. Either method can work, but light application is key.
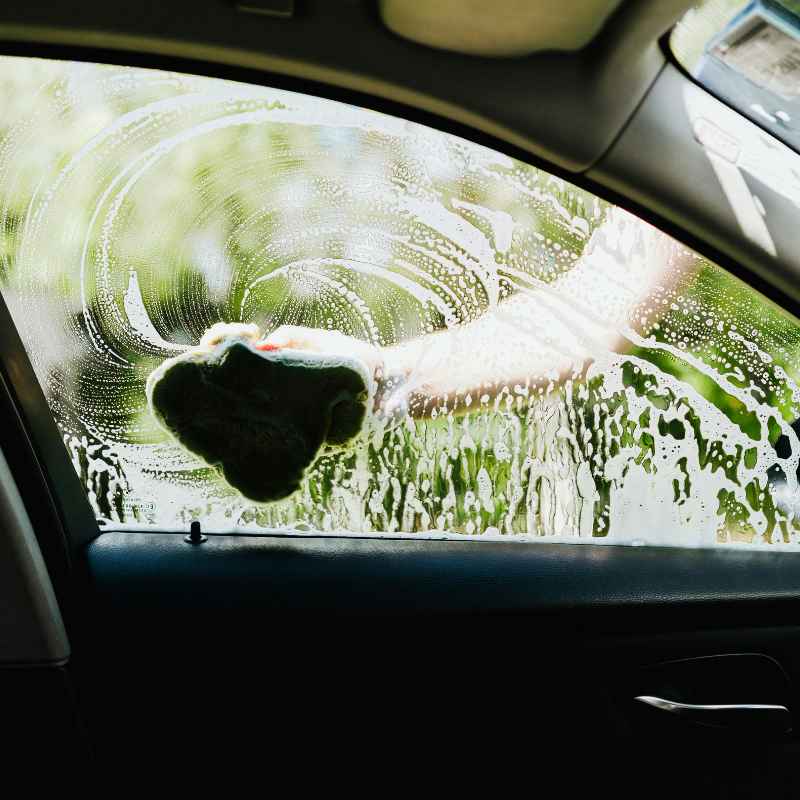
Step 3: The Wiping Technique
This is where many people go wrong. You want to wipe in a consistent pattern. Start at the top of the window.
Work your way down. Use overlapping strokes. A good technique is to wipe in one direction, say, side-to-side.
Then, on the next pass, wipe in the opposite direction, top-to-bottom. This helps ensure you cover every spot. It also helps prevent you from missing any areas.
Make sure you reach all the edges and corners. Those areas can hide grime. Your first microfiber cloth is for this main cleaning action.
You want to lift as much of the film and dirt as possible. Don’t press too hard. Let the cleaner and the microfiber do the work.
Keep wiping until the glass looks clean and the film is gone.
Step 4: The Buff and Dry
This is the magic step for streak-free results. Take your second, clean, and dry microfiber glass cloth. Fold it into quarters.
This gives you multiple clean surfaces to work with. Now, gently buff the glass. Use a different pattern than you did for cleaning.
For instance, if you wiped side-to-side, now buff in circular motions. Or vice-versa.
Work quickly and thoroughly. The goal here is to dry any remaining moisture. It also polishes the glass to a brilliant shine.
You’re essentially removing any last traces of cleaner or residue. Keep turning the cloth to a dry section as it picks up moisture. Continue buffing until the window is completely dry and clear.
No streaks should be visible.
The Two-Cloth Method Explained
- Cloth 1 (Cleaning): Dampen slightly with cleaner. Wipe away grime in a consistent pattern (e.g., side-to-side).
- Cloth 2 (Buffing): Dry and clean. Fold into quarters. Buff in a different pattern (e.g., circular motions) to remove moisture and polish.
It might take a couple of tries to get the hang of it. But this two-cloth method is the secret to truly spotless windows. It’s the difference between a clean look and a professional finish.
You’ll be amazed at the clarity.
Common Mistakes That Cause Streaks
We all make mistakes when trying to get things perfect. With car windows, there are a few common slip-ups that lead directly to those frustrating streaks. One of the biggest is using too much cleaner.
A lot of people think more cleaner equals more clean. But this just leaves excess liquid on the glass. It’s harder to wipe away and more likely to streak.
Another big no-no is cleaning in direct sunlight. As mentioned before, the sun heats the glass. This dries the cleaner too fast.
It leaves behind a film or spots before you can even wipe them away properly. You end up fighting streaks before you even start. Always choose a shaded spot for this task.
Mistake vs. Solution
Mistake: Using dirty cloths.
Solution: Always use clean microfiber cloths. Wash them separately from other laundry.
Mistake: Too much cleaner.
Solution: Use a light mist. Spray the cloth instead of the glass if needed.
Mistake: Cleaning in direct sun.
Solution: Always clean in a shaded area. Avoid hot glass.
Mistake: Using household cleaners (like Windex with ammonia).
Solution: Ammonia can damage window tint. Use a dedicated glass cleaner or vinegar mix.
Using the wrong kind of cleaning product is also a common error. Some household cleaners contain ammonia. While they might seem good at cutting grease, ammonia can damage your car’s window tint.
It can also leave a haze on some types of glass. Always opt for products specifically designed for automotive glass, or stick to the simple vinegar and water mix.
Finally, not using enough pressure or not wiping thoroughly enough can leave residue. You need to give it a good wipe-down. And importantly, never use a dirty cloth for the final buffing stage.
This is guaranteed to transfer dirt and cause streaks. It defeats the whole purpose of your effort. Pay attention to these common traps, and you’ll avoid most streak-related problems.
Tackling the Windshield – The Toughest Spot
The windshield is often the largest and most challenging window to clean inside. It’s angled, and you have to reach over the dashboard. It’s also the one most critical for your driving view.
That oily film from the dashboard seems to stick to it the most. And reaching the top edge can be awkward, leading to missed spots or streaks.
My trick for the windshield is using a squeegee tool designed for car interiors. They have long handles. This helps you reach all the way across.
You can also use a rolled-up towel or even a pool noodle to help prop up the other end of your cloth. This gives you better leverage. When cleaning, I always work from one side to the other.
Then, I follow up with the buffing cloth, again, side to side, making sure I overlap every stroke.
Windshield Cleaning Tips
- Tools: Consider a long-handled squeegee or reach extender.
- Technique: Work in overlapping horizontal strokes.
- Corners: Pay special attention to the bottom corners where the dash meets the glass.
- Dashboard Film: This is often the biggest culprit on windshields.
It’s really about patience here. Don’t rush the windshield. Make sure you get into every nook and cranny.
The bottom edge where the windshield meets the dashboard is often a dark, greasy area. You might need to do a second pass there. A clean cloth is your best friend for that final streak-free finish on the windshield.
It’s worth the extra effort for that perfectly clear view.
Cleaning Other Interior Windows (Side and Rear)
The side and rear windows are generally easier to clean than the windshield. They are usually more accessible. You can often reach them fully with just your arms.
The same principles apply: use two clean microfiber cloths and a good cleaner. However, there are a couple of things to keep in mind for these windows.
For the rear window, especially if it has a defroster grid, be gentle. You don’t want to rub too hard on those lines. They are delicate.
Wipe parallel to the lines rather than across them. For side windows, ensure you roll them down slightly. This allows you to clean the very top edge of the glass.
This little bit of glass can collect a surprising amount of dirt. It makes a big difference when you look at the car from the side.
Side and Rear Window Notes
- Accessibility: Generally easier to reach than the windshield.
- Rear Defroster: Wipe gently, following the grid lines.
- Top Edge: Roll down windows slightly to clean the upper frame area.
- Headrests: Sometimes, headrests can obscure views. Cleaning windows improves this.
Don’t forget the small triangular windows in the front doors or the rear quarter windows. These tiny panes can also collect dust and get smudged. They might seem insignificant, but a clean car is clean everywhere.
A quick wipe-down of these smaller windows adds to the overall polished look and feel of your car’s interior. It completes the job.
Dealing with Stubborn Residue and Buildup
Sometimes, you encounter a film that just won’t budge. This could be old wax overspray from washing the car, or that stubborn dashboard off-gassing. Standard cleaner might not be enough.
For these tough spots, you might need a little extra power. Some people find using a clay bar works wonders on glass, just like it does on paint.
A clay bar is designed to lift embedded contaminants. You would use it with plenty of lubricant. Glide the clay bar over the glass.
It will pick up anything stuck to the surface. After using the clay bar, you’ll still need to clean and buff the glass. This ensures all residue is gone.
It leaves the glass perfectly smooth and clean. Always test a small area first with any new method.
Tough Residue Solutions
- Clay Bar: Use with lubricant for embedded grime.
- Rubbing Alcohol: Can help break down greasy films. Use sparingly on a cloth.
- Fine Steel Wool (#0000): ONLY on specific glass types and with extreme caution. Check manufacturer recommendations first.
- Patience: Stubborn spots often require multiple passes.
Another option for really greasy buildup is isopropyl alcohol. You can apply a small amount to your cleaning cloth. Gently rub the affected area.
Alcohol is a good solvent. It helps break down oils and grease. But be cautious.
A little goes a long way. You don’t want to use so much that it causes issues with surrounding materials. Always follow up with your regular cleaner and buffing.
These extra steps tackle the really persistent problems.
Preventing Future Streaks and Grime
The best way to avoid streaks is to prevent the grime from building up in the first place. Regular cleaning is key. Don’t wait until the windows are so dirty they’re dangerous to look through.
A quick wipe-down every week or two can make a huge difference. This prevents those stubborn, hard-to-remove films from forming.
You can also try to minimize the sources of interior grime. If your car has a strong plastic smell, consider using an interior protectant. But choose one that doesn’t leave a greasy residue.
Some protectants are designed to be matte and absorb rather than create a shiny film. This reduces the off-gassing onto your windows. Also, try to clean up spills quickly.
Don’t let them dry and bake onto the glass.
Prevention Strategies
- Regular Wiping: A quick clean every few weeks prevents major buildup.
- Dashboard Treatment: Use non-greasy interior protectants.
- Ventilation: Air out your car regularly, especially after new car smell fades.
- Clean Hands: Avoid touching windows with greasy or dirty hands.
- Air Fresheners: Some can leave a film. Consider sprays over passive diffusers for windows.
Consider using a dash mat. These can help prevent direct sunlight from hitting your dashboard. This can reduce the off-gassing process.
It also helps keep the dashboard itself cleaner. A cleaner dashboard means less film transfer to the windshield. Simple habits can make a big impact over time.
Think of it as routine car care.
When to Seek Professional Help
Most of the time, cleaning your car’s interior windows is a DIY job. You can achieve fantastic results with simple tools and techniques. However, there might be times when it’s best to call in the professionals.
If you’ve tried everything and still can’t get the windows clear, it might be worth a visit to a professional detailer.
Sometimes, the glass itself might be damaged or have a permanent etching. This isn’t something you can clean away. Also, if you’ve accidentally used a harsh chemical that has damaged the tint or etched the glass, a pro might be able to help.
Or at least advise you on the best course of action. For most everyday grime and streaks, though, you’ve got this!
When to Consider Professional Cleaning
- Persistent, Deep Stains: If you can’t identify the cause or remove it.
- Damaged Glass: Etching, pitting, or permanent hazing.
- Tint Damage: If you suspect you’ve damaged window tint.
- New Car Smell Issues: If off-gassing is severe and causing constant film.
- Time Constraints: If you simply don’t have the time for thorough cleaning.
A professional detailer has access to specialized tools and products. They also have the experience to handle tough situations. They can assess the glass and determine the best way to restore clarity.
But before you spend money, try the simple methods. You’ll likely find they are more than enough to get your windows sparkling clean and streak-free.
Frequently Asked Questions About Cleaning Car Windows Inside
What is the best cleaner for the inside of car windows?
The best cleaner is usually a mixture of distilled water and white vinegar (4:1 ratio) in a spray bottle. Alternatively, use a dedicated automotive glass cleaner. Avoid household cleaners with ammonia, especially if you have window tint.
How do I stop streaks on my car windows?
Use two clean microfiber cloths: one for cleaning and one for buffing. Apply cleaner sparingly. Wipe in a consistent pattern, and buff with the dry cloth using a different pattern until completely dry.
Always clean in a shaded area.
Can I use Windex on the inside of my car windows?
It’s generally not recommended, especially if your car has window tint. Windex often contains ammonia, which can damage and haze window tint over time. A vinegar and water solution or a dedicated automotive glass cleaner is a safer choice.
How often should I clean the inside of my car windows?
Aim to clean them at least once a month, or more often if you notice a buildup of film or dirt. Regular, light cleaning is much easier than tackling heavy grime. Check them weekly for quick spots.
What causes the hazy film on the inside of my windshield?
This haze is often caused by the off-gassing of plastics and vinyl materials on your car’s dashboard and interior. It can also be caused by smoke, vaping residue, or even oily residue from your hands. Regular cleaning with the right products helps remove it.
Can I use paper towels to clean my car windows?
While you can use paper towels in a pinch, they are not ideal. Many paper towels leave behind lint and can cause streaks. High-quality microfiber glass cloths are much better for a streak-free finish because they are designed to trap dirt and absorb moisture without leaving residue.
What is the best way to clean a windshield with a lot of glare?
A clean windshield is key to reducing glare. Ensure you clean both the inside and outside thoroughly. For inside glare caused by film, follow the two-cloth method precisely.
A squeegee tool can also help reach all areas of the windshield effectively for a consistent clean.
Final Thoughts on Crystal-Clear Visibility
Getting your car’s interior windows perfectly clean and streak-free is totally achievable. It’s all about using the right tools, a good cleaner, and a bit of patience. Remember the two-cloth method.
And always clean in the shade. With these simple steps, you’ll enjoy a much clearer, safer view every time you drive.
Don’t get discouraged if your first try isn’t absolutely perfect. Like anything, it takes a little practice. Soon enough, you’ll be a pro at achieving that showroom shine.
Enjoy the enhanced visibility and the satisfaction of a job well done!