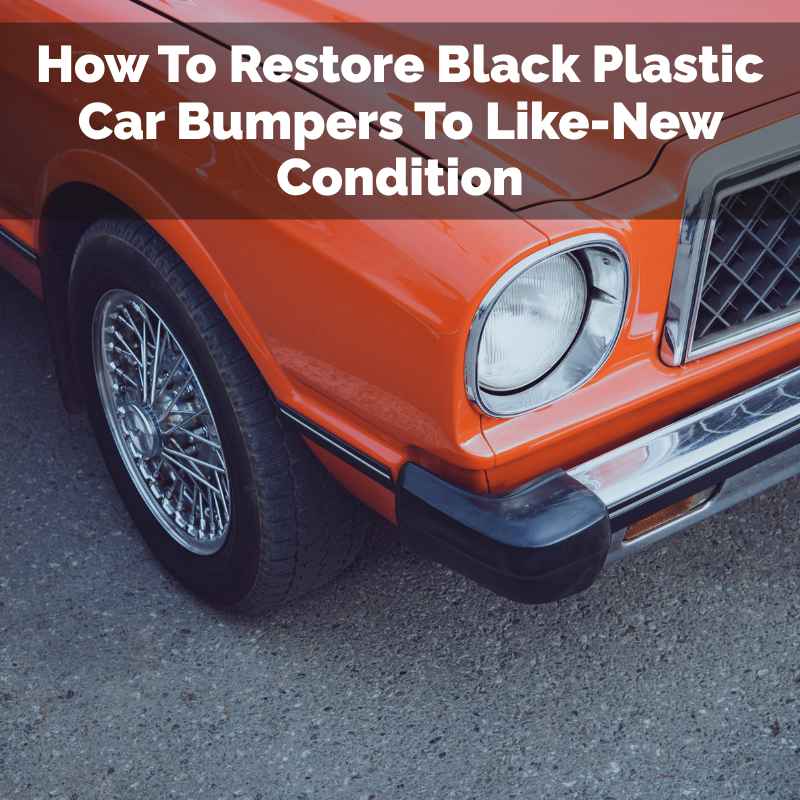
How To Restore Black Plastic Car Bumpers To Like-New Condition
Restoring faded black plastic car bumpers involves cleaning them thoroughly, then applying a product designed to replenish and protect the plastic. This process removes dullness and UV damage, returning a deep, rich black color that makes the car look much newer.
Understanding Why Black Plastic Fades
It’s easy to get annoyed when your car’s black plastic parts turn gray. But knowing why it happens helps a lot. The main culprit is the sun.
UV rays from the sun are powerful. They break down the plastic over time. This makes the color fade.
It also makes the plastic brittle. Air pollution plays a part too. Road grime, salt in winter, and other stuff in the air can cling to the plastic.
Washing alone might not get all of this off. Over time, it builds up. It creates a dull layer.
This dullness makes the plastic look gray. It’s like a film covering the original color. Moisture can also get into the plastic.
This causes white streaks. These are often called chalking. It’s a natural process.
But it’s one we can fight.
My Own Bumper Battle: A Tale of Two Faded Fenders
I remember when my old sedan started showing its age. It wasn’t the paint. That was still decent.
It was the bumpers. Specifically, the black plastic trim and the bumpers themselves. They had gone from a deep, rich black to a sad, chalky gray.
I felt a pang of annoyance every time I looked at them. It made the whole car look neglected. I tried washing them really well.
That helped a little. But the chalky look came back fast. Then I tried some generic cleaner I had.
It made them look wet and dark for a few hours. But the sun dried them out, and they were back to being dull. I felt like I was wasting my time.
One weekend, I decided to really dig into it. I spent hours online. I read about different products.
I learned about the sun’s damage. I felt a bit more hopeful. I bought a few different products.
I was ready to give it a serious try. Seeing that first bit of deep black return was so satisfying!
The Science of Fading: UV Rays vs. Plastic
What’s Happening: The plastic used in car parts is often a polymer. These polymers have long chains of molecules. When UV light hits them, it breaks these chains.
This process is called photodegradation. It changes how the plastic reflects light. It also releases tiny particles.
These particles are what you see as chalky dust.
Why it Looks Gray: The broken polymer chains and the released particles scatter light. Instead of absorbing light and looking dark, they reflect it. This scattered light appears as a dull, gray hue.
Think of it like looking at white chalk. It’s made of tiny particles that scatter all light.
Step-by-Step: Bringing Back the Black
The good news is you can fix this. It takes a little effort. But the results are usually worth it.
First, you need to clean the plastic. This is super important. You can’t just put stuff on a dirty surface.
Use a good car wash soap. A soft brush or sponge works well. Get into all the nooks and crannies.
Sometimes, a plastic cleaner is even better. These cleaners are made to lift dirt and grime. They can also remove old wax or sealant.
Let the plastic dry completely. This is key. Any water trapped underneath can mess things up.
After cleaning and drying, you’re ready for the magic. There are a few main types of products you can use.
Product Types for Restoration
Let’s talk about the tools for the job. Different products do different things. Some are temporary fixes.
Others offer longer-lasting results. It’s good to know the difference.
1. Plastic Restorers (Dressings)
These are common. They often have silicones or oils. They make the plastic look wet and dark.
This is usually a temporary fix. The dark color comes from the product filling the pores. It also makes the surface smooth.
It looks good for a few washes or weeks. But the sun will break them down again. They are good for a quick shine.
But not for a lasting repair.
2. Trim Restorers (Ceramic-Infused or Polymer-Based)
These are a step up. They often contain polymers or even ceramic particles. They bond to the plastic surface.
This means they last longer. They don’t just sit on top. They actually change the surface a bit.
They fill in tiny cracks. They also block UV rays. This helps prevent future fading.
These can last for months. Some even up to a year. They are a better investment for a lasting look.
3. Heat Gun Method (Use with Caution!)
This is a more advanced technique. You use a heat gun. You gently warm the plastic.
The heat makes the original oils in the plastic come to the surface. This brings back the dark color. It looks amazing when done right.
But it’s risky. Too much heat can melt or warp the plastic. You can ruin your bumper.
It’s best for experienced detailers. Or if you’re feeling very brave and careful. Always test on a hidden spot first.
Quick Scan: Choosing Your Product
| Product Type | Appearance | Longevity | Ease of Use | Best For |
|---|---|---|---|---|
| Plastic Restorers (Oils/Silicones) | Deep, wet look | Short (weeks) | Very Easy | Quick touch-ups |
| Trim Restorers (Polymers/Ceramics) | Deep, satin black | Medium to Long (months) | Easy | Lasting results |
| Heat Gun | Like new factory finish | Very Long (years) | Difficult/Risky | Experts or brave DIYers |
Applying the Restorer: The Gentle Touch
Let’s focus on the most common and safest method: using a trim restorer. Get your product ready. Most come with an applicator pad or a small sponge.
You can also use a soft microfiber cloth. First, apply a small amount of product to the applicator. Don’t use too much.
You can always add more. Work in small sections. This stops the product from drying too fast.
Gently rub the product into the plastic. Use a back-and-forth motion. Or a circular motion.
Make sure you cover the entire faded area. Really work it in. You should see the color changing as you go.
This is the exciting part! Once you’ve covered an area, let it sit for a few minutes. The product needs time to soak in.
Check the product’s instructions. They often say how long to leave it.
After letting it sit, take a clean microfiber cloth. Gently wipe away any excess product. You don’t want streaks.
This step is important for a clean finish. Buff the area lightly. This helps to set the product.
It also gives it a nice sheen. Repeat this process for all the faded plastic parts. Take your time.
Don’t rush it. Doing it section by section makes it manageable. You’ll be amazed at the difference.
What was once dull and gray will be deep and black again. It’s like giving your car a facelift.
Pro Tip: Testing in an Inconspicuous Area
Before you go all-in on your bumpers, test the product. Pick a spot that’s not easily seen. Maybe the underside of a fender or a small edge.
Apply the restorer there. See how it looks. See how it cures.
This way, you know what to expect. You won’t have any surprises on the main parts.
Real-World Context: Bumpers in Different Climates
Where you live matters. Cars in sunny places like Arizona or Florida face constant sun. This means plastic fades faster.
You’ll need to restore them more often. Or use a product with strong UV protection. In colder climates, like those with snowy winters, road salt is a big issue.
Salt can be very harsh on plastics. It can get into the pores and cause damage. Even in mild climates, rain and humidity can cause problems.
They can lead to chalking. Thinking about your local weather helps you choose the best approach. And it helps you know when to reapply.
Contrast Matrix: What’s Normal vs. Concerning
- Normal Fading
- A light gray or chalky appearance. It looks dull but the plastic itself is still smooth and feels solid.
- Concerning Signs
- Deep cracks appearing in the plastic. The plastic feels very brittle and might crumble when touched. White powdery residue that won’t wash off easily, even after deep cleaning.
What This Means for Your Car’s Look
Restoring your bumpers has a big impact. It’s not just about the plastic itself. It’s about the overall appearance.
A car with faded bumpers looks tired. It can make good paintwork look less appealing. When the bumpers are deep black again, it’s amazing.
The car looks cleaner. It looks newer. It looks more cared for.
This can even help with resale value. People look at the whole car. They notice the details.
Shiny, dark bumpers draw the eye. They make the car seem more valuable. It’s a relatively small job.
But the visual payoff is huge. It makes you feel good about your car.
Stacked Micro-Sections: Quick Checks
Feel Test: Run your hand over the plastic. Does it feel smooth or rough and chalky? Smooth is good.
Rough means more UV damage.
Color Depth: Look at the plastic next to a painted area. Is the contrast too big? A stark difference shows fading.
Surface Texture: Is the plastic glossy or dull? Dullness signals a loss of its original finish.
Keeping Your Bumpers Looking Great: Prevention is Key
Once you’ve got that nice black color back, you want to keep it. The best way is to prevent the damage. Regular washing helps.
It removes the dirt and grime before it can build up. Using a car wash soap is better than harsh detergents. After washing, you can apply a protectant.
Many of the trim restorers are also great protectants. They have UV blockers. Applying them every few months is a good idea.
It adds a layer of defense. Parking your car in a garage or a shaded spot helps too. This reduces its exposure to direct sunlight.
Even using a car cover when parked for long periods can make a difference. Think of it like sunscreen for your car’s plastic. The more you protect it, the longer it stays looking good.
Quick-Scan Table: Maintenance Schedule
| Action | Frequency | Notes |
|---|---|---|
| Wash Car | Every 1-2 weeks | Use car wash soap, avoid harsh cleaners |
| Apply Trim Protectant | Every 2-4 months | Choose one with UV protection |
| Deep Clean Plastic | Every 6 months or as needed | Use a dedicated plastic cleaner |
| Garage/Shade Parking | Always possible | Reduces sun exposure |
Frequently Asked Questions
Can I use tire shine on my car bumpers?
Tire shine can make your bumpers look dark and shiny temporarily. However, it’s not designed for plastic trim. It can attract a lot of dust.
It also washes off easily with rain. It doesn’t offer UV protection. So, it’s not a good long-term solution for restoring bumpers.
How often should I restore my black plastic bumpers?
This depends on your climate and the product you use. With a good quality trim restorer that has UV protection, you might need to reapply every 3-6 months. In very sunny or harsh climates, it could be more often.
Less durable products might need touch-ups every few weeks.
Is the heat gun method safe for all plastic bumpers?
No, the heat gun method is not safe for all plastic bumpers. Some plastics can melt or warp easily. It’s a technique best left to professionals or very experienced DIYers.
Always test on an inconspicuous area first and use the lowest heat setting. Extreme caution is advised.
Will cleaning products damage my car’s paint?
Most car wash soaps are safe for both paint and plastic. However, harsh household cleaners can damage car paint. Always use products designed for automotive use.
If you’re using a strong plastic cleaner, try to avoid getting it on the painted surfaces. Rinse well.
How do I know if my bumper plastic is beyond repair?
If the plastic is deeply cracked, brittle, or shows signs of disintegration, it might be beyond repair with simple products. In these cases, you might need to replace the bumper or plastic trim piece. But for most fading and chalkiness, restoration is usually possible.
Can I paint my faded black plastic bumpers instead?
Yes, you can paint them. But it’s a more involved process. You need special plastic adhesion promoters.
You also need to prep the surface perfectly. Painting can offer a very durable finish. But it’s more work than using a restorer.
And if not done right, paint can peel or chip.
Conclusion: Renewing Your Car’s Look
Dealing with faded black plastic bumpers doesn’t have to be a headache. By understanding why they fade and using the right products, you can bring back that deep, new-car black. It’s a satisfying process.
It makes your whole vehicle look better. Remember to clean well first. Then choose a good quality restorer.
Take your time applying it. And with a little regular care, you can keep them looking sharp for a long time. Enjoy the fresh look of your car!