How to Get Permanent Marker Off Car Exterior: Proven Essential Guide
Get permanent marker off your car exterior easily! This guide reveals safe, proven methods using common household items and gentle cleaning techniques to restore your car’s flawless finish without damaging the paint. Follow our step-by-step instructions to say goodbye to unsightly marks and hello to a showroom-ready car!
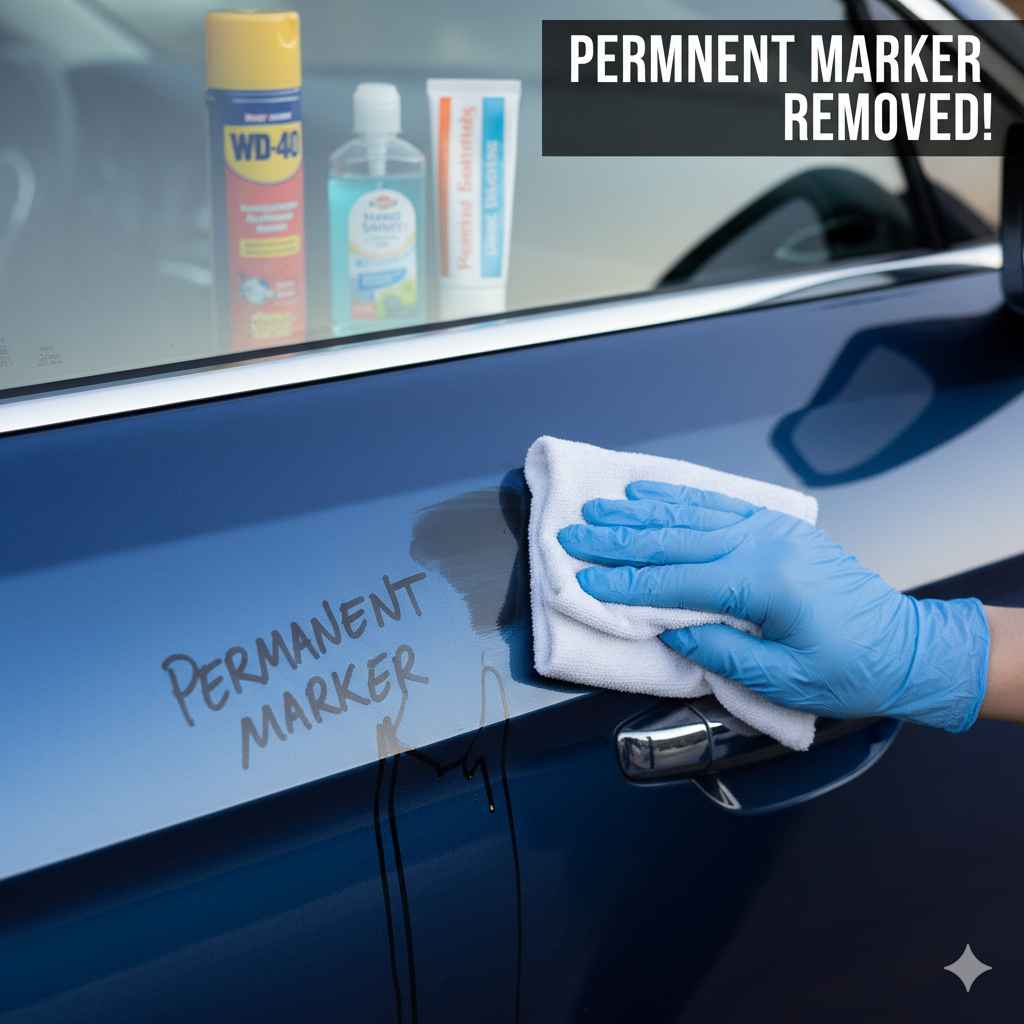
Oh no! You’ve discovered permanent marker scribbled on your car’s shiny exterior. It’s a frustrating sight, no doubt. Whether it was a prank, an accidental markup, or a child’s creative burst, those stubborn lines can feel impossible to remove. But don’t worry! As your guide to all things car care, I’m here to tell you that getting permanent marker off your car’s paint is totally achievable. You don’t need expensive, complicated solutions. We’ll walk through simple, effective methods using things you might already have around the house. Get ready to restore that smooth, clean finish with confidence!
Why Permanent Marker is Tricky (and How We’ll Beat It!)
Permanent markers, as their name suggests, are designed to stick around. The ink contains solvents that help it bond strongly to surfaces, making it resistant to water and fading. When that ink meets your car’s paint, it can feel like a permanent problem. The good news is that car paint, while delicate in some ways, also has a resilient clear coat that can often withstand gentle cleaning methods. The key to success is choosing the right cleaning agent and technique. We want to lift the ink without harming your car’s clear coat or paint underneath. This guide focuses on methods that are effective yet safe for your vehicle’s finish.
Essential Tools and Supplies You’ll Need
Before we dive into the cleaning process, let’s gather what you’ll need. Having everything ready makes the job much smoother and less stressful. You probably have most of these items already!
- Microfiber Towels: These are crucial! They are soft, absorbent, and won’t scratch your car’s paint. Have at least 3-4 clean ones handy.
- Rubbing Alcohol (Isopropyl Alcohol): Available at most drugstores or supermarkets. This is a go-to solvent for removing many types of ink.
- Hand Sanitizer: Another great source of rubbing alcohol, often with a gel consistency that can be easier to control.
- Baking Soda: A mild abrasive that can help lift stubborn marks.
- Window Cleaner: For a final polish and to ensure no residue is left behind.
- Car Wash Soap and Water: For an initial wash to remove dirt and grit.
- Bucket: For your wash solution.
- Gloves (Optional but Recommended): To protect your hands.
- Clay Bar Kit (Optional, for very stubborn cases): A specialized automotive cleaner.
- Car Wax (Optional): To protect the paint after cleaning.

Step-by-Step Guide: Clearing the Mark
Now for the main event! We’ll tackle this step-by-step, starting with the gentlest methods first. This ensures we don’t overdo it and potentially damage your paint.
Step 1: Wash the Area
Before you try to remove the marker, it’s important to clean the affected area. This removes any surface dirt or grit that could scratch your car’s paint during the cleaning process. It also helps you see the marker line more clearly.
- Mix a bit of your car wash soap with water in a bucket.
- Using a clean microfiber towel or a car wash mitt, gently wash the area with the marker on it.
- Rinse the area thoroughly with clean water.
- Dry the area completely with a clean, dry microfiber towel.
Step 2: Test a Small, Inconspicuous Area
This is super important! Before applying any cleaning solution to the main marker mark, test it on a hidden spot of your car’s paint. Think of a place like the lower edge of a door or a part of the bumper that isn’t easily visible. This confirms the cleaner won’t harm or discolor your paint. Wait a few minutes, then check. If there’s any adverse reaction, stop and try a different method or product.
Step 3: The Rubbing Alcohol Method (Your First Line of Defense)
Rubbing alcohol is surprisingly effective at breaking down the solvents in permanent marker ink. It’s often strong enough for most jobs.
- Dampen a clean section of a microfiber towel with rubbing alcohol. Don’t drench it – just make it damp.
- Gently rub the marker line with the dampened towel. You should start to see the ink transfer onto the towel.
- As the towel picks up ink, move to a clean section of the towel or grab a new one. This prevents smearing the ink.
- Continue rubbing gently until the marker line is gone. Be patient! Some marks may require a bit of work.
- If the alcohol is working, but the mark is stubborn, you can try applying a small amount of hand sanitizer (which is alcohol-based) directly to the mark for a few seconds before gently rubbing. The gel can sometimes cling better to the mark.
- Once the marker is gone, clean the area again with a little car wash soap and water, rinse, and dry thoroughly.
Step 4: The Baking Soda Paste Method (For Tougher Marks)
If rubbing alcohol didn’t quite do the trick, a paste made from baking soda and water can offer a little more gentle abrasion to lift the ink without scratching.
- In a small bowl, mix baking soda with just enough water to create a thick paste. Think of the consistency of toothpaste.
- Apply a small amount of the baking soda paste directly onto the remaining marker mark.
- Using a clean, damp microfiber towel, gently rub the paste over the offender. Use light, circular motions. Remember, baking soda is a mild abrasive, so “gentle” is the keyword here.
- See if the ink is lifting. You might need to reapply the paste and repeat the gentle rubbing a few times.
- Once the marker is removed, wash the area thoroughly with car wash soap and water.
- Rinse completely and dry with a clean microfiber towel.
Step 5: Dedicated Automotive Cleaners (When Needed)
Sometimes, a truly stubborn mark might need a specialized product. Auto detailers often use products like Goo Gone, which is designed to remove adhesives and residue without harming vehicle finishes. Always follow the product instructions precisely and test in an inconspicuous area first.
A clay bar kit can also be a lifesaver for deeply embedded marks. A clay bar is a pliable material that, when used with a lubricant, gently lifts contaminants from the paint’s surface. This is a bit more advanced but highly effective for tough jobs. You can find comprehensive guides on how to use clay bars safely on reputable automotive detailing sites.
Step 6: Treat Minor Paint Touch-ups (If Necessary)
In very rare cases, especially if a harsh cleaner was used aggressively or the paint was already compromised, you might notice a slight dulling of the clear coat or a very faint outline of the mark. If this happens, you might consider a light clay bar treatment or a polishing compound designed for automotive paint. For deeper scratches or damage, it might be best to consult a professional detailer.
For incredibly minor paint imperfections often seen after removing stubborn marks, a good quality car wax can help restore shine and protect the paint. Applying a thin layer of wax according to the product’s instructions can fill microscopic imperfections and add a protective layer, making your paint look its best.
Step 7: Final Wash and Protection
Once the marker is completely gone and the area is clean, give your car a final wash and dry. This ensures all cleaning residues are removed. For an extra layer of protection and to restore that deep shine, consider applying a coat of car wax to the entire vehicle, or at least to the section you worked on. This will help protect your paint from future mishaps and keep it looking its best.
Understanding Different Paint Types and Caution
Most modern cars have a multi-layer paint system, typically involving a primer, base coat (color), and a clear coat. The clear coat is the protective outer layer that you’re primarily working with. While it’s durable, it can be scratched or dulled by harsh chemicals or abrasive scrubbing.
Here’s a quick breakdown of what to be mindful of:
| Paint Component | Importance During Cleaning | Potential Risks |
|---|---|---|
| Clear Coat | Primary surface being cleaned. Needs gentle treatment. | Scratching from abrasive materials, dulling from harsh solvents. |
| Base Coat (Color) | Underneath the clear coat; can be damaged if clear coat is compromised. | Discoloration if harsh chemicals penetrate a damaged clear coat. |
| Primer | Adhesion layer; rarely exposed unless paint is severely damaged. | Unlikely to be affected by these methods. |
Important Note on Non-Factory Paint Jobs: If your car has a custom paint job, an aftermarket finish, or is an older vehicle with a simpler paint system, exercise extra caution. Always test new products in an inconspicuous area first. Some specialty paints or finishes might react differently to common cleaning agents.
Tips for Success and Prevention
To make this process even easier and to keep your car looking great, here are a few extra tips:
- Work in the Shade: Always try to clean your car in a cool, shaded area. Direct sunlight can heat up the paint surface, causing cleaning solutions to dry too quickly and potentially leaving streaks or marks.
- Gentle is Key: I can’t stress this enough. Always start with the gentlest method (like rubbing alcohol) and the least abrasive technique. Avoid firm scrubbing.
- Clean Tools: Use clean microfiber towels and clean buckets. A dirty towel can introduce new scratches.
- Address it Quickly: The sooner you try to remove the marker, the easier it will be. Fresh ink is much easier to lift than ink that has bonded with the paint for days or weeks.
- Keep it Clean: Regularly washing and waxing your car can create a protective barrier that makes it harder for things like permanent marker to adhere strongly, and easier to remove if they do. According to the experts at Autopia, a proper wash is the first defense against contaminants.
- Prevention: If you often carry markers in your car, consider a designated spot for them or store them in a small container to avoid accidental contact with your car’s interior or exterior.
For a comprehensive understanding of car paint care and protection, resources like those from the Environmental Protection Agency (EPA) on automotive coatings can offer valuable insights into how car paint is made and protected.

Frequently Asked Questions (FAQ)
Q1: Can I use nail polish remover to get permanent marker off my car?
A1: While nail polish remover often contains acetone, which can dissolve certain plastics and inks, it can also be very harsh on car paint and clear coats. It’s best to avoid it. Rubbing alcohol is a much safer and often equally effective alternative.
Q2: Will rubbing alcohol damage my car’s wax?
A2: Rubbing alcohol can indeed strip wax. This is why it’s important to reapply wax after cleaning, especially if you’ve used alcohol or baking soda. The cleaning process is more important than preserving old wax in this instance.
Q3: What if the marker is on a chrome bumper or plastic trim?
A3: For chrome or plastic, rubbing alcohol is usually safe. However, be extra gentle on plastic trim, as some plastics can become cloudy with harsh chemicals. Always test in an inconspicuous spot first. Plastic cleaners or protectants can be used afterward.
Q4: Can automatic car washes remove permanent marker?
A4: Automatic car washes are generally designed for dirt and grime. They are unlikely to remove permanent marker, and the brushes or high-pressure jets could potentially make a mark worse or cause micro-scratches if the area is already stressed.
Q5: Is it safe to use a magic eraser (melamine foam) on my car?
A5: Magic Erasers are very fine abrasives. While they can be effective on some surfaces, they have a high potential to dull or scratch automotive clear coats. It’s generally recommended to avoid them on painted car surfaces and stick to softer methods unless you are very experienced and understand the risks.
Q6: My car is black. Will these methods leave white streaks?
A6: Black paint shows everything! If you don’t rinse and dry thoroughly, or if you allow cleaning products to dry on the surface, you might see residue. Always follow up with a thorough wash, rinse, and dry, and consider waxing afterward to restore shine and prevent future residue issues.
Conclusion
Discovering permanent marker on your car can be a heart-stopping moment, but hopefully, this guide has shown you that it’s a fixable problem. By using simple, accessible items like rubbing alcohol and baking soda, and by following a careful, step-by-step approach—always starting with the gentlest method and testing in a hidden spot—you can successfully restore your car’s pristine exterior. Remember to be patient, work gently, and always ensure your tools are clean. With a little effort, your car will be back to looking its best, free from those unwanted marks. Happy cleaning!