How to Keep Car Seats Clean: Essential Tips
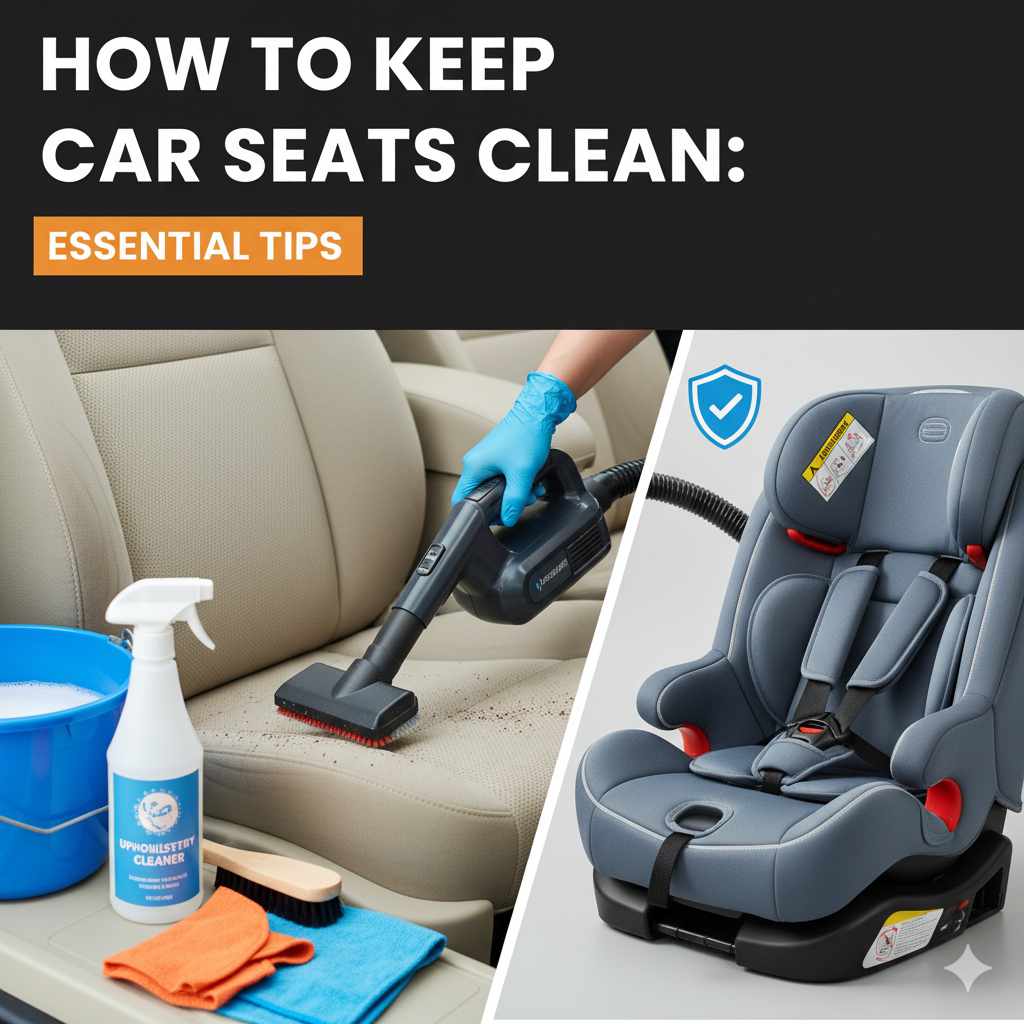
Keeping your car seats clean is easy with regular upkeep! Vacuuming, spot cleaning spills immediately, and using appropriate cleaners for your seat material will prevent stains and keep your car looking and smelling fresh. Follow these simple tips for pristine car seats.
Hey there, fellow drivers! Md Meraj here. Ever notice how quickly car seats can go from looking great to… well, not so great? Crumbs, spills, dust, and the general wear and tear of daily life can leave even the nicest car feeling a bit grubby. It’s a common frustration, right? But don’t worry, keeping your car seats looking and feeling like new doesn’t require a mechanic’s workshop or a mountain of cash. With a few simple habits and the right techniques, you can tackle this challenge head-on. We’ll walk through easy steps to make your car seats sparkle, so you can enjoy a cleaner, more comfortable ride. Let’s get started!
Why Keeping Your Car Seats Clean Matters
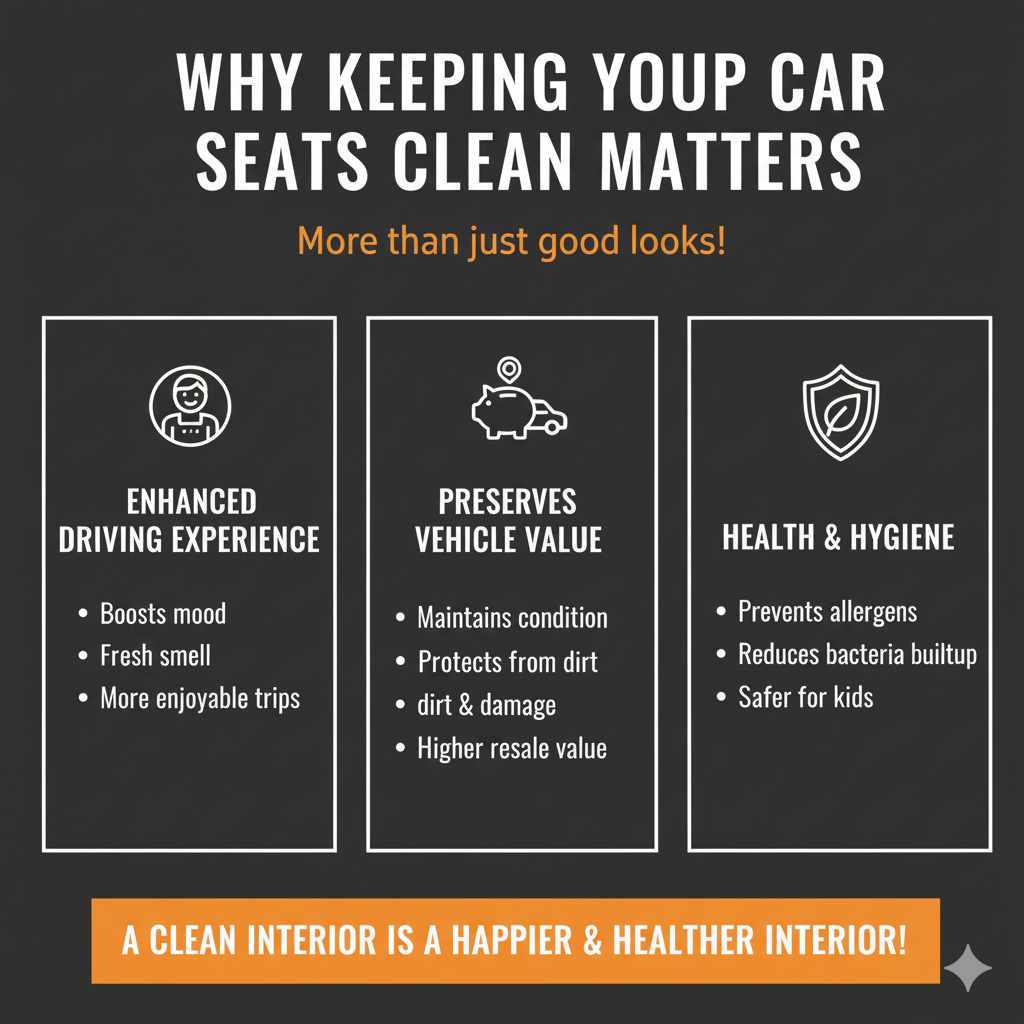
It’s more than just looks. A clean car interior can significantly improve your driving experience. Think about it: stepping into a fresh-smelling car, free from sticky spots or lingering odors, just feels better. It can boost your mood and make even short trips more enjoyable. Plus, protecting your car seats from dirt and damage helps maintain their condition, which is important if you ever plan to trade in or sell your vehicle. Keeping them clean also prevents allergens and bacteria from building up, contributing to a healthier environment inside your car. For parents, it means a safer and more pleasant space for kids, complete with all their snacks and adventures!
Understanding Your Car Seat Material
Before you grab any cleaning spray, it’s super important to know what your car seats are made of. Different materials need different care. Using the wrong product can cause damage, like fading the color, drying out the material, or even leaving streaks. The most common types are:
- Fabric (Cloth): This is found in many cars. It’s comfortable but can absorb spills easily, leading to stains and odors.
- Leather: A premium option, leather looks and feels luxurious. It’s more durable than fabric but requires specific conditioning to prevent drying and cracking.
- Vinyl: Often found in older cars or trucks, vinyl is very durable and easy to wipe down. It’s weather-resistant and practical.
- Alcantara (Suede-like): A softer, more delicate material that mimics the look and feel of suede. It requires gentle cleaning and shouldn’t be saturated with liquids.
Check your car’s owner’s manual or look for tags on the seats themselves if you’re unsure. Knowing your material is the first step to cleaning success!
Essential Tools for Clean Car Seats
You don’t need a professional detailer’s arsenal. A few well-chosen items will make a big difference. Having these on hand means you’re ready for spills and general upkeep:
- Vacuum Cleaner: A powerful vacuum with different attachments (crevice tool, brush attachment) is your best friend for removing loose dirt, crumbs, and debris. A small, portable car vacuum can be very handy.
- Microfiber Cloths: These are essential for wiping, drying, and buffing. They are gentle on surfaces and effectively trap dirt without scratching. Have a few clean ones ready.
- Interior Cleaner: Choose a cleaner specifically designed for car interiors and suitable for your seat material. Look for pH-neutral or all-purpose interior cleaners.
- Upholstery Cleaner (for fabric): If you have fabric seats, a good upholstery cleaner can tackle tougher stains and odors.
- Leather Cleaner and Conditioner (for leather): These are a duo essential for leather. The cleaner removes dirt, and the conditioner keeps the leather supple and protected. Avoid harsh chemicals that can strip natural oils.
- Soft Brush: A soft-bristled brush (like an interior detailing brush or even a soft toothbrush) can help lift dirt from fabric or work cleaner into crevices.
- Spray Bottles: For mixing your own cleaning solutions or diluting commercial ones.
- Bucket: For rinsing cloths or mixing cleaning solutions.
- Trash Bags: For quick disposal of wrappers, tissues, and other car detritus.
Step-by-Step Guide: How to Keep Car Seats Clean
Let’s get down to business! Here’s how to tackle both regular maintenance and those inevitable spills.
Step 1: The Initial Declutter and Vacuum
Before any deep cleaning, take everything out of your car. Look under seats, in pockets, and between cushions. You’ll be surprised what you find!
- Remove Debris: Clear out all trash, loose items, floor mats, and car seats if applicable.
- Initial Vacuum: Use your vacuum cleaner’s brush attachment to go over the seats, carpets, and floor mats. This removes loose dirt, dust, and pet hair.
- Crevice Cleaning: Switch to the crevice tool to get into all the tight spots – between the seat cushions, along the edges, and in seat belt guides. This is where crumbs love to hide!
- Floor Mats: Don’t forget to vacuum your floor mats thoroughly. If they are heavily soiled, consider taking them out and cleaning them separately (more on that later).
Step 2: Spot Cleaning Spills and Stains
The key to preventing permanent stains is acting fast! The longer a spill sits, the harder it is to remove.
For Fabric Seats:
- Blot, Don’t Rub: If it’s a liquid spill, immediately blot with a clean, dry microfiber cloth. Rubbing can push the stain deeper into the fabric and spread it.
- Use Mild Solution: Mix a small amount of mild laundry detergent or a dedicated upholstery cleaner with water in a spray bottle. Test in an inconspicuous area first.
- Spray and Blot: Lightly spray the stained area. Let it sit for a minute, then gently blot again with a clean cloth. Work from the outside of the stain inward.
- Rinse (Gently): Dampen another clean cloth with plain water and blot the area to remove any soap residue.
- Dry: Press with a dry microfiber cloth to absorb as much moisture as possible. Allow to air dry completely. You can point a fan at the area to speed things up.
For Leather Seats:
- Blot Liquid Spills: Absorb any liquid immediately with a soft cloth.
- Use Leather Cleaner: Apply a small amount of leather cleaner to a microfiber cloth (not directly onto the seat).
- Wipe Gently: Wipe the stained area in smooth, overlapping strokes.
- Dry: Buff the area dry with a clean, dry microfiber cloth.
Step 3: General Cleaning for Fabric Seats
Once the car is vacuumed and immediate spills are handled, it’s time for a more thorough clean if needed.
- Choose Your Cleaner: Use a dedicated fabric upholstery cleaner. Look for one that is safe for automotive interiors. You can often find good DIY recipes, but always test! For instance, a mix of water and mild dish soap can be effective for light dirt. A mixture of 1 part white vinegar to 3 parts water can help with odors. As an example, the EPA offers guidance on safer cleaning products that can be adapted for car interiors.
- Test Spot: Always test your cleaner on an inconspicuous area of the seat first to ensure it doesn’t discolor or damage the fabric. Let it dry completely before proceeding.
- Apply Cleaner: Lightly spray the cleaner onto the seating surface, working in small sections. Avoid oversaturating the fabric, as this can lead to mold and mildew.
- Agitate (Carefully): Use a soft brush or a clean microfiber cloth to gently agitate the cleaner into the fabric. This helps lift dirt and stains.
- Wipe Away Residue: Use a damp (not wet) clean microfiber cloth to wipe away the cleaner and lifted dirt. Rinse your cloth frequently.
- Dry Thoroughly: Press down with dry microfiber cloths to absorb moisture. Open doors and windows to allow for maximum air circulation. A fan can be helpful here.
Step 4: Cleaning and Conditioning Leather Seats
Leather seats need a different approach to keep them looking supple and prevent them from cracking.
- Apply Leather Cleaner: Spray a dedicated automotive leather cleaner onto a microfiber applicator or cloth. Never spray directly onto the leather.
- Clean Surfaces: Gently wipe down the leather surfaces, paying attention to areas that get more contact, like the driver’s seat bolsters and steering wheel.
- Wipe Off Residue: Use a clean, dry microfiber cloth to wipe away any excess cleaner.
- Apply Leather Conditioner: Once clean and dry, apply a high-quality automotive leather conditioner. This replenishes natural oils, protects against UV rays, and keeps the leather soft and preventing it from drying out and developing cracks. Apply a small amount to an applicator pad or microfiber cloth.
- Work It In: Gently massage the conditioner into the leather, working in sections.
- Buff: Allow the conditioner to penetrate for a few minutes, then buff off any excess with a clean, dry microfiber cloth. This gives it a nice, subtle sheen.
Regular conditioning (every 3-6 months, depending on climate and usage) is crucial for leather longevity. For detailed advice on protecting automotive leather, resources like Leather Honey offer comprehensive guides on care and maintenance.
Step 5: Tackling Vinyl Seats
Vinyl is generally the easiest to clean. It’s resilient and water-resistant.
- Wipe Down: Most of the time, a damp microfiber cloth is all you need. For more grime, use a mild soap and water solution or a dedicated vinyl cleaner.
- Spray and Wipe: Lightly spray your chosen cleaner onto a microfiber cloth or directly onto the vinyl (if it’s not a strong chemical cleaner).
- Clean: Wipe down the vinyl surfaces. For stubborn marks, a soft brush can help, but avoid abrasive pads that could scratch.
- Rinse and Dry: Wipe with a clean, damp cloth to remove residue, then dry with a separate dry microfiber cloth.
Ensure any vinyl cleaner doesn’t leave a greasy residue, as this can attract more dirt.
Step 6: Cleaning Floor Mats and Carpets
Your floor mats and carpets bear the brunt of dirt tracked into the car.
- Rubber/All-Weather Mats: Take these out. Hose them down, scrub with a stiff brush and a cleaner like dish soap or an all-purpose cleaner, rinse thoroughly, and let them air dry completely in the sun.
- Carpet Floor Mats: Vacuum them thoroughly. For stains, use a carpet cleaner or upholstery cleaner as described for fabric seats. You can also use a carpet extractor for a deeper clean.
- Carpeted Floor: After removing mats, vacuum the car’s carpeted floor. For stains, spot clean as you would fabric seats. A carpet cleaner specifically for cars is a good investment.
Step 7: Dealing with Odors
Sometimes, even after cleaning, lingering smells can be an issue.
- Ventilation: The best first step is always to air out your car. Open doors and windows, especially on a warm, dry day.
- Baking Soda: Sprinkle baking soda liberally on fabric seats and carpets. Let it sit for several hours or overnight to absorb odors, then vacuum it up thoroughly.
- Vinegar Solution: A diluted white vinegar spray (1 part vinegar to 3 parts water) can help neutralize odors on fabric if used cautiously and tested first. Spray lightly and allow to air dry.
- Activated Charcoal: Place open containers or bags of activated charcoal in the car. It’s highly effective at absorbing odors over time without adding any scent.
- Professional Ozone Treatment: For persistent, strong odors (like smoke), professional ozone treatments are available, but do your research and ensure safety protocols are followed, as ozone can be harmful if not handled correctly.
Preventive Maintenance: Keeping Your Car Seats Clean Longer
Cleaning is great, but prevention is even better! These habits will help keep your car seats looking good between deep cleans:
Regular Quick Cleans:
- Weekly: A quick vacuum of obvious crumbs and dirt, and a wipe-down of the dashboard and door panels.
- As Needed: Address spills immediately! Keep a small kit in your car with microfiber cloths and a travel-sized interior cleaner or stain remover wipes.
Protect Your Seats:
- Seat Covers: These are fantastic for protecting seats from spills, sun damage, and wear and tear, especially if you have kids or pets. They come in various materials and styles.
- Pet Hammocks/Covers: If furry friends are regular passengers, a pet-specific cover is a must to catch hair, dirt, and moisture.
- Child Seat Mats: Place a mat or towel under child car seats to protect the upholstery from indentations and spills.
- Avoid Eating in the Car: This is the simplest but often hardest rule. Limiting food and drinks can drastically reduce the mess.
- Shake Out Mats: Regularly shake out your floor mats to remove loose dirt before it gets ground into the car’s carpet.
Table: Cleaning Product Guide by Seat Material
Here’s a quick guide to choosing the right cleaning products for your car seats. Always remember to test in an inconspicuous area first!
| Seat Material | For Light Cleaning | For Stains & Deep Cleaning | For Odors | Special Care |
|---|---|---|---|---|
| Fabric (Cloth) | Mild soap and water, microfiber cloth | Upholstery cleaner, diluted vinegar (for odors), mild detergent | Baking soda, activated charcoal, diluted vinegar | Avoid oversaturation; ensure thorough drying. |
| Leather | Dedicated leather cleaner, microfiber cloth | Specialized leather cleaner for tougher spots | Baking soda (if in a sealed way to avoid contact), manufacturer-recommended deodorizers. | Regular conditioning is vital to prevent drying and cracking. |
| Vinyl | Mild soap and water, damp microfiber cloth | Vinyl cleaner, all-purpose interior cleaner | Baking soda, activated charcoal | Avoid abrasive cleaners or pads that can scratch. |
| Alcantara (Suede-like) | Slightly damp microfiber cloth, very gentle brushing | Specialized Alcantara cleaner or very diluted mild soap | Baking soda (carefully applied and vacuumed), activated charcoal | Use minimal liquid; brush gently when dry to lift nap. |

Frequently Asked Questions (FAQ)
Q1: How often should I clean my car seats?
For fabric seats, a quick vacuum once a week and a more thorough cleaning every 1-3 months is usually sufficient. Leather seats benefit from cleaning every 1-2 months and conditioning every 3-6 months. Vinyl seats can be wiped down as needed, often weekly.
Q2: Can I use household cleaners on my car seats?
It’s best to use cleaners specifically designed for automotive interiors. Household cleaners can sometimes be too harsh, contain chemicals that damage upholstery, or leave residues that attract dirt. Always test any cleaner in an inconspicuous spot first.
Q3: What’s the best way to get rid of pet hair from car seats?
A powerful vacuum cleaner with a rubber brush attachment works well. You can also use a lint roller, a damp rubber glove (the hair clings to it), or specialized pet hair removal tools that are designed to lift and gather fur.
Q4: My child spilled juice on the fabric seat. How do I get the stain out?
Act fast! Blot up as much liquid as you can with a clean cloth. Then, use a fabric upholstery cleaner or a solution of mild dish soap and water. Spray lightly, gently blot or agitate with a soft brush, then wipe with a damp cloth to rinse. Finally, blot dry and allow to air dry.