Proven Car Wax Removal: Effortless Shine
Proven Car Wax Removal: Effortless Shine – Easily remove old wax for a brilliant finish using simple steps and common household items. Get your car looking its best without harsh chemicals or expensive professionals.
It’s a common sight for any car owner who loves to keep their ride looking its best: that stubborn old wax that just won’t budge. Sometimes, wax can build up in trim, get into crevices, or just looks… well, past its prime. You might have tried the wrong methods, leaving white residue or even dulling your paint. Don’t worry! Removing old car wax doesn’t need to be a headache. With a few simple tools you likely already have, you can cut through that waxy film and reveal the glorious shine underneath. Let’s get your car looking showroom-ready, the easy way.
Why Does Car Wax Need Removing?
Keeping your car’s paint protected and looking good is a satisfying task for many car enthusiasts. Wax is a fantastic way to achieve this. It forms a protective barrier against UV rays, dirt, and moisture, and it gives your car that deep, glossy shine we all love. However, like anything, car wax doesn’t last forever. Over time, it breaks down, degrades, and needs to be removed or replaced to maintain that pristine look and optimal protection. But why exactly do we need to remove it, rather than just layering new wax on top?
Several factors make car wax removal a necessary step in your car care routine:
- Build-up and Haze: As wax ages, it can break down due to environmental factors like sun exposure, temperature changes, and road grime. This degraded wax can form a hazy or cloudy layer on your car’s paint, dulling the shine and making it look less appealing.
- Poor Adhesion for New Wax: Applying new wax over old, degraded wax is like trying to glue something to a surface that’s already covered in peeling paint. The new wax won’t bond properly, leading to uneven coverage, reduced durability, and a less satisfactory shine. You want a clean surface for the best protection.
- Wax in Trim and Crevices: Often, when you wax your car, some of the product can get into black plastic trim, rubber seals, or tight gaps. Over time, this wax dries, becomes discolored, and can leave unsightly white streaks or residue. Removing it is key to a clean, finished look.
- Preparing for Paint Correction: If you’re planning to polish your paint to remove scratches or swirl marks, it’s crucial to remove all existing wax. Polishes work by abrading the clear coat, and wax can interfere with this process, making it less effective and potentially causing more issues. A clean surface ensures your polishing efforts are successful.
- Applying Different Protection: Perhaps you want to switch from a traditional carnauba wax to a synthetic sealant or a ceramic coating. For these advanced protectants to bond effectively, the surface must be meticulously clean and free of any old wax layers.
Think of it like repainting a piece of furniture. You wouldn’t just slap a new coat of paint over old, chipped paint, would you? You’d first clean and prep the surface. Car waxing is similar. Proper wax removal is the essential first step for a truly brilliant, long-lasting shine and effective protection for your vehicle.

Essential Tools and Supplies for Wax Removal
Getting rid of old wax is much simpler than you might think, and you probably have most of what you need in your garage or under your sink. The key is to use the right tools to gently lift and remove the wax without damaging your car’s paint. Here’s a rundown of what’s commonly used:
Tools You’ll Need
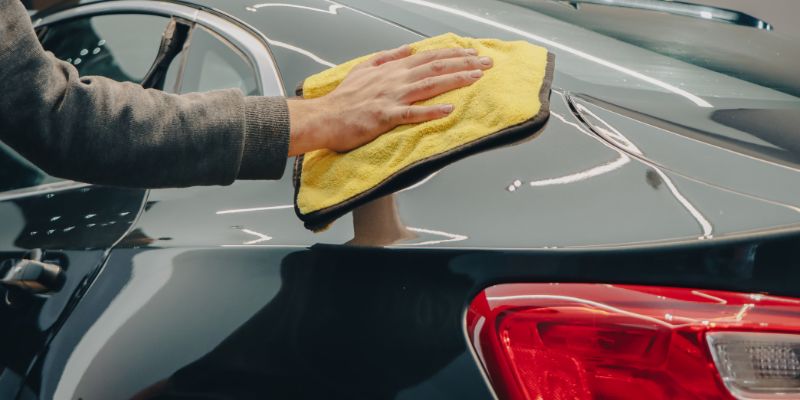
- Microfiber Towels: These are your best friends in car care. They’re incredibly soft, absorbent, and designed to trap dirt and residue without scratching your paint. You’ll need several for the removal process. If you’re new to microfiber, check out this guide on how to care for microfiber towels to keep them in prime condition.
- Clay Bar or Clay Mitt: For lightly bonded wax residue and surface contaminants, a clay bar or mitt is excellent. It’s like a magic eraser for your car’s paint, gently lifting embedded particles.
- All-Purpose Cleaner (APC) or Car Wash Soap: A good quality car wash soap will help lift surface dirt and some wax. For tougher wax residue, a diluted All-Purpose Cleaner (specifically designed for automotive use) can be very effective.
- Isopropyl Alcohol (IPA) or Panel Prep Spray: For stubborn wax in trim or to ensure a perfectly clean surface before applying new protection, a diluted Isopropyl Alcohol solution (typically 15-30% IPA in distilled water) or a dedicated panel prep spray is ideal.
- Soft Brushes (Optional but Recommended): Small, soft-bristled brushes (like detailing brushes or even old, soft toothbrushes) are fantastic for agitating cleaner into tight spots and trim where towels can’t reach.
- Bucket: For your wash solution.
What to Avoid
It’s just as important to know what not to use. Harsh chemicals, abrasive scrubbers, or rough cloths can easily damage your car’s clear coat, leading to scratches, swirl marks, and dullness. Always opt for gentle, car-specific cleaning products.
Step-by-Step: How to Remove Car Wax from Car
Ready to tackle that old wax? Follow these simple steps for a clean, smooth surface and a rejuvenated shine. We’ll cover a few common scenarios, from general wax build-up to stubborn residue in trim.
Method 1: General Wax Removal with Car Wash Soap and Microfiber Towels
This is your go-to method for everyday wax removal and preparation for a new layer of protection.
- Pre-Rinse Your Car: Start by rinsing the entire car with a strong stream of water. This removes loose dirt and debris, preventing it from being rubbed into the paint during washing.
- Wash Your Car: Use your favorite car wash soap mixed with water in a bucket. Wash the car from top to bottom using a clean microfiber wash mitt or sponge. Rinse your mitt frequently in a separate rinse bucket if you have one (the two-bucket method is best for preventing scratches).
- Rinse Thoroughly: After washing, rinse all the soap residue from the car.
- Dry the Car: Use clean, high-quality microfiber drying towels. Gently pat or blot the water, or carefully wipe in one direction.
- Inspect for Residue: Look closely at the paint. If most of the old wax is gone and you only see a light haze, you might be ready for new wax. If there’s still visible wax build-up or a dull appearance, proceed to Method 2.
Method 2: Deeper Wax Removal with Clay Bar or Mitt
If Method 1 wasn’t enough, or you have some stubborn bonded contaminants along with the wax, a clay bar is the next step.
- Wash and Dry First: Ensure your car is washed and dried according to Method 1, Step 1-4.
- Prepare Your Clay Lubricant: You can use a commercial clay lubricant spray, or a diluted solution of car wash soap and water in a spray bottle. Some people also use a 1:1 mixture of Isopropyl Alcohol and distilled water as a lubricant, but be cautious with this on very hot days or on sensitive paints. Always test in an inconspicuous area.
- Work in Small Sections: Don’t try to clay the whole car at once. Tackle one small panel or section of the car at a time (e.g., half the hood, one door).
- Spray Lubricant: Generously spray the chosen section with your clay lubricant. Keep the surface wet.
- Glide the Clay: Take a small piece of clay bar (about the size of a credit card), or use your clay mitt. Gently glide it over the lubricated surface in straight lines (back and forth or side to side). Do NOT use circular motions. Apply minimal pressure; let the clay do the work.
- Check the Clay: As you glide, you’ll feel the clay dragging if it’s picking up contaminants. When the clay reaches the end of a pass, it should glide smoothly. Fold the clay to expose a clean surface if it starts to pick up a lot of grit. If you drop the clay, discard it immediately – it will be contaminated with dirt that can scratch your paint worse than the original wax!
- Wipe and Inspect: After claying a section, wipe it clean with a fresh, clean microfiber towel. You should feel a much smoother surface. Move to the next section and repeat.
- Final Rinse and Dry: Once the entire car has been clayed, give it a final light rinse and dry it thoroughly with microfiber towels.
Method 3: Tackling Wax in Trim and Crevices
Wax residue on black plastic trim and rubber is a common annoyance. Here’s how to get it clean.
- Use a Soft Brush and Cleaner: For most trim, a diluted All-Purpose Cleaner (APC) or even your car wash soap solution, applied with a soft detailing brush or an old toothbrush, can lift the wax. Gently agitate the cleaner into the affected areas.
- Wipe Away: Use a clean, damp microfiber towel to wipe away the cleaner and loosened wax. You may need to rinse and repeat if there’s a lot of buildup.
- For Stubborn Residue – Isopropyl Alcohol (IPA): If the wax is really stuck in the plastic texture, a diluted Isopropyl Alcohol solution (15-30% IPA in distilled water) is very effective. Some car care enthusiasts prefer a dedicated panel prep spray for this.
- Application: Lightly spray the IPA solution onto a clean microfiber towel, not directly onto the trim.
- Gentle Blotting/Wiping: Gently blot or wipe the affected trim. The alcohol helps to dissolve and lift the wax. Be careful not to saturate the area, especially on older or more delicate plastics.
- Rinse and Dry: After using IPA, it’s a good idea to rinse the trim with water and dry it with a separate clean microfiber towel to remove any alcohol residue.
- Protectant Application (Optional): Once the trim is clean and dry, you might want to apply a plastic and rubber protectant to restore its look and provide UV protection.
Understanding Wax Types and Removal
Not all waxes are created equal, and while the general removal methods are similar, understanding the type of protection you’re removing can be helpful.
Here’s a quick look at common types:
| Wax Type | Key Characteristics | Typical Removal Difficulty | Notes |
|---|---|---|---|
| Carnauba Wax | Natural wax derived from palm leaves; offers a deep, warm shine and good durability (typically 1-3 months). | Easy to Moderate | Can sometimes leave a slight haze if built up. Washes off with most car soaps. |
| Synthetic Sealants | Man-made polymer-based coatings; offer excellent durability (3-6+ months) and a bright, reflective shine. | Moderate | Can sometimes be more resistant to basic washing. IPA or dedicated paint cleaners are often best for removal. |
| Hybrid Waxes/Sealants | Formulated with both natural and synthetic ingredients. | Moderate | Removal difficulty is similar to synthetic sealants. |
| Ceramic Coatings (SiO2) | Advanced protective layers offering very long-term durability (1-3+ years) and superior hydrophobic properties. (Technically not a “wax” but often referred to in the same context). | Difficult/Requires Specifics | Not typically removed with simple washing or general wax removers. Requires specialized “stripper” shampoos or polishing. For this article, we focus on traditional waxes. |
For the average car owner using traditional carnauba or synthetic waxes, the methods described above should be highly effective. The key is patience and using the right tools.
Troubleshooting Common Wax Removal Issues
Even with the best intentions, you might run into a few hiccups. Here are some common problems and how to solve them:
White Residue Still on Trim
- Problem: The wax is deeply ingrained in the textured plastic or rubber.
- Solution: Increase the concentration of your IPA solution slightly (up to 50% if needed, but test first) or use a dedicated plastic cleaner specifically designed for removing old waxes and dressings. A stiffer (but still soft) nylon brush can help agitate in the crevices.
Swirl Marks or Scratches Appearing
- Problem: You used an abrasive towel or applied too much pressure during removal.
- Solution: Unfortunately, this means the clear coat was lightly scratched. Your best bet is to now polish the paint to remove these new imperfections. This is why using the softest microfiber towels and gentle techniques is so important.
Paint Looks Dull After Removal
Problem: The removed wax might have been contributing to a perceived shine, or you might have inadvertently stripped any underlying sealant or glaze that was already there.
Solution: This is perfectly normal! A clean, “stripped” surface often looks duller than a waxed one. This is exactly what you want before applying a new protectant. The smooth, clean surface is ready for a fresh, high-quality wax, sealant, or coating application, which will then restore that vibrant shine and protection.
Wax in Battery Terminals or Under the Hood
Problem: Wax can get into unwanted places during application.
- Solution: For engine bays or battery terminals, use a dedicated engine degreaser or a strong APC. You might need sturdy brushes and a good rinse. Ensure you disconnect the battery before cleaning in that area for safety.
Tips for Applying New Wax After Removal
Once you’ve gone through the effort of removing old wax, you want to apply your new protection effectively. Here are a few tips:
- Ensure the Surface is Bone Dry: Water can compromise the bonding of new wax or sealant.
- Work in the Shade: Applying wax on a hot or sunny surface can cause it to dry too quickly, making it difficult to remove and potentially leaving streaks. Always work in a cool, shaded area.
- Apply Thin, Even Coats: Less is often more with waxes and sealants. A thin, even coat provides better protection and is much easier to buff off.
- Use a Clean Applicator Pad: Whether it’s foam or microfiber, use a clean applicator pad separate from your cleaning towels.
- Follow Product Instructions: Always read and follow the specific instructions on your new wax or sealant product, as application and curing times can vary.
A clean slate is the best foundation for long-lasting, beautiful protection for your car’s paint.
Conclusion
Removing old car wax can seem like a daunting task, but as you’ve seen, it’s actually quite straightforward. By using the right tools like soft microfiber towels, quality car wash soap, and perhaps a clay bar or diluted Isopropyl Alcohol for stubborn spots, you can effectively strip away degraded wax. This process not only removes unpleasant build-up and residue from trim but also prepares your car’s paint for its next layer of protection, ensuring a better-looking, longer-lasting shine.
Don’t be afraid to get your hands a little dirty! Following these proven methods will give you the confidence to maintain your car’s appearance, whether you’re a seasoned detailer or just starting out. Enjoy that fresh, clean surface and the beautiful shine you’ve worked hard to achieve!
Frequently Asked Questions
- Q1: Can I just wash my car to remove old wax?
- A1: A good car wash with a quality soap will remove loose dirt and some degraded wax. However, for stubborn build-up or ingrained residue, you’ll likely need additional steps like clay barring or a gentle chemical cleaner to fully strip the old protection.
- Q2: What is the best way to remove wax from black plastic trim?
- A2: Gently agitate a diluted All-Purpose Cleaner (APC) with a soft brush or toothbrush in the trim. For tougher spots, use a microfiber towel slightly dampened with diluted Isopropyl Alcohol (15-30% IPA in distilled water) or a dedicated plastic cleaner.
- Q3: Will removing wax harm my car’s paint?
- A3: No, not if you use the correct methods and tools. Using soft microfiber towels, gentle cleaners, and avoiding abrasive materials will protect your paint. Always test any new cleaner in an