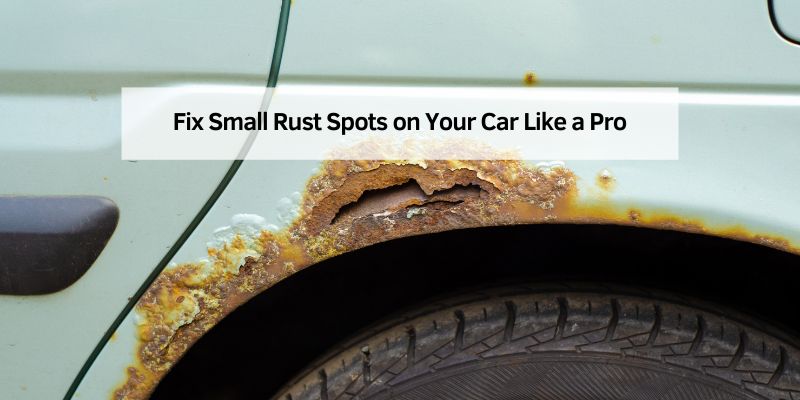
Fix Small Rust Spots on Your Car Like a Pro
Small rust spots on car paint are a common problem — and one you can fix yourself with basic tools and about a day’s work. Catching rust early is critical: a pinhole spot that costs $50 to fix DIY can spread into a panel-wide repair costing $500+ if left untreated. This guide covers exactly how to remove small rust spots from your car and prevent them from returning — plus the feathering, color-matching, and clear coat choices that separate a repair you can still spot from one a body shop customer would never notice.
To remove small rust spots from a car: sand through the rust to bare metal using 80-grit, then 120-grit, then 400-grit sandpaper. Apply rust converter and let it dry 20–30 minutes. Spray 2–3 coats of self-etching primer, then apply matching touch-up paint in thin layers, and finish with clear coat. Total DIY cost: $50–$100. Total time: 1–2 days (mostly drying time).
What Are Small Rust Spots?
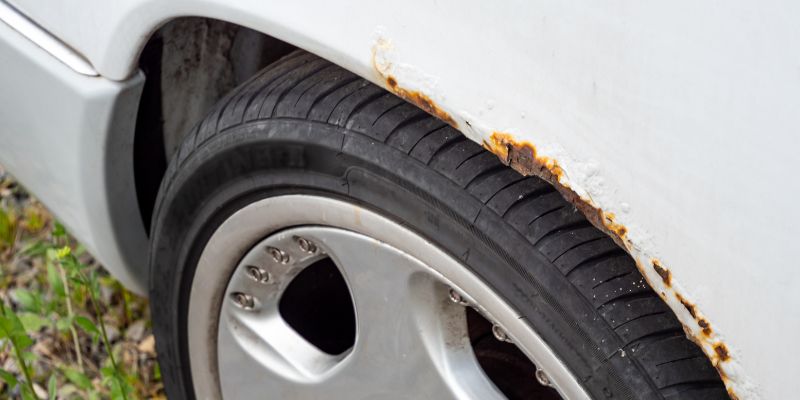
Rust spots are patches of corrosion on a car’s metal surface. They form when water, oxygen, and bare metal interact — a process called oxidation. Small rust spots most commonly appear where the paint has been chipped or scratched, exposing the underlying metal to moisture. If ignored, they spread beneath the paint surface before becoming visible, eventually causing paint bubbling, pitting, and structural weakening. Fixing them early — while they’re still surface-level — is far simpler and less expensive.
Why Small Rust Spots Matter
Surface rust that appears as a small dot can spread aggressively beneath the paint, undermining the surrounding clear coat and primer. A tiny spot on a car’s hood or door can expand into a hole within 12–18 months in wet climates. Beyond aesthetics, deep rust weakens structural panels and dramatically reduces resale value. Addressing spots when they’re quarter-sized or smaller keeps the repair DIY-friendly and the cost minimal.
Tools and Materials You’ll Need
Most of what you need is available at any auto parts or hardware store:
- Sandpaper (80, 120, 400 grit): Removes rust and smooths metal progressively through the grits
- Rust converter: Chemically neutralizes remaining rust and converts it to an inert coating that stops spread
- Self-etching primer: Bonds directly to bare metal and creates a foundation for paint
- Touch-up paint: Must match your car’s paint code exactly for an invisible repair
- Clear coat: Seals the paint and provides UV and moisture protection
- Masking tape and plastic sheeting: Protects surrounding panels from overspray
- Gloves and safety glasses: Essential protection from rust dust and chemical splatter
- Microfiber cloth and car wash soap: For cleaning before and after the repair
Table 1: Tool and Material Costs
| Item | Estimated Cost | Where to Buy |
|---|---|---|
| Sandpaper (variety pack) | $5–$10 | Hardware store |
| Rust converter | $10–$15 | Auto parts store |
| Self-etching primer | $10–$20 | Auto parts store |
| Touch-up paint | $15–$25 | Auto parts store |
| Clear coat | $10–$20 | Auto parts store |
Our Top Pick
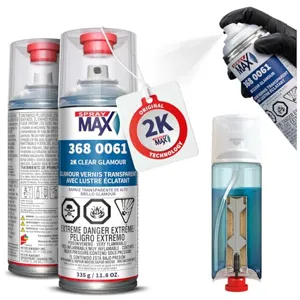
SprayMax 2K Glamour High Gloss Clear Coat
Best for: Panels exposed to constant sun, road salt, or gasoline splash (hoods, roofs, fender edges).
Why we picked it: This is a true 2K product — a hardener chemically cross-links with the resin as it cures, producing a finish that’s noticeably harder and more UV- and chemical-resistant than a single-stage 1K rattle can. It’s the same chemistry body shops spray, just in a self-contained aerosol can.
Main drawback: Contains isocyanates in the hardener — work in a ventilated area and follow the can’s mixing/activation instructions exactly, and once activated it has a limited working window before it sets up in the can.
View Our Pick on Amazon
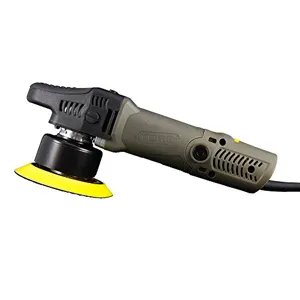
Chemical Guys TORQX Dual-Action Polisher Best for: Feathering repair edges and final paint leveling by machine instead of by hand. Why we picked it: An 8mm random-orbit throw makes it far easier to taper a repair edge evenly than hand-sanding, cutting the risk of an uneven, visible ring around the fix. Main drawback: Overkill for a single dime-sized spot — worth it if you have several repairs or plan to keep it for future detailing. Check on Amazon |
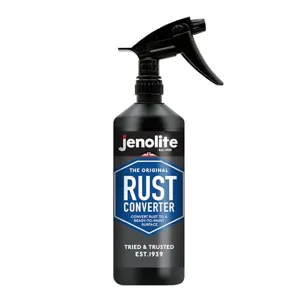
JENOLITE Rust Converter Trigger Spray Best for: Chemically neutralizing any rust that’s left in metal pitting after sanding. Why we picked it: Water-based, all-in-one converter, primer, and inhibitor in a single trigger-spray bottle — converts remaining rust to a paint-ready surface instead of just covering it up. Main drawback: Needs a full dry-through cure (usually overnight) before priming, so it adds a day to the timeline if you skip it. Check on Amazon |
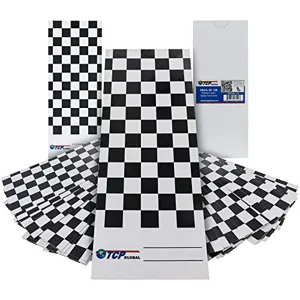
TCP Global Paint Spray-Out Test Cards Best for: Checking your touch-up paint’s color match before it ever touches the car. Why we picked it: The same test-panel method body shops use to catch metamerism — paint that matches in one light but looks off in another — for about the cost of a coffee. Main drawback: An extra step most DIYers skip, but skipping it is exactly why some touch-ups look slightly off in direct sunlight. Check on Amazon |
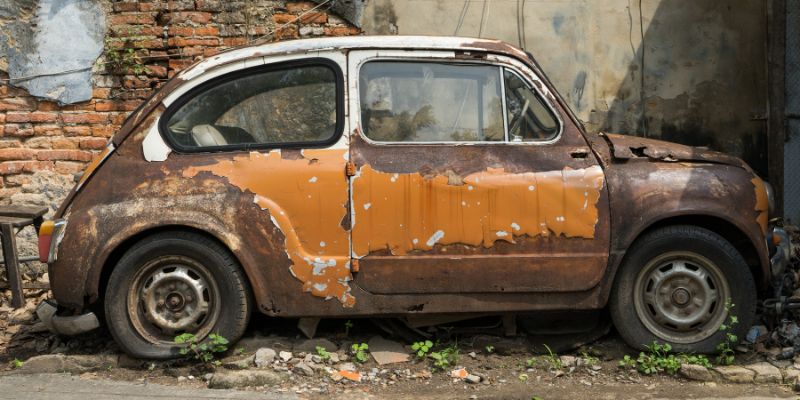
Step-by-Step Guide to Remove Small Rust Spots from Car
Follow these steps on small rust spots on any panel for a clean, lasting repair.
Step 1: Prep Your Work Area
Work in a shaded, well-ventilated area — direct sunlight causes primer and paint to dry too fast and prevents proper adhesion. Lay down a tarp to catch rust dust. Wear gloves and safety glasses before starting; rust particles and paint fumes are both hazardous.
Step 2: Clean the Rusty Area
Wash the rust spot and surrounding area with car wash soap and water to remove dirt, road grime, and contaminants. Dry thoroughly with a microfiber cloth. A clean surface lets you see the full extent of the rust and ensures primer and paint bond properly.
Step 3: Mask Off the Area
Apply masking tape and plastic sheeting around the repair area. Tape along panel lines where possible — this creates a natural boundary that makes the repair blend more naturally into the existing paint. The masked area should extend several inches beyond the rust spot to allow for feathered sanding edges.
Step 4: Sand the Rust Away
Sand through the rust with 80-grit sandpaper until you reach clean, bare metal — you’ll see silver metal beneath where the rust was. Switch to 120-grit to smooth the sanded area and feather the edges into the surrounding paint (this feathering is what makes the repair invisible). Finish with 400-grit wet-dry paper for the smoothest possible surface before priming. Sand gently near the edges to avoid cutting through the existing clear coat on unaffected paint.
Step 5: Apply Rust Converter
Brush or spray rust converter onto the sanded bare metal area. The converter reacts chemically with any remaining rust traces, converting iron oxide to a stable black polymer coating that blocks further oxidation. Let it cure for the time specified on the label — typically 20–30 minutes. Do not sand after applying rust converter; the coating is the base layer.
Step 6: Prime the Area
Apply self-etching primer in thin, even coats — hold the can 10–12 inches from the surface and use sweeping left-right motions. Let each coat flash dry for 10–15 minutes before applying the next. Two to three coats is standard. Self-etching primer bonds chemically to bare metal, creating an adhesion layer that regular paint alone cannot achieve.
Step 7: Paint and Protect
Apply touch-up paint matched to your car’s color code in thin layers — rushing with thick coats causes runs and drips that are harder to fix than rust. Let each layer dry for 10 minutes. Two to three thin coats build the proper depth of color. Finish with clear coat to seal the repair and provide UV protection. Wait 24 hours before touching or washing the repaired area.
How to Make a Rust Repair Invisible: Pro Feathering and Blending Techniques
Following the seven steps above gets rust off your car and paint back on it — but there’s a gap between a repair that stops the rust and one that actually disappears. Body shops close that gap with three habits most DIY guides skip entirely: feathering the sanded edge well past the primer line, testing the paint match on a spray-out card before it touches the car, and choosing the right clear coat chemistry for the panel. None of these add real cost, just a bit more patience.
Feather the Edge Past the Primer Line
Feathering means sanding the boundary between the repair and the original paint into a smooth taper instead of a hard edge. After priming, extend your sanding 2–3 inches beyond the primer’s edge using 400-grit, then 600–800-grit, working in overlapping circles so there’s no ridge where old paint meets new. This is the single technique most home touch-up jobs skip — and it’s the main reason a DIY spot repair often reads as a visible patch instead of blending in. Pros feather every repair this way before a single coat of color goes down.
Test Your Paint Match with a Spray-Out Card First
Even with the correct paint code, mixed touch-up paint can look slightly off once it’s on the car — a problem painters call metamerism, where a color matches under one light but looks different under another. Before spraying the repair itself, spray a small test card with your mixed paint and hold it against the car’s actual panel under three lighting conditions: open shade, direct sunlight, and garage or shop lighting. Body shops never skip this step; it costs a few dollars in cards and five minutes, and it catches a bad match before it’s permanent.
Choose 2K Clear Coat Over Single-Stage Aerosol for High-Exposure Panels
Most single-stage aerosol clear coats are 1K products — they cure by simple solvent evaporation and offer moderate protection, which is fine for a quick touch-up in a low-wear spot. A 2K clear coat uses a separate hardener that chemically reacts with the resin as it cures, producing a finish that’s meaningfully harder and more resistant to UV, gasoline, and chemical exposure. For panels that see constant sun and road spray — hoods, roofs, trunk lids, fender edges — that extra durability is worth the added prep. The trade-off: 2K hardeners contain isocyanates, so mix and spray in a ventilated area and follow the can’s working-time window exactly.
Benefits and Drawbacks of DIY Rust Removal
DIY rust repair saves significant money — a professional body shop typically charges $100–$500+ per spot, while materials cost $50–$100. The trade-off is time and technique: rushing the sanding or paint stages leads to results that look worse than the original rust, and a missed patch of rust will resurface in 6–12 months. For spots larger than a quarter or in structurally critical areas (frame rails, floor pans), professional repair is the better choice.
Table 2: DIY vs. Professional Rust Repair
| Method | Cost | Time Needed | Skill Level |
|---|---|---|---|
| DIY | $50–$100 | 1–2 days | Beginner |
| Professional | $100–$500+ | 1–3 days | None needed |
Other Ways to Fix Rust
If sanding feels like too much work for a very small spot, there are alternatives. A rust remover gel (such as Iron X or Evapo-Rust) dissolves surface rust chemically — apply, wait, and wipe. This works well for pinpoint spots that haven’t penetrated to bare metal yet. A touch-up paint pen works for tiny chips that have just begun to rust. For larger, deeper, or structural rust — the kind that has eaten through a panel rather than sitting on the surface — see our full surface, scale, and deep rust repair guide, or have a body shop cut out the rusted panel section and weld in new metal — the only permanent solution for advanced rust.
My Top Tips for Success
- Inspect thoroughly first. Check wheel wells, door bottoms, and underside edges where rust starts unseen. Surface spots often have deeper rust underneath than they appear.
- Don’t rush sanding. The most common DIY failure is inadequate sanding — if any rust remains before applying rust converter, the repair will fail within months.
- Match paint exactly. Use your car’s paint code (found on a sticker in the door jamb, hood, or trunk) to get correct touch-up paint. Even slight color mismatches are visible in direct sunlight.
- Work in dry conditions. Moisture interferes with primer and paint adhesion. Ideal conditions: above 60°F, humidity below 70%, no rain in the 24-hour forecast.
Common Mistakes to Avoid:
- Skipping rust converter — rust beneath the primer will bubble back through in months
- Applying thick paint coats — thin layers bond better and dry without runs
- Poor masking — overspray on surrounding paint creates texture differences that show clearly
Safety First
Always wear gloves and safety glasses when sanding or painting. Rust dust is a respiratory irritant — wear a dust mask during sanding steps. Work in a well-ventilated area when using rust converter, primer, and paint, as the fumes are hazardous in enclosed spaces. Follow all chemical manufacturer instructions for drying times and safe disposal.
Table 3: Safety Gear Checklist
| Item | Why It’s Needed |
|---|---|
| Gloves | Protects hands from rust, chemicals, and paint |
| Safety glasses | Shields eyes from sanding dust and spray |
| Dust mask (N95) | Prevents inhaling rust particles during sanding |
How to Prevent Rust Spots
Prevention is far easier than repair. Wash the car regularly — especially after winter driving when road salt coats the underside and wheel wells. Dry thoroughly after washing to prevent standing water. Apply a quality wax or paint sealant every 3–4 months; the protective layer is your paint’s primary defense against moisture penetration. Address paint chips and scratches immediately with touch-up paint before moisture reaches bare metal.
- Wash the car after driving in rain, snow, or coastal conditions
- Apply touch-up paint to chips within days of noticing them
- Wax every 3–4 months to maintain a moisture barrier
- Car door dents that chip the paint are one of the most common rust starting points — repair dents promptly before moisture reaches bare metal. Check water spots and remove them promptly — prolonged water contact accelerates rust initiation
Conclusion
Removing small rust spots is one of the more straightforward DIY car repairs — the tools are inexpensive, the steps are systematic, and the results look professional when done patiently. Sand thoroughly, use rust converter, apply primer in thin coats, match the paint code exactly, and seal with clear coat. The entire materials cost runs $50–$100. Catching rust early at the pinhole stage keeps it from becoming a $500 body shop visit — monthly checks of vulnerable areas (wheel wells, door edges, hood front) are the easiest prevention strategy. If you want the full picture of why rust starts and how it spreads once it appears — including causes and prevention scenarios this page doesn’t dig into — our companion piece on dealing with small rust spots effectively covers that ground; this guide stays focused on the sand-convert-prime-paint process plus the feathering, color-matching, and clear coat choices that make a repair disappear. And if a spot is already spreading, see how to stop rust on a car from spreading before it grows past the pinhole stage.
Frequently Asked Questions
What causes small rust spots on cars?
Rust spots form when water and oxygen reach bare metal through paint chips or scratches. Road salt significantly accelerates the process by lowering water’s freezing point and increasing its electrical conductivity, which speeds the electrochemical oxidation reaction. Check the car monthly for new chips and address them immediately.
Can I fix rust spots without sanding?
For very light surface rust that hasn’t penetrated to bare metal, a rust remover gel like Iron X can dissolve the oxidation without sanding. Spray or brush it on, wait a few minutes, and wipe off. For rust that has pitted the metal or lifted the paint, sanding down to bare metal is necessary — applying paint over active rust without removing it first will not last.
How do I find my car’s paint code?
Look for a sticker or metal plate in the door jamb (driver’s side), under the hood near the firewall, or in the trunk area. The code is a combination of letters and numbers (e.g., “WA8555” for GM or “B526P” for Toyota). Take this code to an auto parts store to get exactly matching touch-up paint.
Will rust come back after I fix it?
Rust will return if any active rust was left beneath the primer, or if the clear coat doesn’t fully seal the repair. Using rust converter (not just sanding) and applying proper clear coat significantly reduces recurrence. Maintain the clear coat by keeping the area waxed and checking monthly for any new bubbling around the repair edges.
Should I hire a pro for small rust spots?
For surface-level spots on body panels, DIY is appropriate and cost-effective. Hire a professional when: the rust is larger than a few inches across, the metal has fully corroded through, the spot is on a structural component (frame, floor pan, door hinge pillar), or if a color-match repair is needed and the car has a metallic or pearlescent finish that’s difficult to blend.
How long does it take to fix a rust spot?
Active work time is 2–4 hours, but the total elapsed time is 1–2 days because of required drying times between rust converter, primer coats, paint coats, and clear coat. Rushing drying times is the most common cause of poor results. Plan to start early in the day and let the final clear coat cure overnight before driving.
Can I prevent rust without a garage?
Yes. Wash the car regularly (especially in winter), dry it thoroughly after washing, and apply wax or paint sealant every 3–4 months. A quality car cover provides excellent protection when parked outdoors long-term. Touch up any paint chips immediately before moisture reaches the metal.
What’s the difference between a DIY touch-up and a professional feather-blend repair?
A basic DIY touch-up sands and paints only the rust spot itself, which often leaves a visible ring where the new paint meets the old. A professional feather-blend repair extends the sanding 2–3 inches past the primer edge in a smooth taper, tests the paint match on a spray-out card before it touches the car, and typically finishes with a 2K clear coat instead of a single-stage aerosol. None of these steps require professional equipment — they just add time and attention most quick touch-ups skip.
Should I use 2K or 1K clear coat on a rust repair?
Use a 1K single-stage aerosol clear coat for a quick touch-up on a low-wear area, since it’s simpler to apply and doesn’t require mixing a hardener. Choose a 2K clear coat for panels that see constant sun, road salt, or gasoline splash — hoods, roofs, trunk lids, and fender edges — because its chemically cured finish is noticeably harder and more UV- and chemical-resistant. Handle 2K products in a ventilated area, since the hardener contains isocyanates.