How To Remove Tinted Stickers From Car Windows Cleanly
It’s a common frustration. You’ve got a sticker on your car window, maybe a parking permit, a registration tag, or even an old tint film. You want it gone.
But the thought of scraping and scratching your car glass makes you hesitate. You worry about leaving behind sticky residue or cloudy marks. This guide is here to help you tackle that stubborn tint or sticker.
We’ll walk through the easiest ways to get it off cleanly. You’ll feel great about having a clear, spotless window again. Let’s get that old sticker removed without any fuss.
Getting rid of tinted stickers from car windows cleanly involves patience and the right tools. Heat helps soften the adhesive. Gentle scraping and a good cleaning solution are key. The goal is a smooth, clear surface without scratches or sticky residue. This process is manageable for most car owners.
Understanding Tinted Stickers and Adhesives
Tinted stickers on car windows are often made of vinyl. They might be factory-applied tints or aftermarket additions. The real challenge usually lies in the adhesive holding them to the glass. This glue can be strong. It might also degrade over time, becoming brittle or gummy. Some adhesives are designed to be permanent. Others can soften with heat, which is a good thing for removal.
The type of window matters too. Side windows and rear windows are usually made of tempered glass. This glass is strong but can be scratched. The front windshield is typically made of laminated glass. This is two layers of glass with a plastic film in between. Scratching this type can be more serious. It might require professional repair.
Understanding the sticker and the glue is the first step. It helps you choose the best method. It also helps you avoid making a mess or damaging your car. Many people try to peel them off dry. This often leads to tearing the sticker. Then you’re left with tiny pieces and a sticky backing. That’s never fun.
Personal Experience: The Sticker That Wouldn’t Budge
I remember one hot summer afternoon, I was trying to remove an old registration sticker from my rear passenger window. It was a faded, brittle thing. I’d tried peeling it before, and it just flaked off, leaving the sticky part behind. This time, I was determined. I grabbed a plastic scraper and started working. The sun was beating down, making the glass hot. But even that didn’t seem to help much.
I pulled and scraped, and the sticker tore into a million tiny pieces. Then came the sticky residue. It was like trying to clean super glue off glass. I used Goo Gone, then Windex, then rubbing alcohol. Each time, it seemed to smear more than remove. I was getting frustrated. My knuckles were sore from scraping. A small part of me started to panic. Was I going to have to live with this sticky ghost forever? Or worse, damage my window permanently? I felt a wave of annoyance wash over me. I just wanted a clean window. This felt way harder than it should be.
Sticker Removal Steps: A Quick Overview
Preparation is Key: Clean the window first. Gather your supplies.
Soften the Adhesive: Use heat or a remover.
Gentle Scraping: Use a plastic tool.
Remove Residue: Apply a cleaner.
Final Polish: Make it sparkle.
The Magic of Heat: Softening the Glue
Heat is your best friend when dealing with sticky adhesives. The warmth makes the glue softer and more pliable. This allows it to release from the glass more easily. You have a few options for applying heat.
The most common and easiest way is to use a hairdryer. Set it to a medium or high heat setting. Hold it about 4-6 inches away from the sticker. Move the hairdryer back and forth across the entire sticker. Do this for about 1-2 minutes. You want the sticker and the glass to feel warm to the touch.
Be careful not to overheat one spot. You don’t want to crack the glass, especially in cold weather. Also, avoid touching the hairdryer directly to the glass.
Another option, if you have one, is a heat gun. These are more powerful. Use them with extreme caution. Keep them on a low setting. Keep them moving constantly. They can heat the glass up very quickly. For most car window stickers, a hairdryer is perfectly sufficient and much safer.
If it’s a sunny day, you can let the sun do some of the work. Park your car in direct sunlight for an hour or two. This can warm the window enough to help. You can then proceed with removal.
Choosing Your Removal Tools Wisely
The tools you use are important. You want things that will get the job done without causing damage.
For scraping, always opt for plastic. A plastic razor blade or a plastic scraper is ideal. These are designed for cleaning glass and other delicate surfaces. They are much less likely to scratch than metal. You can find them at auto parts stores or even online. Even a credit card or a stiff plastic gift card can work in a pinch.
Avoid metal razor blades if at all possible. If you must use one, hold it at a very shallow angle. Use it very gently. But I strongly advise against it for car windows. The risk of a permanent scratch is too high.
For cleaning, you’ll need a good glass cleaner. Windex is a popular choice. Isopropyl alcohol (rubbing alcohol) is also very effective. It helps break down sticky residue. You might also want a dedicated adhesive remover. Products like Goo Gone or WD-40 can be useful. However, always test these in an inconspicuous area first. Make sure they don’t damage any surrounding trim or paint.
Safe Scraping Toolkit
- Plastic Razor Blades (best choice)
- Plastic Scraper Tool
- Old Credit Card or Gift Card
- Microfiber Cloths (for wiping and drying)
- Spray Bottle with Warm Water (optional, for lubrication)
Step-by-Step Guide: Removing the Sticker
Let’s walk through the process together. Imagine you’re doing this right now.
First, make sure your car is parked in a safe, accessible spot. If possible, work in the shade. This prevents the glass from getting too hot too quickly.
Step 1: Clean the Area
Spray the window area with a glass cleaner or just plain water. Wipe it down with a clean microfiber cloth. This removes any dirt or grit. You don’t want to grind dirt into the glass as you scrape.
Step 2: Apply Heat
Grab your hairdryer. Set it to a medium-high heat. Hold it about 4-6 inches from the sticker. Move it back and forth. Warm the entire sticker for about a minute or two. The glass should feel warm, not scorching hot.
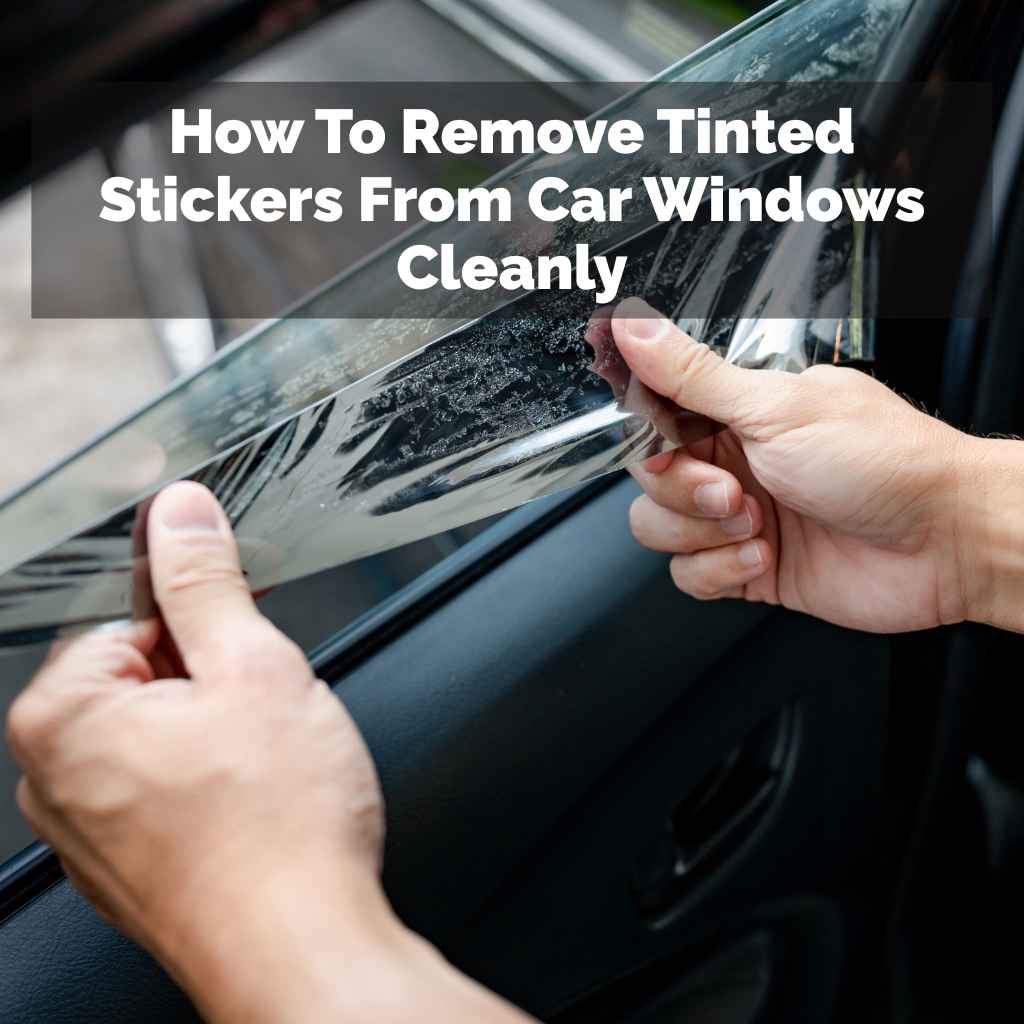
Step 3: Start Peeling
Try to find a corner or edge of the sticker. Gently lift it with your fingernail or the edge of your plastic scraper. If the adhesive is soft enough, the sticker should start to peel away.
Peel slowly and steadily. Try to pull the sticker back on itself, at a low angle. If it starts to tear, stop. Apply more heat and try a different section.
Step 4: Scrape Away
If peeling isn’t working perfectly, it’s time for the plastic scraper. Hold the scraper at a shallow angle to the glass. Gently work it under the edge of the sticker. Use short, firm strokes. Let the scraper do the work. Don’t force it.
If you hit resistance, apply more heat to that spot. You can also spray a little soapy water or glass cleaner to lubricate the area. This can help the scraper glide more easily.
Step 5: Tackle the Residue
Once the main part of the sticker is off, you’ll likely have some sticky residue left behind. This is where the real work can begin. Don’t panic!
Spray the residue generously with your chosen cleaner. This could be isopropyl alcohol, a commercial adhesive remover like Goo Gone, or even a mix of vinegar and water. Let it sit for a few minutes. This allows the cleaner to break down the glue.
Then, use your plastic scraper again. Or, you can use a microfiber cloth soaked in the cleaning solution. Rub the residue firmly in a circular motion. You should see it start to ball up and lift off the glass.
You might need to reapply the cleaner and repeat the rubbing process several times. Patience is key here. Don’t rush it.
Step 6: Final Clean and Polish
Once all the sticker and residue are gone, give the window a thorough cleaning. Use a good quality glass cleaner. Spray it generously. Wipe the entire window with a clean, dry microfiber cloth. Use an ‘S’ pattern or top-to-bottom strokes to avoid streaks.
Check the window from different angles in good light. If you see any smudges or missed spots, repeat the cleaning process. You want a perfectly clear, streak-free finish.
Residue Removal Options
- Isopropyl Alcohol: Effective, evaporates quickly.
- Goo Gone / Adhesive Removers: Stronger, follow instructions.
- WD-40: Works well, but needs thorough cleaning after.
- Vinegar & Water: A good natural option for lighter residue.
- Warm Soapy Water: Can help soften, especially with heat.
Alternative Methods for Stubborn Stickers
Sometimes, even with heat and scraping, a sticker can be incredibly stubborn. Here are a few other tricks to try.
The Car Wash Solution
Some people have success with a high-pressure car wash. The hot water and soap can help soften the adhesive. You can try directing the spray at the sticker. Then, attempt to peel or scrape it while it’s still warm.
Rubbing Alcohol Soak
If heat isn’t cutting it, try soaking a cloth or paper towel in isopropyl alcohol. Press this soaked material firmly onto the sticker. You might need to hold it there for 10-15 minutes. Cover it with plastic wrap to keep it from drying out too fast. The alcohol can penetrate the sticker and dissolve the adhesive from the inside out. After soaking, try peeling and scraping.
Steam Power
A garment steamer or even a steam cleaner can be very effective. The steam penetrates the sticker and softens the adhesive quickly. Be careful with the heat. Keep the steamer moving. This method is great for larger tint films. You can often peel them off in large sections after steaming.
Vinegar Power
White vinegar is another natural option. Mix equal parts white vinegar and water in a spray bottle. Spray the sticker and let it sit for about 10-15 minutes. Then try to scrape it off. It’s not as strong as alcohol or commercial removers, but it can work for less aggressive adhesives.
Real-World Context: Why Stickers Stick So Well
Car window stickers and tints are designed to stay put. Manufacturers use adhesives that can withstand temperature changes, moisture, and vibrations from driving.
Weather plays a big role. In hot climates, the sun bakes the adhesive, sometimes making it stickier. In cold climates, the adhesive can become brittle. This makes it easier to break off, but also harder to remove cleanly.
The type of glass also matters. The smooth surface of glass is ideal for adhesives to bond to. Over time, dirt and grime can get trapped under the sticker. This can make removal harder.
What This Means for Your Car
Understanding these removal methods means you can tackle this task confidently. You don’t need to fear damaging your car. It means you can keep your car looking its best. A clean window improves visibility. It also just makes the car look nicer.
When it’s normal to have a sticker, it’s usually when it’s required by law, like a registration sticker. It’s also normal to want it gone once it expires.
When to worry? If you are using a metal scraper and feel like you are digging in, or if you see visible scratches forming, stop. If you are using strong chemicals and they start to affect surrounding paint or trim, stop and clean them off immediately.
Simple checks include looking at the window after you finish. Is it crystal clear? Are there any dull spots or scratches? If so, you might need to use a polishing compound designed for glass. But usually, the methods above leave the glass perfect.
Tint Removal vs. Sticker Removal
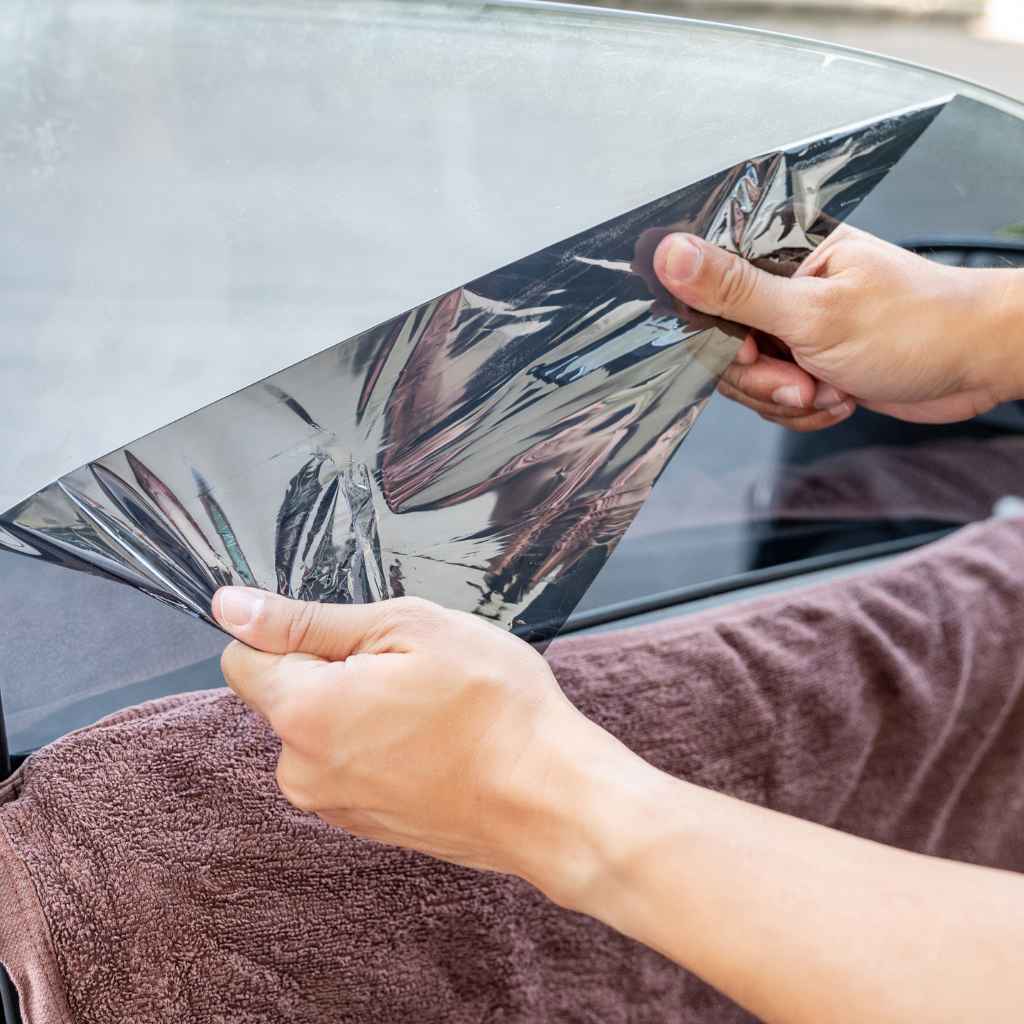
Tint Film: Often covers a larger area. Can be trickier. Heat is crucial.
Often peels off in sheets if heated correctly. Residue can be extensive.
Single Stickers: Usually smaller. May tear easily. Focus on lifting an edge and working slowly.
Quick Tips for a Smooth Removal
Here are some final tips to make your sticker removal job easier.
Work in Sections: Don’t try to remove the whole sticker at once. Focus on a small area. Heat, scrape, and clean that part before moving on.
Be Patient: Rushing this job is how you make mistakes. Take your time.
Clean Your Tools: Wipe your scraper and cloths often. This prevents spreading old glue around.
Ventilation is Good: If using strong chemicals, make sure the area is well-ventilated. Open your car doors.
Test Removers: Always test strong removers on a small, hidden spot first.
Protect Surroundings: Use towels to protect your car’s paint or trim from cleaners.
Frequently Asked Questions About Sticker Removal
Can I use a razor blade to remove stickers from car windows?
It is not recommended. Metal razor blades can easily scratch tempered glass on car windows. A plastic razor blade is a much safer alternative. If you must use a metal blade, use extreme caution and hold it at a very low angle.
How long does it take to remove a car window sticker?
It can take anywhere from 15 minutes to an hour or more. This depends on the sticker type, adhesive strength, and how stubborn it is. Patience is key.
What is the best way to remove sticker residue from car windows?
Isopropyl alcohol is highly effective for sticker residue. Commercial adhesive removers like Goo Gone also work well. Apply the cleaner, let it sit for a few minutes, then rub with a cloth or scrape gently with a plastic tool.
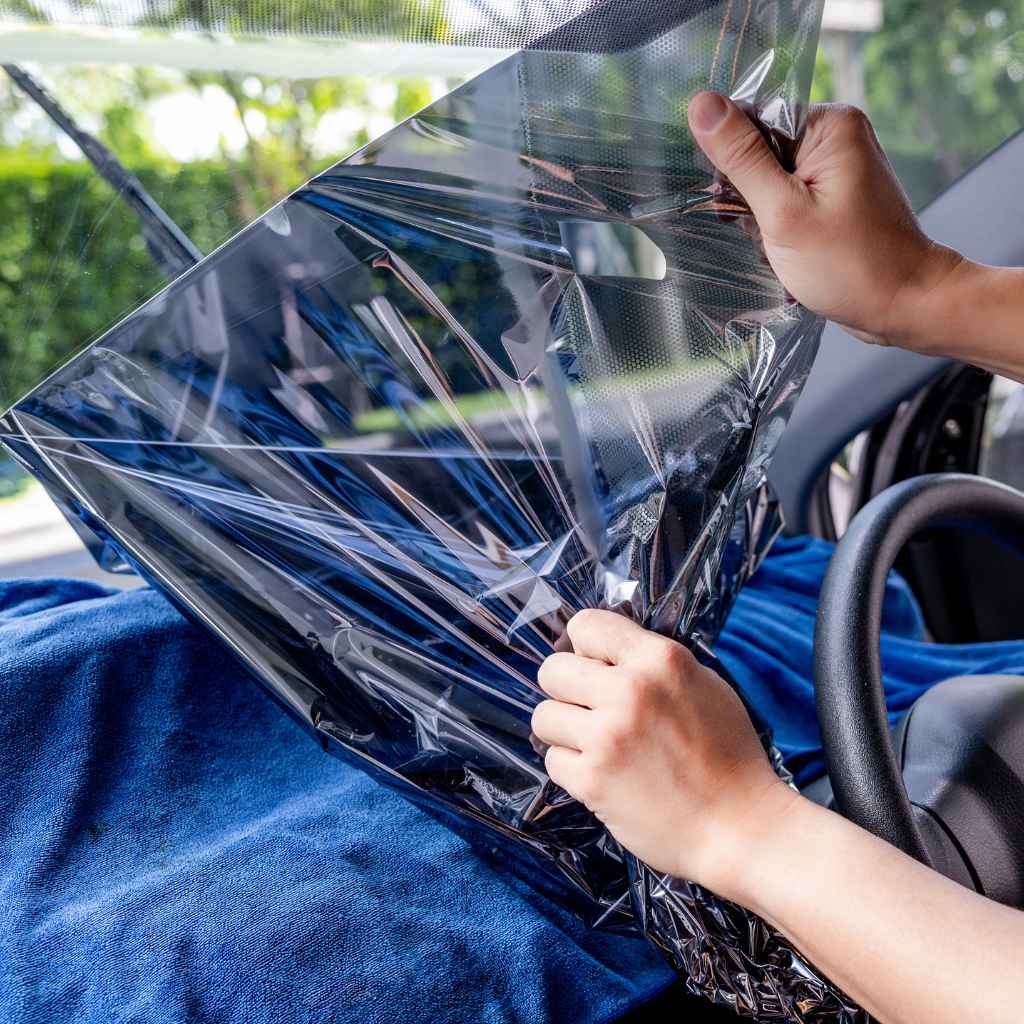
Can I remove tint film from my car windows?
Yes, tint film can be removed. Heat from a hairdryer or heat gun is essential to soften the adhesive. Then, carefully peel it off, often in large sections. You will likely need to clean off adhesive residue afterward.
Will Windex remove sticker residue?
Windex can help with lighter residue, especially if used with heat and a bit of scrubbing. For stronger adhesives, it’s often not enough on its own. You may need a stronger cleaner like isopropyl alcohol or a dedicated adhesive remover.
Is it safe to use WD-40 on car windows for stickers?
WD-40 can help break down adhesives. It’s quite effective for this. However, it can leave an oily film. You must clean the window thoroughly with a good glass cleaner afterward to remove all traces of WD-40.
Conclusion
Removing tinted stickers from your car windows doesn’t have to be a headache. With the right approach, a little heat, and some gentle tools, you can achieve a perfectly clean window. Remember to be patient. Take your time with the process. You’ll be rewarded with a clear, scratch-free view. Enjoy your spotless car glass!