Do You Check Antifreeze When Car Is Hot Or Cold? Essential Guide
You must always check your car’s antifreeze (coolant) level when the engine is completely cold and turned off. Checking when hot is very dangerous due to high pressure, which can spray scalding fluid and cause severe burns. Always wait until your engine is cool for safe and accurate readings.
How often have you worried about that little gauge creeping up in traffic? Keeping your engine cool is vital, and the antifreeze is the hero making sure it stays that way. But when it comes time to top it up, a simple question causes big confusion: Should you check it hot or cold? This is a super common worry for new car owners. Getting this simple step wrong could lead to a messy situation, or worse, damage your engine later. Don’t worry! I’m here to clear up the confusion with easy steps. We will learn the safe, right way to check your coolant level so you can maintain your car like a pro. Let’s look at safety first, then accuracy, and put your mind at ease.
The Only Safe Answer: Why You Must Check Antifreeze When Cold
When dealing with your car’s cooling system, safety is always priority number one. The cooling system is pressurized when the engine runs, which means the coolant inside is much hotter than boiling water. Think of it like a shaken soda can—if you open it quickly, things go everywhere.
This rule is universal across nearly all modern vehicles. Never, ever attempt to open the radiator cap or the coolant reservoir cap while the engine is hot or even warm.
The Danger of Checking Hot Coolant
When your engine runs, the thermostat opens, and the water pump circulates coolant throughout the engine block and radiator. This builds significant pressure inside the closed system. This pressure dramatically raises the boiling point of the coolant/water mixture.
Here is what happens if you check it hot:
- Sudden Pressure Release: Removing the cap releases this intense pressure instantly.
- Scalding Spray: The superheated coolant will erupt out of the opening like a geyser.
- Severe Burns: This hot, pressurized spray causes immediate, serious burns to your hands, face, and body.
- System Damage: Rapid cooling or depressurization can sometimes put stress on older hoses or radiator components.
Because the risk of personal injury is so high, the standard, expert advice is crystal clear: Check coolant levels only when the engine is completely cold.
What Does “Cold” Really Mean for Your Car?
For safety, “cold” needs a specific definition. It doesn’t just mean the car hasn’t moved in five minutes. It means the entire engine assembly has returned to ambient (outside) temperature.
Here’s how you know it’s safe to check:
- Ensure the engine is switched off.
- Wait for at least one hour after driving on a short trip.
- If you’ve been driving on the highway or towing, wait two to three hours. A large engine holds heat longer.
- The radiator hoses should feel completely cool and soft to the touch, not firm or warm.
If you can safely place your hand on the upper radiator hose without pulling it away instantly, it is likely safe to proceed. Always err on the side of caution—if you feel any warmth, wait longer.
How to Safely Check Your Antifreeze Level (Step-by-Step Guide)
The good news is checking your antifreeze is straightforward once you know where to look and wait for the temperature to drop. We will focus on the overflow reservoir, which is the easiest and safest place for routine checks.
Tools You Might Need
For most beginner checks, you won’t need many tools, but keep these handy:
- Rags or shop towels (for wiping up spills).
- The correct type of coolant/antifreeze (check your owner’s manual!).
- Safety glasses (recommended for added peace of mind).
Step 1: Park and Wait Safely
Pull your car into a safe spot, engage the parking brake, and turn the engine off. Now, set a timer. For most daily driving, plan on waiting 60 to 90 minutes before touching anything under the hood related to the cooling system.
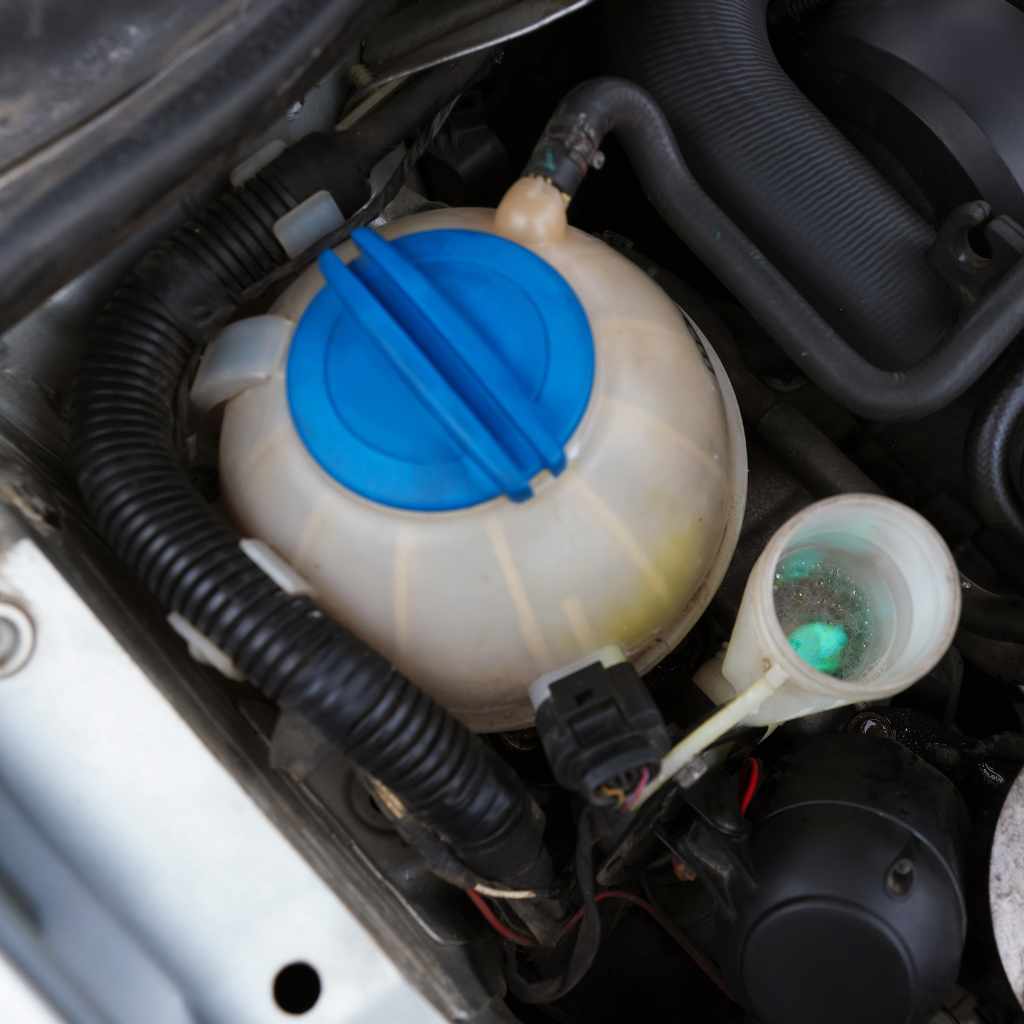
Step 2: Locate the Coolant Reservoir
Open your hood. You are looking for the coolant overflow tank or reservoir. This is usually a translucent (partially see-through) plastic container, often white or light-colored, sitting somewhere near the radiator on the side of the engine bay.
It will often have markings indicating “MIN” or “LOW” and “MAX” or “FULL.” Sometimes, on older vehicles, the only place to check is directly in the radiator filler neck, but if your car has a separate plastic reservoir, use that first.
Step 3: Read the Level (Cold Engine)
Look at the side of the tank as the engine sits on a level surface. The coolant level should sit between the “MIN” and “MAX” lines. If it is nearer the MIN line or below it, you need to add more fluid.
Expert Tip: Coolant loses its effectiveness over time. If the fluid looks rusty, muddy, or you notice floating debris, it’s time for a coolant flush, not just a top-up. Consult resources like the Environmental Protection Agency (EPA) for proper disposal guidelines if you drain fluid.
Step 4: Adding Coolant Safely (If Needed)
If the level is low, put on your safety glasses (just in case) and slowly unscrew the cap of the reservoir tank. Do not yank it off quickly.
Add the correct type of coolant mix. Most modern cars require a 50/50 pre-mixed coolant/water solution. Never just add plain water unless it is an extreme emergency, as pure water does not protect against freezing or boiling as well.
Fill the tank until the fluid reaches the “MAX” line. Do not overfill it, as the system needs space to expand when it heats up.
Step 5: Final Check and Monitoring
Securely tighten the cap. Close the hood. Start the engine and let it run for 10 minutes, watching the temperature gauge closely. Ensure the heater blows hot air inside the cabin, which confirms coolant is flowing correctly. After you turn the car off, wait another hour and re-check the level one last time to ensure it settled correctly.
Understanding Your Coolant: Color Matters
Antifreeze is not just one type of fluid; it comes in several chemical formulations based on the metals and plastics used in your specific vehicle’s engine. Using the wrong type can cause corrosion and expensive damage. This is known as coolant degradation, and it’s why you need the right replacement fluid.
Here is a quick guide to common coolant colors. Always verify the exact requirement in your owner’s manual.
| Coolant Color | Common Type | Usage Notes |
|---|---|---|
| Green | IAT (Inorganic Acid Technology) | Older vehicles (pre-1990s). Requires frequent changes (every 2 years/30k miles). |
| Orange/Red/Pink | OAT (Organic Acid Technology) | Common in many modern US/European cars. Lasts longer (up to 5 years/150k miles). |
| Yellow/Blue/Purple | HOAT (Hybrid Organic Acid Technology) | A mix, often used in newer European/Asian vehicles. |
Mixing colors is generally a recipe for disaster unless the manufacturer specifically states they are compatible. When in doubt, stick to a 50/50 mix of distilled water and the OEM-specified coolant.
When Do You Need to Pop the Radiator Cap (The Hot Component)?
As mentioned, checking the reservoir is standard for topping off. However, sometimes the reservoir level looks fine, but you suspect a larger problem, or you need to perform a coolant flush or replacement. This requires opening the radiator cap, which sits directly on top of the radiator itself.
This action should ONLY ever be taken when the engine is stone cold.
If you suspect a leak or need to ensure the system is completely full after a repair, the cold radiator cap removal is necessary:
- Confirm the engine has been off for several hours (preferably overnight).
- Place thick gloves or a heavy towel over the radiator cap.
- Turn the cap slowly to the first stop (where you hear a slight hiss or release of residual air pressure). This is the safety notch.
- Once the hiss stops, press down and twist completely to remove the cap.
- The coolant should be visible near the top. If it is low, slowly add the appropriate mix until it reaches the neck opening.
Note on Modern Cars: Many newer vehicles, especially those with complex cooling systems or plastic radiators, may not even have a traditional, easily accessible radiator cap. The reservoir often acts as the primary fill point, simplifying this step for DIY mechanics.
What If My Car Overheats? Immediate Actions vs. Checking Coolant
Experiencing overheating is stressful. The temptation is to immediately pull over, shut it off, and check the coolant level. Resist the urge to check the fluid immediately!
Immediate Overheat Protocol
If your temperature gauge spikes into the red zone or an overheat warning light comes on:
- Turn off the A/C and turn your cabin heater on full blast. This pulls heat away from the engine and into the car cabin—it helps temporarily redistribute the heat.
- Pull over safely to the side of the road at the first opportunity.
- Shut the engine off immediately.
- Pop the hood (if steam isn’t billowing out violently). Opening the hood helps the engine bay dissipate heat faster.
- Wait. Do not touch the radiator cap or any hoses for at least two hours.
- Once cool, check the reservoir. If it’s empty, you have a major leak or boil-off. Towing the vehicle to a professional shop might be the safest next step.
Remember, overheating is usually a symptom of a bigger problem (like a stuck thermostat, a leak, or a failing water pump), not just low fluid. Checking the fluid when hot only tells you if the coolant boiled away due to the overheat.
Coolant Checks Between Fluid Changes: How Often?
How frequently should you perform this safety check? It depends on how much you drive and the age of your vehicle. Checking regularly builds great preventative maintenance habits.
Recommended Coolant Check Frequency
- Standard Daily Driver: Check the reservoir level once a month.
- Long Road Trip Preparations: Check the day before you leave.
- Cars with Known Minor Leaks: Check weekly, as you’ll need to top off more frequently.
-
Following a Repair: Check daily for the first week to ensure the system is holding pressure and fluid.If your coolant reservoir level drops significantly between these checks, you have an external leak, and professional service is needed soon. Coolant doesn’t just disappear into thin air; it either leaks out or burns off due to an internal gasket failure.
Troubleshooting: What If the Coolant Level Seems Wrong Even When Cold?
Sometimes, even after waiting and checking correctly, the readings seem confusing. Here are a few common issues a beginner might run into:
Symptom on Cold Check Likely Cause Action Required Level is very low; reservoir is almost empty. Significant external leak (hose, radiator) or large internal leak (blown head gasket). Do not drive far. Top up carefully and have a mechanic inspect for leaks immediately. Level is fine, but the radiator hose feels squishy/soft. Hose deterioration or air trapped in the system (bad bleed). Inspect hoses for cracks. If hoses look fine, the system may need to be properly “burped” to remove air pockets. Coolant level is fine, but the engine runs hot. Stuck thermostat, failing water pump, or blocked radiator core. Coolant level isn’t the issue; a circulation component is failing. Schedule service. It is important to remember that your car’s cooling system is designed to be sealed. A perfectly sealed system should rarely require top-ups unless you are replacing components or performing routine maintenance. If you find yourself adding massive amounts of coolant monthly, safety dictates a full inspection.
FAQ: Beginner Questions About Antifreeze Checks
Q1: Is it safe to touch the radiator cap if the engine has been off for 30 minutes?
A: No, 30 minutes is usually not enough time. The system needs to cool down to ambient temperature. Wait at least one hour, or until all radiator components and hoses are cool to the touch. Safety first!
Q2: What if I run out of coolant on the road? Can I use tap water?
A: In an absolute emergency, yes, use whatever clean water you have to get to a safe location or gas station. Tap water will work temporarily to prevent immediate overheating, but it lacks corrosion inhibitors and freezes easily. Replace the emergency water with the proper coolant mix as soon as possible.
Q3: How do I know if my car uses antifreeze or just coolant?
A: They are basically the same thing! “Antifreeze” is the common name for the chemical additive (like ethylene glycol or propylene glycol) that prevents water from freezing and boiling. “Coolant” is the term used for the final mixture of antifreeze and distilled water (usually 50/50).
Q4: Can checking the antifreeze level cold damage my engine?
A: Checking the level itself when cold cannot damage the engine; in fact, it’s the only way to ensure accuracy without risking injury. Neglecting to check and running the car critically low on coolant is what causes damage.
Q5: Where do I find the right type of antifreeze for my car?
A: The single best source is your vehicle’s owner’s manual. It will specify the required coolant technology (e.g., OAT, HOAT) and color. If you do not have the manual, look for the information printed on the cap of the old reservoir or contact your local dealership parts department with your VIN.
Q6: Why is my coolant level dropping but there is no puddle under the car?
A: This usually points to an internal leak, meaning the coolant is being burned in the combustion chamber or leaking into the oil system. Look for white smoke from the exhaust pipe or milky/foamy oil under the oil cap. These are serious signs requiring immediate professional repair.
Conclusion: Maintaining Confidence Under the Hood
You now have the confidence and the clear steps to manage one of the most important fluid checks on your vehicle. The key takeaway is simple: patience equals safety. Always check your antifreeze reservoir levels when the engine is completely cold.
By dedicating a few minutes once a month to this quick safety inspection, you are actively preventing overheating, which saves you from costly breakdowns and road-side stress. Remember the coolant colors, respect the pressure when hot, and always prioritize waiting for that engine to cool down. You are taking excellent care of your car, and that’s what smart driving is all about. Keep checking, stay safe, and enjoy the peace of mind that comes with knowing your cooling system is topped up correctly!