Car Engine Troubleshooting Guide
Car engine troubleshooting starts with one rule: stop driving for oil-pressure or temperature warnings, heavy knocking, overheating, or a severe misfire; otherwise check five basics first, fluids, battery voltage, visible leaks, scan codes, and the air intake. I have seen people guess wrong and turn a $20 sensor issue into a cooked catalytic converter, spun bearing, or tow bill. This guide lays out a triage-first workflow, safe home checks, stop-driving signs, and the point where a shop visit stops being optional.
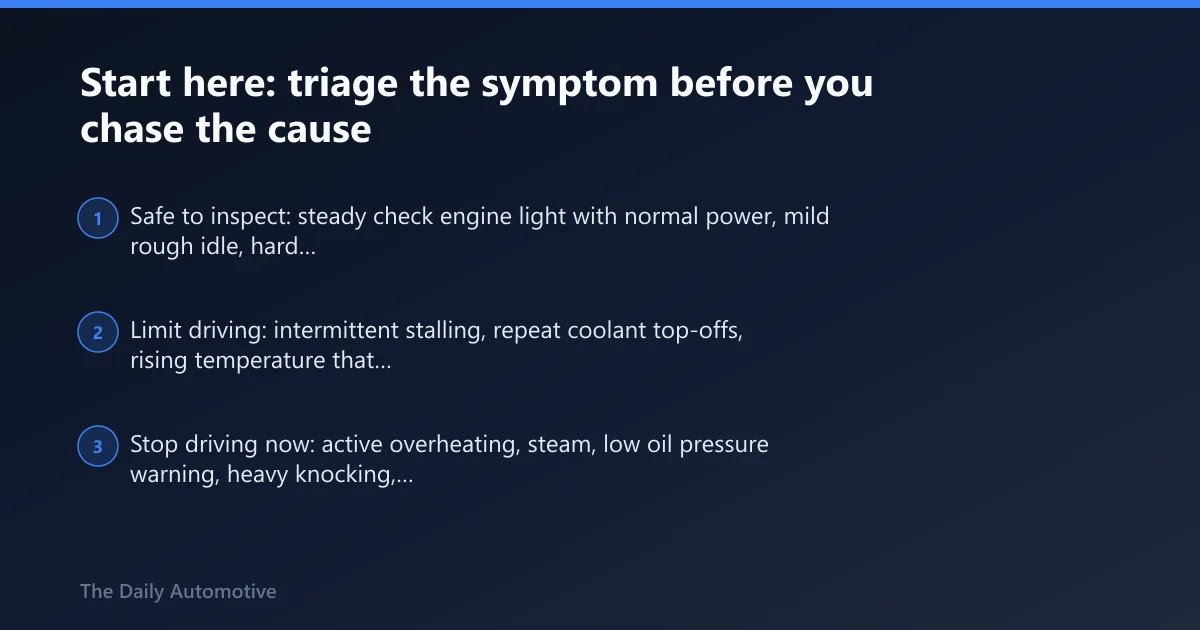
Start here: triage the symptom before you chase the cause


The three buckets: safe to inspect, limit driving, stop driving now
Most engine complaints fit into three urgency buckets. That matters more than the parts list.
- Safe to inspect: steady check engine light with normal power, mild rough idle, hard starting without smoke or overheating, fuel-economy drop, or a brief noise that is not getting worse.
- Limit driving: intermittent stalling, repeat coolant top-offs, rising temperature that settles back down, new ticking with an oil warning that flickers, or a misfire that is mild but repeatable.
- Stop driving now: active overheating, steam, low oil pressure warning, heavy knocking, flashing check engine light, or stalling in traffic.
What to note before testing
Write down what changed first. Warning lights, temperature behavior, smell, idle quality, restart behavior, and whether the fault appears cold, hot, under load, or at idle will point the next test in the right direction.
A sweet smell and wet residue move the cooling system to the top of the list. A sulfur smell with a flashing check engine light points harder at a catalyst-damaging misfire. A stall only after warm-up often sends me toward fuel delivery, crank or cam signal, or heat-sensitive electrical faults.
Why symptom order matters more than parts lists
Misfire, stalling, overheating, and warning lights overlap. A worn spark plug can misfire. So can a vacuum leak, bad injector, low compression, wiring damage, or engine control trouble. Swapping parts from a symptom list burns time and money fast.
The better workflow is simple: match the symptom to the system, then run the quickest test that can split likely causes. That is the backbone of a useful Car engine troubleshooting guide.
What is engine troubleshooting?
Engine troubleshooting is the process of matching symptoms, warning lights, noises, and scan data to the next correct test instead of guessing at parts. The goal is to narrow the fault by system first, then decide whether a driveway inspection is enough or a shop-level test is needed.
Symptom, system, test, decision
That four-part workflow keeps the diagnosis honest. Start with the symptom, then narrow it to the system, then test, and make the decision last.
A rough idle might belong to ignition, fuel, air, compression, or control electronics. If the check engine light is on, scan it before buying anything. If the temperature is climbing, check coolant level and leaks before suspecting sensors. If oil pressure is low, shut the engine off before chasing a noisy pulley.
How systems overlap
Fuel, ignition, cooling, and lubrication faults do not stay in neat boxes. A bad oxygen sensor can trigger the check engine light and hurt gas mileage, but it can also hide a mixture problem caused by an intake leak. Coolant loss can create overheating, rough running, and even stalling if the engine gets hot enough.
Misfire is a good example. Aged spark plugs are linked to weak ignition and misfiring. Yet the same symptom can come from low fuel pressure, a dead injector, a vacuum leak leaning one bank out, or low compression in one cylinder.
Driveway checks versus shop tests
Safe driveway checks can include fluid levels, battery voltage at rest, loose intake tubes, visible leaks, damaged hoses, unplugged connectors, scan codes, and freeze-frame data from a code reader. On newer cars, those checks answer a lot of early questions.
Shop-only work usually starts when diagnosis calls for a fuel-pressure gauge, compression test, leakdown test, cooling-system pressure test, smoke machine, oscilloscope, or more advanced circuit testing. Once the diagnosis depends on those tools, guessing gets expensive.
What should I check first when the check engine light comes on?
A steady check engine light usually allows basic inspection and a code scan before a shop visit, while a flashing check engine light means stop driving and treat it like an active misfire risk. The light is a diagnostic warning, not automatic proof of a major engine failure.
Steady versus flashing check engine light
A steady light says the engine computer saw a fault and stored evidence. It may be an oxygen sensor issue, an evaporative leak, a mixture problem, or an early ignition fault. If the engine runs normally, start with codes, fuel-cap condition, fluid checks, and a visual look at air-intake plumbing.
A flashing light is different. It usually means the misfire is bad enough to dump raw fuel into the catalytic converter and overheat it fast. Do not keep driving to see if it clears up.
What an OBD-II code can tell you, and what it cannot
On newer cars, scan the codes before clearing anything. Note stored codes, pending codes, and freeze-frame conditions such as cold start, idle, or cruise. That context matters.
A code points to a failed test, not always a failed part. An oxygen sensor code can come from a tired sensor, but also from vacuum leaks, exhaust leaks ahead of the sensor, injector issues, or a misfire changing exhaust oxygen content. Oxygen sensors commonly fail after 80,000 to 100,000 miles, especially on cars with lots of short-trip heat cycles, and sensor problems can hurt gas mileage, but the code still needs cause-based diagnosis.
CEL on with no driveability loss
If the car runs normally, this is often the safest place to begin. Check the oil on the dipstick with the car on level ground, then check the coolant level only when the engine is fully cool and look for any drop from the tank mark. Inspect the air filter box and intake duct for cracks or loose clamps. Look for disconnected vacuum lines. Then scan the car.
Older high-mileage cars without much useful scan data need more physical inspection up front. Newer OBD-II cars reward a scan first because fuel trims, misfire counts, and coolant temperature data can keep the diagnosis from drifting.
Why is my car engine misfiring?
Engine misfire usually starts the diagnostic path with ignition, especially spark plugs, but it should not end there. Worn plugs, weak coils, injector faults, vacuum leaks, low compression, and even engine control problems can all create the same shake, stumble, or hard-start complaint.
Start with spark plugs
Spark plugs handle ignition inside the cylinder. The article says spark plugs should be changed every 30,000 to 100,000 miles. That range depends on plug type and vehicle, but the useful takeaway is simple: age matters.
Aged spark plugs are linked to weak ignition and misfiring. They also fit hard starting, rough idle, and poor response under load. If service history is unknown and the mileage is in that range, inspect plug condition before buying coils or injectors.
How to split ignition, fuel, air, and compression faults
Use the symptom shape. A single-cylinder code leans toward plug, coil, injector, or compression on that cylinder. A random misfire can come from vacuum leaks, low fuel delivery, contaminated fuel, or a control fault.
- Scan for cylinder-specific or random misfire codes.
- Inspect the air intake and vacuum hoses for obvious leaks.
- Check plug age and condition if access is reasonable.
- Look for coil connector damage or oil in plug wells.
- If the basics do not explain it, move to injector balance, compression, or wiring tests at a shop.
When the fault points past plugs and coils
If plug and coil condition look acceptable but misfire stays on the same cylinder, the next suspects are injector function, compression loss, or wiring. If multiple cylinders on one bank are affected, vacuum leaks or fuel-delivery problems move up the list.
Engine control unit issues are less common, but they belong in the picture once normal ignition and fuel checks stop making sense. That is where live data and circuit testing matter.
Red flags for stop-driving
A flashing check engine light is the hard line. So is a severe shake that makes the car feel unsafe or sends raw-fuel smell through the exhaust. Keep driving a bad misfire and the catalytic converter may pay for it first.
Why is my engine overheating?
Engine overheating should be treated as a stop-driving problem because coolant loss and cooling-system faults can escalate fast. The fastest useful checks are coolant level, visible leaks, fan operation, and radiator condition, because overheating usually happens due to coolant loss and can lead to catastrophic failure.
Start with coolant level and visible leaks
Engine coolant is the fluid that carries heat away from the engine and into the radiator. If the level is low when the engine is cool, the question becomes where it went. Look for wet hose ends, crusty residue around the radiator tanks, seepage at the water pump area, and coolant smell after shutdown.
The radiator, thermostat, hose, water pump, and cooling fan are all possible causes when temperature rises. A leak does not need to be dramatic to matter. A small seep can still start a chain reaction.
Dirty coolant and why flushes matter
Dirty coolant is likely if the car is over 100,000 miles old or five years old. That matters because sediment can clog the radiator. Once flow is restricted, heat rejection drops and overheating gets easier to trigger in traffic or hot weather.
A flush and refill make sense when the coolant is contaminated but the system still passes leak and pressure checks. It will not fix a split hose, weak fan, stuck thermostat, or blocked radiator core.
Radiator role, leak points, and blockage risk
The radiator rejects heat from the coolant. It works only if coolant reaches it and air moves through it.
Common leak points include tank seams, hose connections, drain points, and damage from road debris. Blockage matters too. Dirty coolant sediment can clog the radiator, and blocked radiators can aid overheating. Also check the front face for packed bugs, dirt, or bent fins restricting airflow.
Stop-driving thresholds
If the gauge keeps rising, steam appears, coolant is actively dripping out, or the engine overheats again after topping off, stop driving. Overheating can lead to catastrophic failure. This is where a tow is cheaper than cylinder-head work.
When to use an engine flush on high-mileage vehicles
High-mileage engines require a different approach to sludge removal. A mild, detergent-based flush applied right before an oil change is generally safe, but using one on an engine with active leaks, heavy unknown buildup, or worn seals can dislodge debris and trigger costly repairs. In those cases, short-interval oil changes are the safer path.
The decision depends entirely on your engine’s current condition. Choosing the right high-mileage engine flush means matching the product to whether your vehicle is leak-prone, sludge-prone, or simply aging. Specific formulations exist for balanced cleaning, severe buildup, and seal protection, helping you avoid turning routine maintenance into an unexpected repair bill.
Engine Flush vs. Oil Change: When Chemicals Help and When They Hurt
A standard oil change is the correct maintenance step for most engines. An engine flush decision guide explains that chemical flushes should only be used when a vehicle’s service history is unknown, sludge buildup is light, and oil pressure remains normal.
If the oil already looks clean or heavy deposits have accumulated, adding a flush solvent risks loosening debris that can block the oil pickup screen or expose weakened seals. The supporting article provides a practical decision checklist that scores your specific vehicle before you buy a bottle, helping DIY owners and used-car buyers avoid expensive internal damage by choosing the right service based on actual engine condition rather than guesswork.
When a Fuel-System Additive Solves the Problem
Sea Foam Motor Treatment specifically addresses light fuel-system deposits, upper-cylinder lubrication needs, and fuel stabilization for stored vehicles. While it is a cost-effective option for routine maintenance, it is not a heavy-duty solution for severe injector clogs, heavy intake-valve coking, or significant oil sludge. Using it for these severe issues wastes money and delays necessary repairs. Sea Foam treatment review maps each use case to the specific issue it can realistically fix, helping you determine if a dedicated cleaner or mechanical repair is the better choice for your vehicle’s condition.
Choosing the right oil for turbocharged engines
Turbocharged engines generate extreme heat, making oil selection critical to prevent bearing coking and premature failure. The wrong viscosity or formulation can quickly turn a routine oil change into an expensive repair bill.
A practical approach is using a full synthetic oil that matches your owner’s manual specifications, often a 0W grade in colder climates or 5W-30 for daily drivers. Conventional oils generally cannot withstand turbo temperatures. For specific recommendations organized by climate, mileage, and factory approval, this guide covers budget turbo engine oil options that provide safe protection without overspending. Matching the correct specification protects your turbocharger while keeping maintenance costs manageable.
Conventional vs. Synthetic Oil: Matching Lubricant to Engine Stress
Choosing between conventional, synthetic blend, and full synthetic oil directly affects cold-start protection, wear rates, and long-term repair costs. Conventional oil suits older, low-stress engines on short change intervals, while synthetic is the stronger choice for turbocharged, direct-injection, high-mileage, or severe-duty applications.
Selecting the wrong viscosity or base stock can thin out critical lubrication during startup and accelerate internal wear. The supporting guide breaks down a practical decision matrix that matches oil type to your specific vehicle, mileage, climate, workload, and budget. Use this framework before your next service appointment to ensure proper conventional versus synthetic oil selection and avoid turning minor lubrication gaps into expensive engine damage.
Top-End Rebuild vs. Full Engine Replacement: Choosing the Right Repair
When an engine loses compression, burns oil, or misfires persistently, the repair path depends entirely on where the damage lives. A top-end rebuild addresses worn valves, seals, head gaskets, and camshaft components while leaving the bottom end intact. This approach saves significant labor costs when cylinder walls, pistons, and bearings remain within specification.
A full replacement becomes necessary once crankshaft scoring, rod knock, or severe block damage enters the picture. Before approving any estimate, proper diagnostics—including leak-down tests and oil analysis—determine which route actually fixes the root cause rather than masking symptoms. Understanding engine rebuild options prevents overspending on unnecessary teardowns or underestimating catastrophic internal wear that demands a complete swap.
Selecting the Correct PCV Valve to Prevent Oil Leaks
The correct PCV valve must match your engine’s specific OEM flow rate and fitment, not just the generic label on the box. Installing an incorrect or universal valve often leads to elevated crankcase pressure, persistent oil leaks, and accelerated sludge buildup because the system cannot properly manage blow-by gases.
This guide details how to identify the right part for GM, Ford, Honda, and Hyundai engines while explaining why universal alternatives frequently fail. It includes a decision table linking symptoms like high oil consumption to specific fixes, helping you avoid misdiagnosis. Proper selection protects seals and ensures long-term engine health. Consult this PCV valve selection guide before replacing components to confirm compatibility and restore proper crankcase ventilation.
Clearing Intake Valve Coking Without a Teardown
Direct injection engines often develop carbon buildup on intake valves that standard fuel additives cannot reach. The dedicated CRC GDI IVD spray targets these deposits chemically, making it a viable solution for mild to moderate coking before resorting to mechanical walnut blasting. This product is effective for resolving rough idles or airflow issues caused by fresh buildup, but it will not dissolve hard, baked-on crusts. For owners of GDI vehicles, understanding this limitation saves money and prevents false hope on severe cases. See the detailed review of the CRC GDI IVD cleaner to determine if your specific symptom profile matches its chemical limits.
Knowing which cleaner targets which component
Many drivers assume any aerosol spray works on any intake component, but using the wrong product can damage sensitive electronics or leave carbon deposits untouched. Using throttle body cleaner on a mass air flow sensor, for example, risks destroying the heated wires inside the housing. Conversely, MAF cleaner is not formulated to dissolve the heavy carbon buildup found in throttle bores. The linked guide clarifies these distinctions so you can avoid idle issues and diagnostic confusion.
This comparison breaks down the specific uses for mass air flow cleaner versus throttle body cleaner. It identifies the physical locations for each, explains why cross-contamination causes problems, and provides a simple decision matrix. Following these instructions ensures you target the correct part of the air intake system effectively.
What causes low oil pressure and poor engine lubrication?
Low oil pressure and poor lubrication usually begin with an oil-level or circulation problem, and both can damage internal moving parts quickly. Check the oil level and condition first, but shut the engine off immediately if the warning stays on, noise builds, or knocking joins the complaint.
Quick checks that take minutes
Pull the dipstick on level ground. If the oil is low, confirm whether the engine is leaking or consuming it before simply topping off and moving on. Look underneath for fresh drips. Check around the filter and drain area if visible.
Poor lubrication is harmful to moving parts like pistons and bearings. That is why low pressure should never be treated like a minor electrical glitch until proven otherwise.
Oil pump role and failure symptoms
The oil pump supplies pressure so oil can circulate through the engine. Oil pump failure can prevent oil from circulating. The warning signs can include low oil pressure, oil pump noise, and valve-train noise.
Noise shape matters. Light top-end ticking can happen before heavier bottom-end trouble appears. Deep knocking is far more serious. Engine knocking can cause costly damage if left unchecked.
When to shut it off
If the low oil pressure light stays on, if ticking becomes knocking, or if the engine sounds rough enough that the noise changes with rpm, shut it off. Do not idle it in the driveway to listen a little longer. The test is over at that point.
What engine problems can cause stalling?
Engine stalling often points to an engine component fault and deserves prompt inspection, especially if it repeats or happens in traffic. Airflow problems, fuel-delivery faults, crank or cam signal loss, charging issues, and hot-running sensor failures are common paths to check before blaming the transmission.
Idle stall, under-load stall, and hot restart stall
A stall at idle often pushes the search toward air leaks, idle control issues on older vehicles, throttle-body contamination, or mixture faults. A stall under load raises suspicion around fuel delivery or ignition breakdown. A hot restart stall often points to heat-sensitive electrical or sensor problems.
Manual and automatic context
Manual cars can stall from driver input, clutch issues, or severe low-rpm lugging, but repeated unexpected stalling still needs engine diagnosis. Automatic cars remove most driver-caused stall scenarios, so stalling there more often points straight at engine management, fuel, or charging issues.
The page says stalling can indicate something wrong with an engine component. That is the right baseline.
Fast checks before the shop visit
Listen for the fuel pump prime if the vehicle normally makes one. Check whether the battery light or other warning lights came on before the stall. Scan for codes if the engine restarts. Inspect intake ducting for collapse or disconnection. If stalling repeats, professional inspection stops being optional.
Symptom-to-action table: quickest checks and stop-driving thresholds
Use the table from left to right
Do not skip the red-flag column. The quickest check only matters if the car is still safe to inspect. Once the stop-driving threshold is met, the next step is shutdown, not another part swap.
| Observable symptom | Quickest at-home check | Red-flag stop-driving threshold |
|---|---|---|
| Misfire, rough idle, shaking under load, hard starting | Scan for misfire codes, check whether the CEL is steady or flashing, inspect intake duct and vacuum hoses, review spark plug age if near 30,000 to 100,000 miles | Flashing CEL, severe shake, raw-fuel smell, or loss of power strong enough to make traffic unsafe |
| Overheating, rising temperature gauge, coolant smell, steam | When cool, check coolant level, look for visible leaks at radiator, hoses, and water-pump area, confirm fan operation if safe to observe | Gauge keeps climbing, steam appears, coolant is actively leaving the system, or overheating returns after refill |
| Low oil pressure warning, ticking, knocking, sudden mechanical noise | Check oil level and visible leaks; do not keep the engine running to investigate noise | Oil-pressure light stays on, ticking turns to knocking, or any heavy knock is present |
| Stalling at idle, in gear, or after warm-up | Note whether it stalls cold or hot, scan for codes if it restarts, inspect intake tube and battery connections | Repeated stalling, stall in traffic, no-restart condition, or stall paired with overheating or oil-pressure warnings |
| Check engine light on with no driveability loss | Scan codes first, then inspect oil, coolant, air intake, gas-cap seal, and loose connectors | Light begins flashing, temperature rises, oil-pressure warning appears, or the engine starts to misfire or stall |
How do I diagnose common car engine problems in the right order?
Diagnose common engine problems in this order: verify the symptom, scan if possible, inspect the basics, test the most likely system, then decide whether the next step is safe DIY work or shop equipment. That sequence prevents wasted parts swapping and catches stop-driving faults early.
A five-step workflow
- Verify the symptom. Cold or hot, idle or load, steady or intermittent, with or without warning lights.
- Scan if possible. On OBD-II cars, read stored and pending codes before clearing anything.
- Inspect basics. Oil, coolant, intake ducting, battery connections, visible leaks, loose plugs, damaged hoses.
- Test the likely system. Misfire gets ignition and fuel checks. Overheating gets cooling-system checks. Knocking with oil warning gets shutdown and pressure diagnosis.
- Decide the next action. Keep inspecting, limit driving, tow it, or book a shop test.
Best first tools for DIY diagnosis
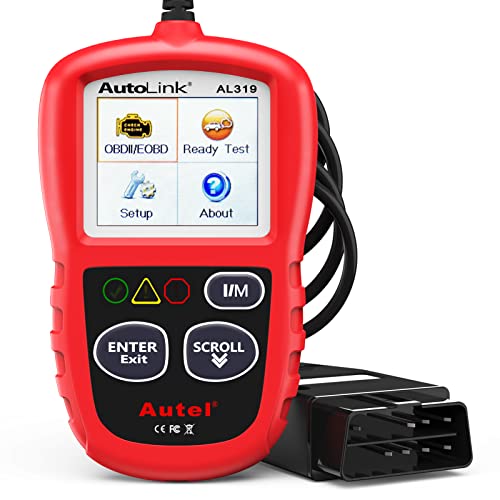
A basic code reader, flashlight, gloves, paper towels, and patience cover a surprising amount. Add cooling-system safety habits: only open the reservoir or cap when the engine is fully cool and the system is not under pressure.
Older high-mileage cars versus newer OBD-II cars
Older high-mileage cars reward physical inspection early. Vacuum hoses crack. Grounds corrode. Cooling systems seep. Scan data may be limited or less precise, so visual evidence carries more weight.
Newer OBD-II cars usually give better clues through live data and code history. Misfire counters, coolant temperature readings, and fuel-trim data can separate sensor, mixture, and ignition paths much faster than guesswork.
When the driveway workflow ends
If the fault needs fuel-pressure testing, compression or leakdown numbers, smoke testing for intake leaks, or advanced electrical diagnosis, the home inspection phase is done. The same applies when overheating, low oil pressure, severe knock, or repeated stalling enter the picture.
Choosing the Right OBD2 Scanner for First-Time Diagnostics
Selecting an appropriate OBD2 scanner prevents misdiagnosis and unnecessary part replacement for beginner DIYers. Most new users only need a basic code reader with live data and clearing functions, reserving advanced ABS or bidirectional tools for specific system faults.
This guide matches scanner capabilities to actual diagnostic needs, comparing handheld readers against Bluetooth options at different price points. Understanding these distinctions ensures you buy equipment that solves real problems rather than overspending on unused features. Review our breakdown of beginner OBD2 scanners to find the right tool for your current skill level and vehicle requirements.
Matching Scanner Features to Beginner Diagnostic Needs
Selecting the right diagnostic tool prevents wasted money on unnecessary parts by ensuring you can read the specific data your vehicle requires. Most first-time DIYers only need a basic OBD2 reader with live data and code clearing capabilities, while advanced features like ABS or bidirectional testing should be reserved for complex repairs.
This guide breaks down scanner types by actual diagnosis level to help you avoid buying equipment that exceeds your current skill set. Review the recommended beginner engine scanners to find a model that matches your troubleshooting goals without overspending on unused functions.
Matching Scanner Capabilities to DIY Diagnostic Needs
When selecting a tool for your first diagnostics, the right OBD2 scanner determines whether you clear faults accurately or waste money on unnecessary parts. diagnostic scanner options range from basic code readers to advanced Bluetooth devices, each serving specific beginner-level tasks. The supporting guide breaks down which models deliver live data and code clearing without overcomplicating the process. It explains why basic handhelds often suffice for initial checks, while guided Bluetooth units help navigate system-specific codes that simple readers miss. Understanding these distinctions prevents misdiagnosis and ensures you invest only in the diagnostic depth actually required for your vehicle.
Frequently asked questions
what causes the check engine light to come on
The check engine light comes on when the control system detects a fault in emissions, fuel mixture, ignition, airflow, or other monitored functions. A steady light usually allows basic checks and scanning, while a flashing light points to an urgent misfire or catalyst-risk condition.
why does my car engine make knocking noises
Knocking can come from poor lubrication, bearing wear, combustion-related problems, or mechanical damage, and it should be taken seriously. If the noise is heavy, grows with rpm, or appears with a low oil pressure warning, shut the engine off because costly damage can follow quickly.
what causes poor engine lubrication
Poor engine lubrication is usually tied to low oil level, blocked oil flow, or pressure loss from pump or internal wear issues. Because lubrication protects moving parts like pistons and bearings, any warning light, ticking, or knock paired with low pressure deserves immediate shutdown.
when should I inspect spark plugs and coolant
Inspect spark plugs when misfire, hard starting, or rough running begins, especially if service history is unknown within the 30,000 to 100,000 mile range. Inspect coolant when temperature rises, level drops, or the vehicle is over 100,000 miles old or five years old and the coolant looks dirty.
Products related to this article
Sponsored / affiliate links. As an Amazon Associate I earn from qualifying purchases. I may earn additional commission from eligible campaigns.